Search This Blog

Monday, July 23, 2012

Homemade Sliced Pickles

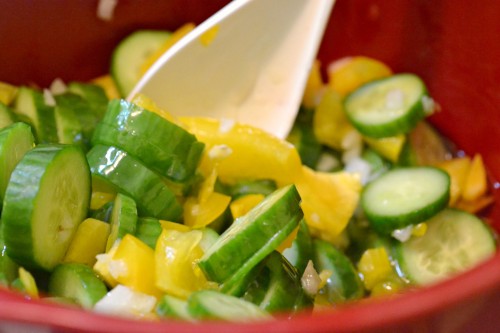
           It's a miracle!!! OK well not REALLY but for the first time in the 15 years we have been married, we have been able to grow cucumbers in our garden. I don't know why we haven't been able to or if we will be able to again..but for now we are savoring the moment : ) I stumbled on this beautiful post from "The Realistic Nutritionist". Beautiful photo and a fantastic recipe.  Have you ever tried to make homemade pickles? If not you are truly missing out. They are easy to make, it just takes a little patience. They take about ten minutes to prepare but a few weeks to cure.  You will get about two pints. Give it a try..you won't regret it. As with most things, homemade is better than store bought any day. Photo and recipe are from The Realistic Nutritionist.

Homemade Sliced Pickles
3 cups of sliced mini cucumbers
3/4 cup sugar
1 medium onion, sliced
1 yellow pepper, sliced
1/2 cup white wine vinegar
Salt and pepper
       In a medium size sauce pan, heat sugar, salt and pepper and vinegar over medium high heat until sugar dissolves, about 6 – 8 minutes. Remove from heat. Mix cucumbers, onion and pepper. Pour vinegar over the vegetables and toss with salt and pepper. Pour mixture into 2 sterile pint-size mason jars and refrigerate for 2 – 3 weeks, or until tangy and crisp.
Monday, July 16, 2012

Caesar Pockets

           I found this wonderful recipe on Kraft. It would be easily customizable. Grilled chicken, fresh tomato slices, shredded cheese. You name it..the possibilities are overwhelming. Funny story about Pita sandwiches. Back in the pre-children days, my husband and I travelled with his family to Lake Powell. His family loves pita sandwiches...I do too,...just not many days in a row. It has taken a long, long while to get past that in fact, I am not sure I am and it has been years. I may make an exception for this wonderful, tasty recipe. I can use some of the fresh from the vine tomatoes that are ripening in my garden. The photo and recipe are from Kraft. Enjoy friends!


Caesar Pockets
4 cups tightly packed torn romaine lettuce
6 oz. OSCAR MAYER Deli Fresh Smoked Turkey Breast, cut into strips
1/4 cup drained roasted red pepper strips
3 Tbsp. KRAFT Grated Parmesan Cheese
1/4 cup KRAFT Classic Caesar Dressing
4 pita breads, warmed, cut in half

Make It


COMBINE all ingredients except pitas.
SPOON into pita pockets.

Kraft Kitchens Tips

~Substitute
Prepare using KRAFT Classic Ranch Dressing.
 
~Variation
Substitute 4 flour tortillas for the pita breads. Spread each tortilla with 1 Tbsp. softened PHILADELPHIA Cream Cheese; top with salad. Fold 2 sides of each tortilla toward center, then roll up, using the cream cheese to seal the edges.
 
~How to Warm the Pitas
Use your microwave, toaster or toaster oven to warm the pitas.
Wednesday, July 11, 2012

I loved you best!

           We had to put our old dog to sleep yesterday. While we knew it was coming (she was 15), it was still difficult. They become part of your family. She was my first "baby". She was ready though and I just couldn't bear to watch her suffer or get any worse. I keep remembering the good times we had over the years with her. She has been through births as well as deaths of loved ones. She kept me company when no one else was around. She was my pal, my playmate, my loyal friend. It seems like just yesterday we found her hiding behind the "Puppy For Sale" sign. She loved chasing a tennis ball, going for car rides and begging for food. She loved the sprinkler and getting everyone wet with the hose. So many great memories..too many to write down.
          Here's to you my sweet baby. 15 years wasn't long enough for our companionship.  Love you old girl. Things just aren't the same around here without you. I hope I treated you the way you deserved to be treated, like a princess. I am sorry I just couldn't bring myself to tell you goodbye before you left. Know that I love and miss you tremendously. Meet me on the other side with your tennis ball ready!


I Loved You Best
Copyright © Jim Willis 2002, all rights reserved

So this is where we part, My Friend,
and you'll run on, around the bend,
...gone from sight, but not from mind,
new pleasures there you'll surely find.

I will go on, I'll find the strength,
life measures quality, not its length.
One long embrace before you leave,
share one last look, before I grieve.

There are others, that much is true,
but they be they, and they aren't you.
And I, fair, impartial, or so I thought,
will remember well all you've taught.

Your place I'll hold, you will be missed,
the fur I stroked, the nose I kissed.
And as you journey to your final rest,

take with you this...I loved you best.

Daphne Oz Blueberry Whoopie Pies

             This recipe caught my attention. It looked fairly simple and delicious and to be honest the recipe is basic enough that you could change it up a bit. Maybe with strawberries or rasperries or even cherries in place of the blueberries. You could make the whoopie pies vanilla instead of chocolate. If you can't find the mascarpone cheese..sub in cream cheese.The possiblities are limited only to your imagination. The recipe and photo are from "The Chew"


Daphne Oz Blueberry Whoopie Pies

For the Whoopie Cake:
1 cups Unbleached All-Purpose Flour
1/4 cup Unsweetened Cocoa
1/4 teaspoon Baking Soda
1/4 teaspoon Fine Salt
4 tablespoons Unsalted Butter (at room temperature)
1/2 cup Granulated Sugar
1 large Egg
1/2 cup Milk

For the Filling:
1 pint Mascarpone Cheese
1/2 cup Confectioners Sugar
1 teaspoon Vanilla
1/4 cup Blueberry Puree (strained)
pinch fine salt
For the Whoopie Cake:
      Arrange the oven racks in the upper and lower thirds of the oven and preheat the oven to 425°F. Line 2 large baking sheets with parchment paper.Whisk together the flours, cocoa, baking soda and salt in a medium bowl. Cream the butter and sugar in the bowl of an electric mixer at high speed until fluffy, about 4 minutes. Add the egg and milk and beat at medium speed until incorporated. At low speed, add the flour mixture in 2 batches, alternating with the milk, mixing until just blended. Using a half-tablespoon measure, drop 18 generous teaspoons of batter onto each sheet, leaving about 2 inches between cakes. Bake the 2 sheets at the same time, 5 to 7 minutes, until springy to touch. Let cool on the sheets for 5 minutes, and transfer to racks to cool completely.   
For the Filling:
      Beat together mascarpone, confectioners sugar, salt and vanilla in a bowl with electric mixer at medium speed until smooth, about 3 minutes. Fold in blueberry puree. Spread filling on half of the cakes. Sandwich them closed and serve.   
 For Blueberry Puree:
         Pulse a pint of blueberries in a blender or food processor until pureed. Strain mixture with strainer or cheese cloth.
Monday, July 9, 2012

California BLT

          While watching the "Food Network" the other day, I happened upon Barefoot Contessa. Normally I do not watch her show because, well... I find her a bit stuffy and I cannot connect with her or most of the food that she prepares. However, this one caught my eye. One reason for that, it was for a twist on a classic recipe..the BLT. BLT's are one of my favorite sandwiches. Her recipe, seemed basic (finally). I thought I would share it with you. I looked it up on Google an her recipe came up as did this one. The only difference between this one and Ina's....the thin sliced red onion and the type of bread. Which, we all have our faves. (I have left a link to her bread recipe). This picture was beautiful, so I opted on this one. So what makes a BLT from the west coast? The Avocado of course. I will admit I wasn't a fan of the green fruits for a long time but turns out, taste buds change and they get smarter. I love these buttery, creamy little things and they are so good for you. The photo and recipe adaptation come from A Hint of Honey. I am going to have to search that site some more. The photos are stunning. Enjoy!


California BLT's
 4 slices thick and hearty whole wheat bread OR Cheddar-Asiago Potato Bread
4 slices bacon (I use thick peppered)
1/4 cup real mayonnaise
4 tender lettuce leaves, washed and dried (Romaine or Bibb)
1 ripe Hass avocado
fresh lemon juice
1 large ripe tomato, thickly sliced (Beefsteak are best)
red onion, sliced (optional)
salt and freshly ground black pepper

DIRECTIONS
 Cook bacon in oven or on stove top until crisp. (I bake my bacon on a sheet pan on 400 degrees until crisp.) Drain on paper towels and set aside. Place 4 slices of bread on a sheet pan and toast them in a 400 F oven for 5 minutes. Turn them over and toast for 1 more minute, until all the bread is evenly browned. Spread each slice of bread with a thin layer of mayonnaise. Cover half with a layer of lettuce. Then place two slices of bacon on top of the lettuce. Peel the avocados and slice them 1/2 inch thick. Toss the avocado slices with lemon juice. Arrange on top of the bacon. Add a layer of tomato slices and sprinkle with salt and pepper. Top with the remaining slices of bread (mayo side down) and serve.

Makes 2 sandwiches.
(Adapted from Food Network)
Thursday, July 5, 2012

Lemon Ice Cream

          I love anything with lemon. A custard shop near my house, sells Lemon Chiffon custard on every other Friday. It is to die for. I have only tried to make ice cream once...a long time ago and it did not work out...at all. Of course I was in my teens and barely started to cook but it was enough to stop me I guess. This ice cream recipe came to my email from Just a Pinch via Pat Morris. It requires NO ice cream maker. The ingredients are basic too. This would be fantastic on any cobbler. It smooths out as it freezes. Can't get any easier than this. Light and refreshing. Delicious. This recipe makes one pint but can easily be doubled. Thanks Just a Pinch!


Lemon Ice Cream
3 Tbsp fresh lemon juice
1 c granulated sugar (you can use splenda)
1 pt half and half
2 tsp grated lemon rind
2 dash(es) (2 drops) yellow food coloring (optional)

      Blend well all of the above ingredients. Pour into a cake pan, glass loaf pan -or ice tray without the removable inserts. Freeze for 3 hours in freezer or freezing compartment of refrigerator. It is not necessary to stir, as it freezes smooth. No cooking -let the freezer do the work; no ice cream maker needed. Enjoy.
Delicious and refreshing on top of a warm slice of Blackberry (or Blueberry) Cobbler.
Saturday, June 30, 2012

Michael Symon's Jalapeno Corn Salad

        Summer is here..with a vengence in most parts of the country. Triple digits everywhere and my whole state is on fire. The last thing you are probably thinking about is more heat. This salad however, will be perfect at your next party or BBQ.  Now I am only highlighting the salad and not the porkchop here but feel free to look up his pork chop recipe.
        Anyone catch "The Chew" this week? Michael Symon made a jalapeno corn salad that just looked scrumptious. You could serve it next to the pork chops like he did on the show or for a wonderful side to compliment anything that you are grilling this summer. Corn will be coming into season soon. I can't wait. Nothing better than some sweet local corn in the summertime.This one you just gotta try! It is so easy and delicious with just the right amount of heat. Remember if you want to keep it on the more mild side, remove the seeds and membranes of the jalapeno. Photo and recipe are from "The Chew".


Michael Symon's Jalapeno Corn Salad
4 ears Corn (husked and silk removed)
2 Limes (zested and juiced)
1/4 cup Cilantro - leaves only (chopped)
1 pint Sweet 100 Tomatoes (halved)
1 Jalapeno (minced)
3 scallions (chopped)
1 clove garlic (minced)
2 Tbs. Olive Oil
Grill the ears of corn til charred at parts, about 3 minutes per side. Remove the kernels from the ear to a bowl, and toss with the lime zest and juice, cilantro, tomatoes, scallions, garlic and jalapeno. Add olive oil and toss to coat. Season with salt and pepper.     

Followers