Search This Blog

Showing posts with label Chocolate. Show all posts
Friday, April 19, 2013

Cutlers Chocolate Sugar Cookies

        Sorry I have been MIA the last few weeks. Between appointments, house remodel and kids. I have had no time to blog. I miss it! Hoping to get back into a groove soon!
        So I stumbled on this recipe. Having a chocoholic in this house, I couldn't pass it up. The recipe only made about 2 dozen. So it is just about right for one chocoholic or a family of moderate sweet eaters. :) I will post the recipe as I found it. I did use dark brown sugar however and in my opinion it could have used about 1/4 cup more flour. The dough was on the stickier side. I put the bowl in the refrigerator for a bit and although the dough had firmed up a bit but it was still a little messy to roll in the sugar. Maybe I didn't let the butter cool long enough?!
        The results.. a puffy, cookie that is a little crispy on the outside and chewy on the inside. Heaven. It is quite rich with chocolate. You could cut down on the cocoa powder if you like but honestly, they were good. Instead of vanilla, if you wanted to get adventurous, you could use a different extract, like orange or raspberry. If you love chocolate.. you gotta try these babies out. I got the recipe from cutlerscookies.blogspot.com


Cutler's Chocolate Sugar Cookies

1/3 cup granulated sugar
1 1/2 cups plus 2 tablespoons all purpose flour
3/4 cup unsweetened cocoa powder
1/2 teaspoon baking soda
1/4 teaspoon baking powder
14 tablespoons unsalted butter
1 3/4 cups packed brown sugar
(the original recipe calls for dark
brown sugar, but  Cutler's likes the flavor of
light brown sugar better)
1 tablespoon vanilla extract
1/2 teaspoon salt
1 large egg plus 1 large yolk

         Place the granulated sugar in a shallow bowl and set aside. Preheat your oven to 350 degrees and line 2 baking sheets with parchment paper. I used my silpat.
Mix flour, cocoa, baking soda and baking powder in a bowl. Microwave 10 tablespoons of butter in a measuring cup until melted, this will take about a minute. Stir remaining 4 tablespoons of butter into the melted butter, melting this also. Allow the butter to cool to between 90 and 95 degrees. This took around 10 minutes for my butter. Place the melted butter, brown sugar, vanilla and salt into the bowl of your stand mixer and mix with the paddle attachment until the mixture is smooth. Mix in the egg and egg yolk. Mix the flour mixture until just combined. 
     Using two tablespoons of dough at a time (I use my small ice cream scoop), roll the dough into balls and roll the balls into the reserved granulated sugar. Place on the prepared baking sheets. Using a glass, flatten the cookies until they are about 2 inches in diameter. Sprinkle each sheet of cookies with another 1 1/2 teaspoon of sugar, left over from when you rolled the cookies in it. 
      Bake the cookies 1 sheet at a time, until the cookies are slightly puffy and the edges have begun to set, this will take around 15 minutes. The cookies should look slightly underdone between the cracks. Allow to cool for 5 minutes on the baking sheet, then remove to wire racks to cool completely.

Tuesday, January 15, 2013

Cutler's Frosted Peanut Butter Cookies

           I am so sorry I have been MIA for so long. Between sick kids and a teething baby. I barely have time to shower. I came upon this recipe on one of my fave blogs, A Bountiful Kitchen. If you are peanut butter and chocolate lover..... this recipe is for you. My goodness the flavors are amazing. These are classified as a try ASAP! The recipe is from Curt Cutler of Cutlers Cookies here in northern Utah. The yummy photo is from Bountiful Kitchen. I had to share this recipe because I love you!  You're welcome! :) Have a great week and try to stay healthy!


Cutler's Frosted Peanut Butter Cookies
Curt Cutler
1 cup butter, room temperature
1 cup brown sugar
1 cup white sugar
1 teaspoon salt
1/2 teaspoon baking powder
1/2 teaspoon baking soda
1 teaspoon vanilla
2 eggs
3 1/4 cups cake flour ( he uses cake flour in all of Cutler's cookies)
1- 12 oz bag Reese's Peanut Butter chips (no substitutions)

Pre-heat oven to 350 degrees and place rack in center of oven.
Cream together butter, sugars, salt, baking soda and powder.  Add vanilla and eggs. Mix well.
Add flour and peanut butter chips. Mix just until flour and chips are blended together.
Using a cookie scoop or ice cream scoop, or just a large spoon, scoop into 2 inch balls and place on a parchment lined cookie sheet about 4 inches apart.  I bake about 8 cookies per sheet.
Bake for about 12 minutes, or until set.

Peanut Butter Frosting

1/2 cup butter, soft-room temperature
3 cups powdered sugar
1/2 cup peanut butter (not natural)
milk to thin to proper consistency (whole milk is best)

Cream together room-temperature butter and powdered sugar. Add peanut butter and beat until smooth. Add milk a tablespoon at time, just until frosting is smooth and creamy. Set aside.

Chocolate Frosting
1 cup butter or 1/2 and 1/2 blend butter/margarine
5-6 cups powdered sugar
1/4 cup unsweetened cocoa (or less if you like a lighter cocoa frosting)
1 tablespoon vanilla
1/4 to 1/3 cup milk

Cream butter and 5 cups powdered sugar. Add cocoa and vanilla. Add milk a tablespoon at a time until frosting is smooth. If needed, add more powdered sugar.

After cookies are cooled, frost with peanut butter frosting. Then frost on top of the peanut butter frosting with the chocolate frosting. When spreading the chocolate frosting on top of the peanut butter frosting, be very gentle and leave a small space between the edge of the peanut butter frosting and the chocolate frosting for a layered frosting look (see photo)
Thursday, September 6, 2012

Milky Way Brownies

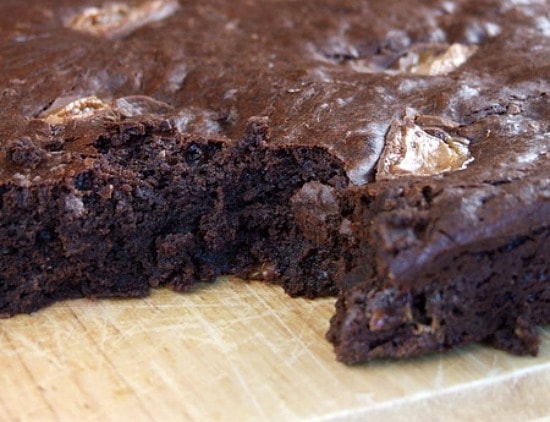
            So here's the thing...I could eat my weight in Milky Way candy bars...every day. I love the things. Especially when they are right out of the fridge or freezer. Yummm! I never crave any junk food while I am pregnant. Just ice. I had my baby just 3 months ago and just like the previous three postpartum times... I crave CHOCOLATE! Normally, I don't eat a lot of chocolate. For some reason, after a baby.... I CANNOT get enough of the stuff. While looking for new ways to feed my love/hate relationship with chocolate, I stumbled on these Milky Way Brownies by recipe girl. The photo and recipe are from her beautiful site. Can you imagine the possibilities? You could chop up any candy bar and create your own dessert. But, to be honest, she had me at Milky Way. MmmMMmmm! I wouldn't have the patience to put them in the fridge and wait. I would want them gooey with a scoop of ice cream.


Milky Way Brownies
1 pound (4 sticks) unsalted butter, cut into pieces
1 pound semi-sweet chocolate chips (or chopped chocolate)
6 ounces unsweetened chocolate, chopped
2 Tablespoons instant espresso powder
7 large eggs
2 Tablespoons vanilla extract
2 1/4 cups granulated white sugar
1 1/4 cups all-purpose flour
1 Tablespoon baking powder
1 teaspoon salt
12 ounces miniature Milky Way Bars, chopped
1 full-size Milky Way Bar, sliced thinly

Directions:

1. Preheat oven to 350°F. Butter and flour 12x18x1-inch pan. Line with foil or parchment that hangs over the sides for ease in getting them out (butter the foil/parchment).
2. In a heatproof, medium-bowl set over a saucepan of simmering water, heat butter, and chocolates until melted and smooth; cool slightly.
3. In a large bowl, whisk together the eggs, espresso powder, vanilla and sugar. Stir the egg mixture into the slightly cooled chocolate mixture. Cool to room temperature.
4. In a medium bowl, sift together flour, baking powder, and salt, then add to batter. Stir chopped mini Milky Way bars into chocolate mixture. Then pour into prepared baking pan and smooth top with a rubber spatula. Place slices of the full-size Milky Way Bar onto the top of the brownie batter.
5. Bake for 25 to 35 minutes, or until toothpick inserted in center comes out clean with a few crumbs attached; do not overbake! Let cool completely, then cover tightly and chill overnight. Chilled brownies are easier to cut.

Tips:

*These taste better the second day.
*If it's a warm day inside your house, you might consider chilling the Milky Way bars before you try to cut them.

Monday, August 20, 2012

Zucchini Oat Dark Chocolate Chip Cookies

           This has been one LONG hot summer. The weather has been unseasonably warm and we have had more than our shares of wildfires. It has been so dry. To top that off we have a new baby and my husband started a new job. He will normally work the day shift but has been on grave shift for almost two months. It has not been easy keeping 5 children quiet while my husband tries to sleep. It threw a wrench in the entire summer. I am so thankful for him and I am thankful for his job but oh how I loathe grave shift. The kids go back to school tomorrow and they are excited....not as excited as their mother but excited. Coincidentally, my husband is now off grave shift. Life will be getting back to  "normal"...I hope. I thought I would brave church yesterday with all 5 kids. I have never had so many people give me that "I feel for you" look. But, we made it....and that's all that counts. Small blessings!
           Are you being over run with zucchini? It is that time of year when people are scrambling trying to figure out what else they could possibly make with zucchini. I stumbled on this recipe at Tollhouse and was intrigued. I love squash of all kinds..my hubby, doesn't prefer squash. I try and sneak it in when at all possible. Loaded with fiber and vitamins it makes it well worth it. Now here's the thing If you are making theses you need to have it grated pretty fine or you need to peel it. My food processor gates pretty coarsely and I was pretty much flossing with the zucchini. This cookie incorporates oats which adds a great texture, along with some spices (I added nutmeg and cloves) and dark chocolate but you could use whatever chocolate you have on hand. Photo and recipe are from Tollhouse.
Zucchini-Oat Dark Chocolate Chip Cookies

Zucchini Oat Dark Chocolate Chip Cookies
1 1/2 cups all-purpose flour
1 teaspoon ground cinnamon
1/4 tsp. ground nutmeg
1/4 tsp. ground cloves
1/2 teaspoon baking soda
1/2 cup (1 stick) butter, softened
3/4 cup granulated sugar
1 large egg
3/4 teaspoon vanilla extract
1 1/2 cups shredded zucchini (1 medium)
1 cup quick oats
1 cup chopped nuts
1 2/3 cups (10-oz. pkg.) NESTLÉ® TOLL HOUSE® Dark Chocolate Morsels

PREHEAT oven to 350° F. Lightly grease baking sheets.
COMBINE flour, cinnamon, nutmeg, cloves and baking soda in small bowl. Beat butter, sugar in large mixer bowl until well combined. Add egg and vanilla extract, beat well. Add zucchini; gradually beat in flour mixture. Stir in oats, nuts and morsels. Drop by rounded teaspoon 2 inches apart onto prepared baking sheets.
BAKE for 9 to 11 minutes or until light golden brown around edges. Cool on baking sheets for 2 minutes; remove to wire rack to cool completely. Store in tightly covered container at room temperature.
Wednesday, July 11, 2012

Daphne Oz Blueberry Whoopie Pies

             This recipe caught my attention. It looked fairly simple and delicious and to be honest the recipe is basic enough that you could change it up a bit. Maybe with strawberries or rasperries or even cherries in place of the blueberries. You could make the whoopie pies vanilla instead of chocolate. If you can't find the mascarpone cheese..sub in cream cheese.The possiblities are limited only to your imagination. The recipe and photo are from "The Chew"


Daphne Oz Blueberry Whoopie Pies

For the Whoopie Cake:
1 cups Unbleached All-Purpose Flour
1/4 cup Unsweetened Cocoa
1/4 teaspoon Baking Soda
1/4 teaspoon Fine Salt
4 tablespoons Unsalted Butter (at room temperature)
1/2 cup Granulated Sugar
1 large Egg
1/2 cup Milk

For the Filling:
1 pint Mascarpone Cheese
1/2 cup Confectioners Sugar
1 teaspoon Vanilla
1/4 cup Blueberry Puree (strained)
pinch fine salt
For the Whoopie Cake:
      Arrange the oven racks in the upper and lower thirds of the oven and preheat the oven to 425°F. Line 2 large baking sheets with parchment paper.Whisk together the flours, cocoa, baking soda and salt in a medium bowl. Cream the butter and sugar in the bowl of an electric mixer at high speed until fluffy, about 4 minutes. Add the egg and milk and beat at medium speed until incorporated. At low speed, add the flour mixture in 2 batches, alternating with the milk, mixing until just blended. Using a half-tablespoon measure, drop 18 generous teaspoons of batter onto each sheet, leaving about 2 inches between cakes. Bake the 2 sheets at the same time, 5 to 7 minutes, until springy to touch. Let cool on the sheets for 5 minutes, and transfer to racks to cool completely.   
For the Filling:
      Beat together mascarpone, confectioners sugar, salt and vanilla in a bowl with electric mixer at medium speed until smooth, about 3 minutes. Fold in blueberry puree. Spread filling on half of the cakes. Sandwich them closed and serve.   
 For Blueberry Puree:
         Pulse a pint of blueberries in a blender or food processor until pureed. Strain mixture with strainer or cheese cloth.
Monday, June 18, 2012

PW's Raspberry Cream Pie

         Well my little one is going on three weeks old. Time sure does fly. What a blessing he is. He has such a sweet spirit about him. He doesn't fuss too much..unless he is getting his diaper changed, being bathed OR his mama won't stop kissing his dimples. I thought that I would be a bit more overwhelmed but everything is going smoothly...so far. My husband started a new job last week and all seems to be going well. It is an adjustment though. He worked at the same place for 15 years and worked four 10 hour days. He works 5 days a week now. Between the new baby, school being out and my husband starting a new job there are moments when this mama wonders if she will make it. The good Lord must have taken mercy on me and given me this sweet soul for a reason.
          I thought that since he is such a good boy, I would try and get a post in here and there. You may or may not know that I love Pioneer Woman. This delicious pie, looks simple and you could sub in your favorite berry. How great would blueberries be with vanilla cookies in place of the Oreos?!  I hope you will try this one..it is definitely a keeper. The photo and recipe are from Pioneer Woman. Enjoy my friends.

TPW_8857

Raspberry Cream Pie
25 whole Oreo Chocolate Sandwich Cookies
4 Tablespoons Butter, Melted
1 cup (generous) Raspberries
3 Tablespoons Sugar
2 containers (6 Ounce Each) Raspberry Yogurt
1 package (3.4 Ounch) Instant Vanilla Pudding Mix
1 cup Heavy Whipping Cream
Extra Raspberries For Garnish
       To make the crust, preheat oven to 350 degrees. Crust cookies in a food processor (or smash in a Ziploc bag with a rolling pin). Stir in melted butter until all combined. Pour into a regular pie pan and press crumbs all over the pan and up the sides. Bake for 3 to 4 minutes---just long enough for it to set. Cool crust completely.
       Place raspberries on a plate or in an empty pan. Smash them with a fork, then sprinkle on 3 tablespoons of sugar. Stir together and allow to sit for 15 minutes.
In the bowl of an electric mixer, combine raspberry yogurt with the instant vanilla pudding mix (just the powder itself.) Beat on low until combined, about 1 minute. Pour in heavy cream and whip on low for 30 seconds. Stop the mixer and scrape down the bowl with a rubber spatula. Turn mixer on medium-high speed and beat for two minutes, or until mixture is thick.
         Turn off mixer, then fold in raspberries until just combined. Pour into cooled pie pan and spread evenly. Freeze for two hours, or until very firm. Cut into slices and top each slice with cookie crumbs, dollops of whipped cream, and extra raspberries. Keep in freezer, allowing time to thaw before serving.
Wednesday, May 23, 2012

Hot Mess Brownies

                 I have 7 days left in my pregnancy. It will be my last one and it is kind of bittersweet. I can't believe how fast it has gone. It is hard to believe that I will be holding this little one soon. It is also the time that my mind starts to race. I worry about the delivery. I hope the baby will be OK. That he is born healthy. I worry about, what if something were to happen to me, who would help take care of my other babies. All of these things race through my itty bitty brain. Typical I suppose. If I drop off of the radar for awhile, know that I am still here..just a little busy. I will return shortly.
                Another beautiful site I discovered today.....Bakeaholic Mama. I mean one look at this picture from her and who would disagree?! My hubby, as most of you know, is a chocoholic and he loves.. loves...loves s'mores. These brownies may send him over the moon. This one is a must make for summer. Thank you Bakeaholic mama. The recipe and photo are beautiful. Stop by and say hello...that way we can all gain weight together.


Hot Mess Brownies
1 cup of butter
3 oz semi sweet chocolate
1/2 cup unsweetened coco powder
1 1/4 cup of sugar
3 eggs
2 tbs vanilla extract
1/4 a cup of sour cream
1/2 cup all purpose flour
1 tsp salt
S'mores stuff:
8 honey graham crackers
2 Hershey milk chocolate bars
2 cups of mini marshmallows

Directions:
In a sauce pan on medium low heat melt butter and semi-sweet chocolate together. Set aside and cool slightly. In the bowl of your electric mixer mix sugar vanilla, and eggs together. Slowly pour in your melted chocolate/butter. Mix in flour , coco powder., salt and sour cream.
       In the bottom of a parchment paper lined 8x8 or 9x9 square pan place 4 graham crackers. Spread 1/2 your brownie batter over the cookies. Top with half of your marshmallows and one of your Hershey bars broken into pieces. Top with 4 more graham crackers. Spread remaining browning batter over the top. Sprinkle remaining mallows over the top with pieces of your 2nd Hershey bar. Bake at 350 for 30-40 minutes. Remove and let cool for about 20 minutes before slicing.
They will be messy, oooeey and gooey I promise!
And if you want to make them extra good...
        Take 1 cup of marshmallows with 1 tbs of butter and 2 tbs of milk. Melt on medium low heat. Drizzle over brownies before serving
Monday, April 30, 2012

Colossal Brownie Ice Cream Sandwiches

           Happy Monday my friends. I hope your weekend went well. Ours had a few rough patches with our soon to be 5 year old but it smoothed out by the end of yesterday. Time to get up and moving. The kids have school and I need to get some much needed house cleaning done. This recipe would be fantastic for a birthday party or if you were feeding a few people. I was surprised to find this recipe on the Quaker Oats site. See? You can convince yourself that this is healthy and have a piece or two. I mean it does have oatmeal in it. Both the recipe and the photo are from Quaker. Have a great week friends!


Colossal Brownie Ice Cream Sandwich recipe

Topping
1/3 cup Quaker® Oats (quick or old fashioned, uncooked)
3 tablespoons all-purpose flour
2 tablespoons firmly packed brown sugar
1/3 cup peanut butter (not reduced fat)
1 tablespoon margarine or butter

Brownies
1 cup (6 ounces) semi-sweet chocolate chips
1/2 cup (1 stick) margarine or butter
3/4 cup granulated sugar
1 teaspoon vanilla
2 eggs
1 cup all-purpose flour
3/4 cup Quaker® Oats (quick or old fashioned, uncooked)
1/2 teaspoon baking powder
1/4 teaspoon salt (optional)

1 quart fat-free or low-fat vanilla ice cream or frozen yogurt, slightly softened

Heat oven to 350°F. Line two 8 or 9-inch round cake pans with aluminum foil, allowing foil to extend over sides of pans. Spray with cooking spray. For topping, combine oats, flour and brown sugar in large bowl. Cut in peanut butter and margarine with two knives until mixture is crumbly; set aside. For brownies, melt chocolate chips and margarine in medium saucepan over low heat, stirring frequently. Remove from heat; cool slightly. Stir in sugar and vanilla. Add eggs; mix well. Add combined flour, oats, baking powder and salt; mix well. Divide batter evenly between pans. Sprinkle with reserved topping, patting gently.

Bake 22 to 24 minutes for 8-inch pan (20 to 22 minutes for 9-inch pan) or just until center of brownie is set. (Do not overbake.) Cool completely in pans on wire rack.

To assemble, spread softened ice cream evenly over one brownie while still in pan. Lift second brownie out of pan; remove foil. With topping side up, place brownie on top of ice cream, pressing gently. Cover and freeze several hours or overnight. Remove from freezer 10 to 15 minutes before cutting. Lift from pan using foil edges. Remove foil; cut into wedges. Individually wrap wedges and store in freezer.

Yield 12
Friday, April 6, 2012

Hershey's Easy Easter Pie

         I scored some killer deals on Amazon the other day for easter candy. Most of it was at least 75% off and I had free shipping. In my HUGE candy assortment, I have Hershey's kisses as well as peanut butter cups. What a better thing to do with all of that candy?....well at least some of it. My hubby could make short work of it. A lot of it is going in plastic eggs for the kids. Peculiar thing to do on a holiday. I have never understood it. Hiding colored eggs and then looking for them. Not really sure where or why that came into play but...I digress. If you are looking for a dessert for the holiday weekend, this recipe comes together in a snap and is so delicious. Your guests will be asking you for the recipe. The recipe and photo are from Hershey's. Enjoy your weekend and your holiday. Spend it with someone you love.


Hershey's Easy Easter Pie
20 REESE'S Peanut Butter Cups Miniatures, unwrapped
50 HERSHEY'S KISSES Brand Milk Chocolates, unwrapped
1 large tub (12 oz.) frozen non-dairy whipped topping, thawed
1 packaged graham cracker crumb crust (6 oz.)
Additional REESE'S Peanut Butter Cups Miniatures or HERSHEY'S KISSES Brand Milk Chocolates (optional)
HERSHEY'S Candy-Coated Milk Chocolate Eggs (optional)
         Chop each peanut butter cup into 6 pieces; set aside. Microwave 50 chocolates in medium microwave-safe bowl on MEDIUM (50%) 1 minute or just until chocolate is melted when stirred; stir in 3-1/2 cups whipped topping until blended. Spread half of chocolate mixture into crust; sprinkle with peanut butter cup pieces. Top with remaining chocolate mixture. Refrigerate 3 hours or until set.Spread with remaining whipped topping just before serving. Garnish each serving with additional candies, if desired. 8 servings.
Monday, April 2, 2012

Fudgy Brownie Cookies

           Over the weekend, my husband had a pretty big project. Trimming our apple tree. Lord have mercy, it was over grown. His sweet sister and nephew came down and helped him load the branches into the truck bed and haul them away. Brenda, his sister is as big a chocoholic as he is. I wanted to make her a yummy, rich, chocolaty treat. I came upon these cookies on Tasty Kitchens. The recipe had wonderful reviews AND they were double chocolate. The recipe was simple and had only a few ingredients. It starts from a box of brownie mix. The only change I would make is (my husband says they are perfect the way they are) baking them just a little bit longer. But, could just be my oven. Start out with the time listed and then adjust if necessary. A great little cookie to have with a tall cold glass of milk or some vanilla ice cream. These are gooey right out of the oven..after cooling they are more firm but still chewy. Thank you to Lifes Ambrosia for this great recipe and photo! Yum! My husband thanks you as well...in between all of the noshing of course.


Fudgy Brownie Cookies
1 package (18 To 21 Oz. Box) Fudge Brownie Mix
1-¼ cup All-purpose Flour
¼ cups Packed Brown Sugar
2 whole Eggs
½ cups Butter, Melted And Cooled
2 Tablespoons Water, Or More As Needed (I used about 3 or 4)
1 cup Dark Chocolate Chunks (I used semi sweet)
          Whisk together brownie mix, flour, and sugar. Using a heavy spoon, stir in the eggs one at a time, followed by butter and 2 tablespoons water. If the batter appears like there is too much flour, add 1 more tablespoon of water. Batter will be very thick.  Fold in chocolate chunks.Cover and refrigerate for 2 hours. Preheat oven to 350 degrees. Grease a cookie sheet (I used my silpat). Drop heaping tablespoons of dough on the cookie sheet. You want pretty thick cookies here to get the brownie feel, about 3 inches apart. Press down slightly. Don’t flatten completely. Bake for 8-10 minutes. Remove from oven, allow to cool 2 minutes on cookie sheet. Transfer to a cooling rack to cool completely.
Monday, March 19, 2012

Double Chocolate Marshmallow Crispy Bars

           I had something else planned for today but when I saw this picture...I just couldn't pass it up. I mean take a look at these and tell me that you aren't drooling. I stumbled on A farm girl dabbles site by way of Tasty Kitchens. It may just be my new obsession. A cute blog full of great recipes and fun things. Check it out. The photo and recipe are from her wonderful site. In the meantime, make these and pair it with a cold glass of milk. Happy Monday!


Double Chocolate Marshmallow Crispy Bars
1/2 c. unsalted butter, at room temperature
3/4 c. sugar
2 large eggs
1 tsp. pure vanilla extract
3/4 c. all-purpose flour
2 T. cocoa
1/4 tsp. baking powder
1/4 tsp. kosher salt
2 c. mini marshmallows
1 c. semi-sweet chocolate chips
1 c. creamy peanut butter
1-1/2 c. Rice Krispies cereal

       Preheat oven to 350°. Spray a 9'' x 13'' pan with cooking spray and set aside. In a medium bowl, cream the butter and sugar. Beat in eggs, one at a time. Add vanilla and stir to combine. Add flour, cocoa, baking powder, and salt. Spread batter into prepared pan and bake for 15 minutes. Do not over bake. Sprinkle marshmallows evenly over the top and bake 3 minutes longer. Cool completely on a rack.
       Once pan is cool, melt the chocolate chips and peanut butter over low heat, stirring to combine. Pour in the Rice Krispies cereal and spread mixture evenly over the marshmallow layer.
Once set, cut into bars. They will cut easier if the top layer is allowed time to set up, especially if they are chilled in the refrigerator a bit.
Friday, March 9, 2012

Mayan Chocolate Truffles

            Sorry my post is really, really late today. It was a beautiful day out and the boys were enjoying the sun and running around. I had my two week grocery shopping to do and I watched my sweet little niece. This is my 600th post. WOW! Who would have thought that I had that much to say and that many recipes that I wanted to try. I hope you have enjoyed my ranting and recipe sharing. I love to search the web and find new recipes to try and enjoy sharing them with you. Here's to 600 more!
            Todays recipe and photo come from Simply Scratch (one of my fave blogs). Mayan chocolate truffles. Chocolate with a kick! Have you ever had Mayan Hot Chocolate. It is SO good. A little bit of spice..a little bit of heat and a whole bunch of goodness. These truffles are dark, decadent and delicious. A must try for any chocoholic!
Tasty Kitchen Blog Mayan Chocolate Truffles

Mayan Chocolate Truffles
8 ounces, weight Dark Chocolate
½ cups Heavy Cream
¼ teaspoons Vanilla Extract
¼ teaspoons Cinnamon
⅛ teaspoons Cayenne Pepper
1 Tablespoon Coffee Or Coffee Flavored Liqueur
Optional Coatings: Powdered Sugar, Cocoa Powder, Toasted Coconut, Etc
         
             Cut up your chocolate as finely as you can (try to get uniform pieces so they will all melt the same, or you will be left with little chunks in the truffles). Place the chocolate into a heat safe bowl (I use a glass mixing bowl).
In a small saucepan, heat your cream just until it comes to a boil (bubbles will begin forming around the edges). Add the heated cream to the chocolate and allow to sit a few minutes.
Add in your vanilla, cinnamon, cayenne and coffee flavored liqueur (you could also use just a Tablespoon of regular fresh brewed coffee).
 * You do not have to add the cinnamon and cayenne, but I find it adds a nice flavor to the truffles.
               Whisk everything together until it is smooth. If you happen to have a few larger chunks, do not fear, you can place the bowl into the microwave for 10 seconds, then remove and stir again. Do this until your mixture is smooth, then allow the bowl to sit at room temperature for 1 hour (and good luck not “tasting” it every time you walk past for that hour).
             With a small spoon or cookie scoop, scoop out small balls of the truffle mixture and place on a cookie sheet (to avoid a huge mess I generally line my sheet with parchment or wax paper) and place these into the fridge for 30 minutes to set.
Tuesday, March 6, 2012

Lucky You Mint Pie

           Yesterday, I had a severe case of Spring Fever. The weather here was just gorgeous. It was 60 degrees and the sun was out. I washed my car because I couldn't see out of the windows. The salt had made a beautiful deposit all over the windows. Everyone else in town had the same idea. There was quite a line. A fight even broke out between two well to do drivers that figured it was their turn next. They were grown men mind you. After the drama I came home and my two year old kissed my car when he got out. It must have been REALLY dirty before. Then I got a wild hair and I washed off my front porch. It had a few months of grime build up on it. While I was at it, I washed the windows and the shutters on the house. All of this knowing, that today, the weather was going to change. It sure felt nice to be outside and even if they only stay clean for a day or so...it was worth it.
           With the day of "green" approaching. I thought it would be fun to have of course a few holiday treats and foods in my arsenal. This one is for those of you that love the combination of mint and chocolate. This smooth and creamy pie is simple to make and will have your guests begging for the recipe. You can share your recipe if you wish, or just keep it to yourself. The recipe and photo are from Nestle. Enjoy my friends. I hope you have a wonderful day, no matter what the weather is.


Lucky You Mint Pie
1 cup (6 oz.) NESTLÉ® TOLL HOUSE® Semi-Sweet Chocolate Mini Morsels
1 can (12 fl. oz.) NESTLÉ® CARNATION® Evaporated Milk
1 tablespoon butter
1 prepared 9-inch (6 oz.) chocolate crumb crust
1 package (3.4 oz.) vanilla instant pudding and pie filling mix
1/3 cup water
1 teaspoon peppermint extract
3 to 4 drops green food coloring (optional)
1 container (8 oz.) frozen whipped topping, thawed, divided
Additional NESTLÉ® TOLL HOUSE® Semi-Sweet Chocolate Mini Morsels, fresh mint sprigs (optional)
           
        MICROWAVE 1 cup morsels and 1/3 cup evaporated milk in medium, uncovered, microwave-safe bowl on HIGH (100%) power for 45 seconds; stir until smooth. Stir in butter; pour into crust. Refrigerate for 20 minutes or until cool to the touch. MEANWHILE, BEAT remaining evaporated milk, pudding mix, water, peppermint extract and 3 drops food coloring in medium bowl until combined. Gently stir in 2 cups whipped topping and additional drop of food coloring, if desired. Spoon over chocolate layer. REFRIGERATE for 2 hours or until set. Sprinkle with additional morsels. Spoon remaining whipped topping in center of pie. Garnish with fresh mint.
Tuesday, February 14, 2012

Double Chocolate Raspberry Cupcakes

            Happy Valentines Day to all of you lovers out there. I have had the same Valentine for almost 20 years now. I am still head over heels in love with him. I am grateful that he came into my life when he did and that he stayed with me. He has given me 3 beautiful children with one more on the way. As well as provided a safe loving home for our adopted daughter. Love you my dear husband.
             Today's recipe and photo come from Jackie (La Casa de Sweets). My goodness, what a wonderful website she has. From reading her info the only thing more beautiful than these cupcakes...is her. She dedicates her blogging life to end world hunger. WoW Jackie...you are awesome! If you get a chance you should stop by her website www.lacasadesweets.com Show this woman that is trying to change this world for the better, some love on this Valentines Day!
           How delicious do these babies look? With real pureed raspberries in the frosting?! That makes all of the calories in the actual cupcake void..right?! I love cupcakes as opposed to a full sized cake for many reasons. They are portable, they a portion sized (if you eat just one), they are fun to decorate and when it comes to kids it is much easier to feed them a cupcake than to give them a fork and plate and expect them to eat an entire piece of cake. These are definitely a must try...if not for today, a day of lovers..then at least put it in your recipe box. You will love the chocolaty goodness mixed with the tang of real raspberries in every bite.

 
Double Chocolate Raspberry Cupcakes
FOR THE CUPCAKES:
1 cup Flour
⅓ cups Cocoa Powder
½ teaspoons Baking Powder
¾ teaspoons Baking Soda
1 pinch Salt
1 cup Milk
⅓ cups Canola Oil
¾ cups Sugar
2 teaspoons Vanilla Extract
½ cups Cocoa Nibs Or Mini Chocolate Chips
FOR THE FROSTING:
2 sticks Unsalted Butter, At Room Temperature
5 cups Powdered Sugar
1 cup Frozen Or Fresh Raspberries (Thawed, If Frozen)
     
For the cupcakes:
     Preheat the oven to 350ÂşF and line a cupcake tray with paper liners. In a small bowl, whisk together the flour, cocoa powder, baking powder, baking soda, and salt. Set aside. In a medium bowl, whisk together the milk, oil, sugar, and vanilla extract. Whisk the flour mixture into the wet mixture until very well-combined. Stir in the cocoa nibs. Pour into the lined cupcake tray, filling each cup about 2/3 of the way. Bake at 350ÂşF for 20 minutes, until a toothpick inserted into the center of the cupcake comes out clean. Let cool completely before frosting.
For the frosting:
       In the bowl of your mixer, beat the butter until light, about 2 minutes. Add 1 cup of powdered sugar and beat for 30 seconds. Add 1/2 cup of the raspberries and beat for 30 seconds. Add the remaining powdered sugar, 1/2 cup at a time, and beat for 1 minute. Add the remaining 1/2 cup of raspberries and beat for 2 minutes. Frost the cooled cupcakes, and enjoy!
Makes 24 cupcakes.

Saturday, February 11, 2012

Chocolate Banana Crepes

            My husband is not a big fan of crepes. Another difference between him and I. Good thing we have some similarities in other areas because 90% of the time...food ain't one of them. I LOVE crepes. They are so versatile. You can fill them with whatever you like. Berries, whipped cream, mousse..you name it. My brother in law, Brad, has a great crepe recipe. He fills them with a cream cheese whipped cream, strawberries and bananas and tops with powdered sugar and chocolate syrup. If that isn't a great way to start the day..I don't know what is. Unfortunately, I wasn't able to get his recipe, so I searched the Internet to find one that I thought you would enjoy. Something....different. Next time, I will get Brads recipe to you. Promise.
               This recipe doesn't call for any cream filling but you could definitely add it. I would need the cream, to soften the flavor of the chocolate. I love chocolate but in moderation (another difference between the dear husband and I). You could add berries..you know strawberries or raspberries would be yummy. The key it seems to a good crepe (according to Brad and he would know).. is to let it rest long enough for the bubbles to dissipate. You could double the recipe if you need a bigger batch. Yumm! The recipe and photo come from livlife.com One to keep in your recipe box for sure.


Chocolate Banana Crepes
FOR THE CREPES:
½ cups Non-fat Milk
1 Tablespoon Butter, Melted
1 whole Egg
1 teaspoon Vanilla
1 Tablespoon Cocoa Powder
2 Tablespoons Powdered Sugar
⅓ cups All-purpose Flour
4 whole Ripe Bananas

FOR THE CHOCOLATE SAUCE:
1-½ Tablespoon Butter, Melted
1 Tablespoon Milk
A Splash Or Two Of Grand Marnier (optional)
1 Tablespoon Cocoa
2 Tablespoons Powdered Sugar
Crepes:
          In a medium bowl stir together the milk, melted butter, egg and vanilla. Whisk in the cocoa powder until completely incorporated, then the powdered sugar, and lastly the flour.
Heat a small nonstick skillet over medium heat and spray with cooking spray or coat with a very small amount of butter. Pour about ¼ cup of the batter into the pan and swirl to form a very thin disk. Cook for about 2 minutes then use a fork or spatula to flip; cook about 1 minute more or until completely cooked.
        Place the crepe on a plate and add desired amount of sliced banana. Drizzle chocolate sauce over the bananas and fold crepe closed with the seam side down.Drizzle with additional chocolate sauce and a sprinkle of powdered sugar. Repeat the process for each crepe and serve warm, but the crepes are just as good cold!

Chocolate sauce:
       Melt butter in a saucepan over low heat then stir in milk and Grand Marnier, if using. Whisk in the cocoa powder and powdered sugar. Heat gently over very low heat to keep warm enough to drizzle.
Note: Liv says you might want to double the sauce. It was that good!

Friday, February 10, 2012

Cherry Chocolate Cake

            I know I am a strange person. I love the taste of many different fruits but can't stand the actual fruit of some. Grapes and cherries to name a few. I am not sure if it is a texture thing or what. We have two full size cherry trees in the backyard as well as a ton of concord grapevines and seedless red grapes. We used to have seedless green grape vines until the ferrel neighbor children ripped them off of the fence..but that is a totally different story. I make grape juice from the concord grapes and my husband and children love grapes so they do their best at eating the rest. Although, there are way to many for them to eat. We donate the rest to our family's free produce stand. As for the cherries, sadly we don't spray them and most of them go to waste. The birds enjoy them and after they fall, the dogs enjoy them. Which, this may be too much info but it makes scooping their droppings quite interesting, Let's just say I have never looked at a Baby Ruth candy bar the same way since. Once again, I have fallen away from the original story here. Walking through the grass on a hot summer day and feeling cherries that the dogs haven't eaten, squish between your toes is an interesting way to spend an afternoon. I wouldn't recommend it.
               Now that I have ruined your appetite for cherries...onto the recipe at hand....This recipe is so simple and delicious..even cherry haters can love this dish, Given enough chocolate I could love anything I suppose. A dollop of sweetened whipped cream and maybe some extra cherries on top. A great dessert for your Valentine. The recipe and photo are from Taste of Home.

Cherry Chocolate Cake Recipe

Cherry Chocolate Cake
1 package (18-1/4 ounces) chocolate cake mix
3 eggs, lightly beaten
1 teaspoon almond extract
2 cans (20 ounces each) reduced-sugar cherry pie filling, divided
3/4 teaspoon confectioners' sugar
         In a large bowl, combine the cake mix, eggs and almond extract until well blended. Stir in one can of pie filling until blended. Transfer to a 13-in. x 9-in. baking pan coated with cooking spray. Bake at 350° for 30-35 minutes or until a toothpick inserted near the center comes out clean. Cool completely on a wire rack. Dust with confectioners' sugar. Top individual servings with remaining pie filling. Yield: 18 servings.
Wednesday, February 1, 2012

Twix Caramel Brownies

             Every now and then, I get to watch something other than cartoons on the television that my husband and I bought. This doesn't happen very often, In fact even when the kids are not around, I find myself watching cartoons for some reason. During the day, if I get a minute, I try to catch the local home/self improvement shows. They usually have recipes on their shows that don't have a lot of ingredients and they use ingredients that are common. In general I don't keep white truffle oil on hand or any other exotic food for that matter. A few days ago They featured this recipe from TwoPeasandtheirPod. I love love love their website. I had to share because it is chocolate and it is good. Is there any recipe with chocolate that isn't? The recipe and photo are from their website.Enjoy.

Twix Caramel Brownies
1 c. (2 sticks) butter
2 c. granulated sugar
2 t. vanilla extract
4 large eggs
¾ c. cocoa
1 c. all-purpose flour
½ t. baking powder
¼ t. salt
1 ½ c. chopped Twix candy bars
⅓ c. caramel ice cream topping

Heat oven to 350°F. Grease a 9 x 13 pan with cooking spray. Set aside. Place butter in medium saucepan on the stove. Heat over medium heat until butter is melted. Remove from heat and stir in sugar and vanilla extract. Add eggs, one at a time, beating well with spoon after each addition. Add cocoa; stir until well blended. Add flour, baking powder and salt; stir until combined. Stir in Twix candy bar chunks. Pour batter into prepared pan.
       Drizzle caramel evenly over the brownies. Using a toothpick, swirl caramel into brownies. Bake for 35-40 minutes or until brownies begin to pull away from sides of pan and a toothpick inserted in the middle comes out clean. Cool brownies completely in pan on a wire rack. Once cool, cut into squares and serve.
Wednesday, January 18, 2012

Toasted Marshmallow Hot Fudge Cake

Dear Confessions of a Cookbook Queen,         
              I have a love/hate relationship with your blog. I love you for all of the delectable desserts and the of the cuff humor that you share with me everyday. I hate you for all of the delectable desserts that you make look so easy and delicious. My hips will never recover from your blog. Although I am pregnant right now and my hips are supposed to be getting wider right at this moment....I am afraid that in a few months I will still LOOK pregnant, even though the baby will be out. sigh. I suppose, the only think that I can do, is share your delectable recipes in my little world. Make my friends' hips get wider, and then...I won't feel so....guilty.
                          Sincerely, Camie

             As you can tell...this recipe and photo came from one of my fave blogs. sigh. I must share with you so that we may grow large together. That way I won't feel as guilty when I have to grease the doors just to get out of the house. You are welcome.


Toasted Marshmallow Hot Fudge Cake
1 box Duncan Hines Dark Chocolate Fudge Cake Mix
Eggs called for on box
Oil called for on box
Water called for on box
1 Jar hot fudge ice cream topping
2 (7 0z) jars Marshmallow Creme
              Preheat oven to 350. Grease and flour a 9×13 inch baking pan and set aside.  Prepare cake batter as instructed on box (make sure to mix for the amount of time it says…don’t skimp on this, it makes a big difference!!)  When cake is almost done, heat hot fudge topping in the microwave until it is pourable. Upon removing cake from oven, immediately increase oven heat to 400. Poke holes across the surface, using the back of a wooden spoon (you want big holes, so don’t use anything tiny). You want the holes about an inch or two apart. Pour hot fudge over the surface of the cake and tilt the pan around to allow the holes to soak it up. Evenly spoon all of the marshmallow creme over the surface of the cake and let it sit for about 5 minutes to get melty. Carefully spread the marshmallow cream with an offset spatula. Place cake back in the oven, and remove once marshmallow topping is browned.
Monday, January 16, 2012

Eclair Pie

            I have a few of these recipes floating around in quite a few of my recipe books. I like this one because instead of chocolate frosting, it calls for chocolate pudding. It just tastes better to me.This dessert is quick and delicious. If you love eclairs, you will love this recipe. The last time I had an actual eclair was back when I was a teenager. My sweet friend Adrian made them for me. I think it is time for her to come visit and we can chat over some tasty eclairs. Until then...these babies will have to do.


Eclair Pie
1 large box Vanilla Instant Pudding
1 small box Chocolate Pudding
6 cups Milk (divided)
1 Large container Cool Whip
1 package of Graham Crackers

Instructions:
Layer Graham Cracker
Layer Vanilla Pudding
Layer Cool Whip
Layer Graham Cracker
Layer Chocolate Pudding

       Remember to whisk puddings and layer when not fully set up so it can be poured on Cool Whip. Also, Cool Whip needs to be thawed.
Thursday, January 12, 2012

Chocolate Banana Breakfast Smoothie

            One of my favorite smoothies EVER! I freeze over ripe bananas that have been peeled and cut into thirds. It thickens up the consistency quite a bit, almost like a milk shake.I have used plain milk as well. You could get the individual packets of instant breakfast or omit the Instant Breakfast and add whey powder. If you are peanut butter lover you could add some peanut butter as well. This would be great after a workout as well. I hope you will give it a try,


Chocolate Banana Breakfast Smoothie
2 Tablespoons Vanilla Yogurt
1 Cup Chocolate Milk
1 Banana (I freeze over ripe bananas for recipes like this I makes a thicker consistency)
2 TableSpoons Carnation Instant Breakfast
1/2- 1 Cup Crushed Ice
           Blend in a blender until smooth.

Followers