Search This Blog

Saturday, April 30, 2011

Ultimate Pork Chops

           Stumbled on this recipe on possibly my new fave blog..Real Country Living. They Look Divine. It's going on my menu board for sure. The picture is from there as well! Yummy!

Post image for Whit’s Ultimate Pork Chops
Ultimate Pork Chops
6 Pork Chops
Paprika to taste
Salt and Pepper to taste
2 Tablespoons Olive Oil
1 Cup Water
1/2 Cup Celery, chopped (Whit doesn’t care for celery, so she makes it without)
1-1/2 oz. pkg. Onion Soup Mix
2 Tablespoons Flour
1 Tablespoon Fresh Parsley, chopped
1/4 Cup cold Water
6 oz. Can Evaporated Milk
       Sprinkle pork chops with Paprika, salt and pepper. Brown chops slowly in hot oil in a large skillet over medium heat; drain of excess oil. Add water, celery and onion soup mix.Cover and cook over low heat for 45 minutes or until chops are tender. If you cook longer than 45 minutes, just add a bit of water now and then to make sure they stay moist enough. I figure, the longer the better…you can get pork chops to be sooooo tender!Remove chops from pan and place on a platter.In a small bowl, combine flour, parsley and cold water; mix until smooth. Whisk into pan drippings, adding evaporated milk over low heat. Cook and stir this mixture until it’s thick and bubbly, about 2 or 3 minutes. You want this to cook thoroughly or your gravy will taste like raw flour.Cover the pork chops (on the platter) with this sauce. Serves 6.
Friday, April 29, 2011

Homemade Hamburger Buns

           Now I know that you can buy a pack of buns at the store for about a buck. After you try these you will never buy those nasty buns again. From Tasty Kitchens...
Post image for Easy Homemade Hamburger Buns


Homemade Hamburger Buns
¾ cups Hot Water
2 Tablespoons Oil
2 Tablespoons Sugar
2 teaspoons Instant Yeast
1 teaspoon Salt
1 whole Egg
2-¾ cups Flour
   Combine all the ingredients with about 1 1/2 cups of the flour in a large bowl. I use my KitchenAid. Beat till smooth. Add enough flour to make a dough that is slightly sticky, but doesn’t stick to your fingers. Knead for about 5 minutes.
Let dough rest for a couple of minutes, then divide into 8 portions. Roll each portion into a ball. Place on a well-greased cookie sheet and press down with the palm of your hand to flatten slightly. Let rise till doubled. (Mine took about 30 minutes, but it depends on the temperature of your kitchen.) Bake in a preheated oven at 350F for about 15-18 minutes. Cut in half and serve, for the yummiest hamburger you’ve ever had.
Note: If you want sesame seeds on top, take them out of the oven after 10 minutes of baking. Brush with beaten egg white and sprinkle with sesame seeds. Then return them to the oven for the remaining 5-8 minutes.
Thursday, April 28, 2011

The Best Hamburgers Around

           While trying to decide what to do for dinner last night...we decided on homemade hamburgers. I, as many of you may know....don't like meat all that much. However, if I am going to make burgers at home I like to season them up a bit. So here's my recipe. The trick is to not have the meat mixture too dry or too soupy. Either was and they just won't stay together. While we are at it, when forming burgers, don't over do the mixing. You are not making wall spackle. You want to eat this after. The more you mix the drier the burger. So only mix until all of the ingredients are mixed in. If you are in a hurry skip the egg and bread crumbs. Tomorrow I will post a recipe for homemade hamburger buns. They are easy and delicious.Enjoy!


Homemade Burgers
2 pounds ground beef ( I use ground chuck)
1/2 onion finely diced or 2 tsp. dried onion (if the onion isn't finely diced your burgers will fall apart)
1 clove garlic diced
1 tsp. season salt
1/2 tsp. black pepper
1 Tbs. Worcestershire sauce
1-2 tsp. Montreal Steak Seasoning
1/2 cup bread crumbs (I use Panko)
1/4 cup BBQ sauce
1 egg

           Mix ingredients in the bowl being careful not to over mix. I usually get 8 good size burgers from this mix. However, this all depends on how big you like your burgers. One trick I have learned with grilling burgers..form them into patties and make a finger sized hole in the center. This will allow the burger to shrink while cooking but still retain most of the size you started out with instead of a large meatball that doesn't fit on a bun. Throw them on the grill and DO NOT flip them over until the juices begin to rise to the top. Flip them over and don't press them into the grill. I know this is tempting but the result will be a dry burger. Cook until they are done to your liking. Throw on some cheese maybe some cooked bacon.... Serve them up while hot!.

****Note: You could make up a big batch and place on a lined cookie sheet and freeze the raw patties. After frozen put them in a freezer bag with wax paper between each burger. Throw them on the grill whenever you like!

Orange Cream Fruit Salad

            A great change from your typical fruit salad. Give this a try!

Orange Cream Fruit Salad
1 (20 ounce) can pineapple tidbits, drained
1 (16 ounce) can peach slices, drained
1 (11 ounce) can mandarin oranges, drained
2 medium firm bananas. sliced
1 medium apple, chopped
1 (3.4 ounce) package instant vanilla pudding mix
1 1/2 cups milk
1/3 cup frozen orange juice concentrate
3/4 cup sour cream

                                                                                                                                                          In a large salad bowl, combine fruits; set aside. In a small mixing bowl, beat pudding mix, milk and orange juice concentrate for 2 minutes. Add sour cream; mix well. Spoon over fruit; toss to coat. Cover and refrigerate for 2 hours.

Wednesday, April 27, 2011

Essential Buttermilk Syrup

After you try this syrup you will not have any other syrup.I was skeptical but it was so simple and delicious. If you don't have buttermilk on hand you can add.. one tsp. white vinegar to one cup milk.  Give this a try! It came my way through Tasty Kitchens. This one is a must try!


Essential Buttermilk Syrup
½ cups Butter
1 cup Sugar
½ cups Buttermilk (if you don't have it on hand 1 cup milk and 1 tsp. vinegar will work)
1 Tablespoon Karo Syrup
1 teaspoon Baking Soda
1 teaspoon Vanilla
           In a LARGE pot, combine butter, sugar, buttermilk, and Karo syrup, and bring to a boil for about 2 to 3 minutes. Add baking soda and vanilla. Mixture will fizz to TWICE THE SIZE or more, so make sure you use a good-sized pot! Set it aside to thicken while stirring occasionally. Pour over waffles, pancakes, and French toast to make them oh. so. much. better!
**Note...Remember when reheating that it will foam up again!
Monday, April 25, 2011

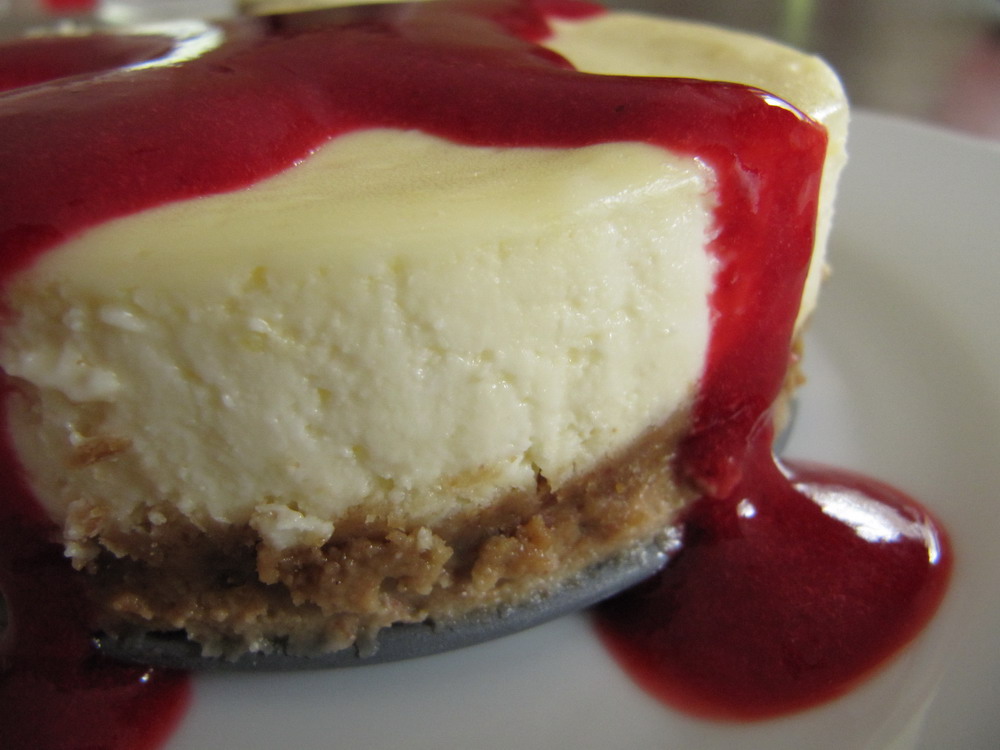
Lemon Cheesecake with Raspberry Sauce


         A rich tasting dessert . You can omit the sauce if you would like but I think it adds a whole new dimension of flavor to the cheesecake!
Lemon Cheesecake with Raspberry Sauce
Crust:
1 1/4 cups graham cracker crumbs
3/4 cup finely chopped nuts
1/4 cup sugar
1/3 cup butter, melted
Filling:
4 blocks Cream Cheese, Softened (8 Ounce Blocks)
1 cup Sugar
1 cup Sour Cream
2 TBL Lemon Juice
1 1/2 TBL Grated Lemon Peel
1 TBL Vanilla Extract
1 1/4 TBL Lemon Extract
4 whole Large Eggs
(This recipe makes either 1 ‘tall’ 9 inch cheesecake or 2 ‘thinner’ 9 inch cheesecakes depending on your preference.)
         Preheat oven to 425 F. Prepare a 9 inch cake pan (with removable base) with a disc of wax paper at the bottom to stop cheesecakes from sticking.In a bowl, combine crumbs, nuts and sugar; stir in butter. Press onto the bottom of a greased 10-in. springform pan; set aside
Meanwhile, in a stand mixer or by hand, beat the cream cheese and sugar until smooth. Add sour cream and mix well. Stir in the vanilla,lemon juice and peel. Add the eggs, one at a time, on low power until combined, scraping the sides of the bowl regularly.Bake 425, for 15 min., lower oven temp to 350, bake 60 min. Turn oven off and crack oven door, leave cake in oven 30 min. Cool on rack, then overnight in refrigerator. Let cool slightly and then refrigerate for 4 hours

Raspberry Sauce
•2 cups Fresh Or Frozen Raspberries
•¼ cups Granulated Sugar
•2 Tablespoons Orange Juice
•2 Tablespoons Cornstarch
•1 cup Cold Water
        Combine the raspberries, sugar and orange juice in a saucepan. Whisk the cornstarch into the cold water until dissolved and smooth; add to the raspberries and bring to a boil. Reduce heat slightly and simmer for 5 minutes, stirring constantly until thickened (the sauce will thicken further while cooling). Into a bowl, strain the sauce through a fine mesh sieve to remove the seeds. The sauce can be served warm or cold; it will keep in the refrigerator for a couple of weeks.

Salted Nut Roll Bars

     
My moms favorite candy bar was the salted nut roll. This ones for you mom!

Salted Nut Roll Bars
1 (16 ounce) jar dry roasted peanuts
1 can sweetened condensed milk
1 (12 ounce) package peanut butter chips
3 tablespoons butter
1 (10 ounce) package miniature marshmallows

Put half of the peanuts on bottom of a 9 x 13-inch baking dish. In a saucepan, melt sweetened condensed milk, peanut butter chips and butter; stir in marshmallows, but do not melt, pour over the nuts and spread out evenly; top with remaining nuts. Let bars cool before cutting.

Saturday, April 23, 2011

Peach Sparkler


Peach Sparkler
1 tablespoon peach puree
Sparkling apple cider, chilled
        To an old school champagne bowl or glass, add the peach puree. Top with sparkling apple cider and gently stir with a cocktail stirrer to combine. Garnish with edible flowers.
Cook's Note: If desired, substitute the sparkling apple cider with your favorite sparkling wine

Strawberry Mousse Pie

  I got this recipe from recipe goldmine. Cute and easy! Just in time to celebrate your Easter holiday! Happy Easter to you and your loved ones!

Strawberry Mousse Pie recipe

Strawberry Mousse Pie

1 1/2 cups (about 1/2 pound) sliced, fresh strawberries
1 cup granulated sugar
1 can (12 fl. ounces) NESTLÉ® CARNATION® Evaporated Milk, divided
1 envelope (7 grams) unflavored gelatin
1 cup thawed, frozen whipped topping
3 3 to 4 drops red food coloring (optional)
1 (6 oz.) prepared 9-inch shortbread crumb crust
Green food coloring
1/2 cup sweetened flaked coconut
24 (about 1/2 cup) jelly beans

PLACE strawberries, sugar and 1/2 cup evaporated milk in blender or food processor; cover. Puree for 20 seconds or until smooth.
Heat remaining 1 cup evaporated milk in small saucepan over medium heat until simmering. Remove from heat. Sprinkle gelatin over milk mixture; stir until completely dissolved. Whisk in strawberry mixture; pour into a medium bowl. Refrigerate uncovered for 20 minutes or until cool to touch. Gently whisk in whipped topping and red food coloring to color desired. Pour mixture into crust.

REFRIGERATE for 2 hours until set.

DISSOLVE 2 to 4 drops of food coloring in 1/2 teaspoon water in small, resealable food storage plastic bag. Add coconut. Seal bag and shake evenly to coat coconut. Spoon coconut around edge of pie to form 8 "nests." Place 3 jelly beans in center of nests.

Recipe and photograph provided courtesy of Nestle and meals.com. Used with permission
Friday, April 22, 2011

Funeral Potatoes~ A quirky thing that comes with living in Utah

             If you are not from Utah..I am sure you ar looking at this post wondering just what in the world ARE funeral potatoes. It seems to be tradition around these parts to make this potato casserole whenever there is a grieving family of sorts..at least that is how it got it's name. There are a ton of different recipes around Utah and you could add or substitute your fave. ingredients but they all use basically the same ingredients. You could add green onion in place of the grated onion, maybe add bacon. Make no mistake though that this rich side dish will accompany any meal well. Especially Easter dinner. If you haven't tried this type of casserole before...give it a whirl.


 Funeral Potatoes
6 c. diced potatoes
1 can (10 3/4 oz.) condensed cream of chicken soup
1 stick butter, melted
1 c. sour cream
2 c. cheddar cheese, grated, divided
1/4 c. grated onion (optional)
Salt and pepper to taste
          Ingredient notes: For the potatoes, it's best to bake russet potatoes wrapped in foil, then cool, peel and dice them. If you want, you can substitute plain frozen diced (not shredded) potatoes. Let the potatoes thaw before using them in the recipe.
         To make reduced fat funeral potatoes, replace the melted butter with 1/2 soup can milk. Use reduced fat sour cream, or replace the sour cream with nonfat, plain Greek yogurt. Reduced fat cheddar cheese also works well.
        Combine soup, butter, sour cream, 1 c. cheese, onion, salt and pepper. Mix well. Add the potatoes and stir gently until combined. Place potato mixture in a 2-3 quart casserole dish or 9 x 13-inch baking pan. Top with the remaining 1 c. cheese. Bake uncovered at 350 degrees for 30-45 minutes or until hot and bubbly.
     A lot of people put crushed corn flakes on top of the funeral potatoes. This recipe doesn't do this, but I've eaten them that way and it does add a nice crunch. If you want to use the corn flake topping, mix 3 tablespoons butter with 3/4 cup crushed corn flakes and sprinkle over the potato mixture before baking. If you're planning to use a crumb topping, mix all the cheese in with the sauce and don't reserve any to sprinkle on top.
Thursday, April 21, 2011

Orange Cream Cheesecake

            This recipe came across my FB yesterday! How Yummy does this look? If you like Orange Creamsicles then this would be a guilty pleasure for you! Sounds simple too! Give it a try and let me know what you think!

            Orange Cream Cheesecake

Orange Cream Cheesecake

When we were kids, we had these orange and vanilla ice cream treats on a stick. The combination was divine. Why not do the same with a cheesecake?

The following recipe uses orange juice concentrate for the orange and a smooth vanilla filling. It is easy to make.

For the crust:
2 cups crushed graham crackers
4 tablespoons sugar
5 tablespoons butter, melted

For the filling:
3 (8-ounce) packages cream cheese, softened
3 large eggs
1 cup granulated sugar
2 tablespoon flour
1/4 teaspoon salt
2 teaspoons vanilla
1/4 cup frozen orange juice concentrate
orange extract or liqueur
a drop or two of both yellow and red food coloring to make an
orange color
2 tablespoons whipping cream
whipped cream for garnish
        Crush the graham crackers. Mix the crumbs with the sugar and melted butter in a nine or ten-inch springform pan. Press the mixture into a crust across the bottom of the pan and up the sides. Put the crust in the refrigerator to set up while you prepare the filling.
 Preheat the oven to 325 degrees. Mix the cream cheese with the paddle attachment of your stand-type mixer set at medium speed until smooth and creamy, about five minutes. Add the eggs, granulated sugar, flour, salt, vanilla, and gently cream together until smooth. Do not over beat. Too much air in the filling will cause the cake to sink and crack.
 Remove two cups of the filling and add the orange juice concentrate, extract, and coloring to the removed filling. Set aside. Add the whipping cream to the remaining vanilla filling. Spread the vanilla filling in the on the crust. Carefully spoon the orange filling around the edge of the cheesecake letting the orange filling flow to the center. Smooth if necessary.
         Bake for 40 to 50 minutes or until the top starts to turn golden and the center of the cake is just slightly jiggly. Because it is not as thick, a ten-inch cheesecake will bake more quickly than a nine.
       Let the cheesecake cool in the pan on a wire rack for ten minutes. Run a knife around the edge of the pan to loosen. Remove the ring and let the cheesecake cool completely. Refrigerate for several hours. Garnish with whipped cream.
Recipe and photograph provided courtesy ofPreparedPantry.

Wednesday, April 20, 2011

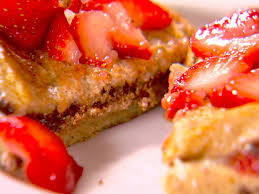
Chocolate Mascarpone Stuffed French Toast with Strawberry Syrup

          While this recipe sounds complicated it is not. It is so easy. Rich, decadent. Sure you couldn't eat this every day or you would have to have someone you love come grease the door to get you out but, what a wonderful thing to make for brunch. For all of the locals (Utah) Harmons grocery carries the Mascarpone. I love Harmons, not just because I worked there but they carry a ton of things that other grocery stores don't. I always check there first. Back to the mascarpone...It can be expensive, I have included a "substitute"recipe for it. However, nothing matches the flavor of the mascarpone. Treat yourself..you are worth it!

Chocolate Mascarpone Stuffed French Toast with Strawberry Syrup
1/2 cup mascarpone, at room temperature
1 tablespoon heavy cream
1 tablespoon orange zest
1 tablespoon granulated sugar
1 ounce semisweet chocolate, melted and cooled, plus more for grating
12 slices day-old brioche, about 3/4-inch thick (I used thick cut french bread)
3 large eggs
1 1/2 cups half-and-half
2 tablespoons unsalted butter, divided, plus more if needed
Confectioners' sugar, for dusting
Strawberry Syrup, warmed, recipe follows
      Cook's Note: Mascarpone is similar to cream cheese in flavor (but better) and has the consistency to match. It makes a great base for this super-easy yummy filling.

***If you are having troubles finding Mascarpone ( it can also be expensive) here is a substitute for it
1 (8 ounce) package cream cheese, softened
1/4 cup heavy cream
2 tablespoons butter, softened
       In a medium bowl, mix together the cream cheese, cream and butter until well blended. Use in place of mascarpone in any recipe
.
     Combine the mascarpone, heavy cream, orange zest and sugar in a bowl. Add the melted chocolate and mix until all the ingredients are incorporated. Using an offset spatula or butter knife, take a generous scoop of the chocolate-mascarpone filling, about 2 tablespoons, and slather it on 1 slice of the brioche, and then top with another slice of brioche. Repeat with the remaining slices and filling; you will make 6 sandwiches.
     In a shallow dish, whisk together the eggs and half-and-half to make an egg bath. (If you don't have half-and-half, milk or heavy cream will work just fine.)
    Preheat the oven to 200 degrees F.  Preheat a nonstick griddle or large skillet over medium heat. Add 1 tablespoon butter to the skillet, moving it around to coat the surface. Dip each sandwich in the egg bath, turning over to coat and soak both sides. Place the sandwich on the hot griddle. (Place only as many sandwiches as will fit easily on the griddle, don't overcrowd.) Cook, in batches, until golden, 2 to 3 minutes per side. Transfer the sandwiches to an oven-safe platter and cover loosely with foil. Place in the oven to keep warm. Add more butter to the griddle, as necessary, and cook the remaining sandwiches.
    Cut the sandwiches diagonally in half, and serve 2 to 3 halves per person. Dust the sandwich with confectioners' sugar and grate chocolate over the top. Ladle a generous portion of the Strawberry Syrup over the sandwiches, or serve alongside for your guests to serve themselves.


Strawberry Syrup:
2 pints whole fresh or frozen strawberries, hulled 
2/3 cup sugar, plus more if needed
1/4 cup corn syrup 
Pinch sea salt
1 tablespoon lemon juice
       In a large saucepan over high heat, add the strawberries and sugar. (A large saucepan is needed just in case the strawberry syrup starts to boil up the sides.) If the strawberries are not as ripe or sweet as you like, add 1/3 cup more sugar. Add 2/3 cup water, the corn syrup and sea salt to the pan. Stir together until the sugar dissolves. Bring to a boil and cook for about 5 minutes, stirring occasionally.
    Strain out the strawberries and continue to boil the liquid until the mixture has thickened to a syrupy consistency, another 8 to 10 minutes. Stir in the lemon juice and add the strawberries back to the saucepan. Gently stir to coat the strawberries in the syrup. (The syrup can be stored in an air-tight container in the refrigerator for up to 1 week, or cooled and frozen.)
         Cook's Note: For an orange-lover's option, use fresh orange juice instead of the lemon juice to finish the syrup. Alternately, for a rich, adult-friendly sauce, add a splash of orange liqueur, like Grand Marnier, to the sauce. Although the alcohol won't completely cook out, most will if cooked a few minutes longer. Yield: 3 1/2 cups

Bumble Berry Fool

             What exactly is a "bumbleberry"? Well there is no berry that is named bumbleberry. It simply means some different berries that have been mixed together. Of you google bumbleberry you will get a silly explanation but honestly it is a group of mixed berries,,,And, what is a fool? Well, I could post many pictures of fools per say but we are speaking of food today! A fool is a traditional English dessert. It is a mixture of fresh fruit puree and whipping cream layered together. Usually made when the fruits are in season. No matter what you call it...it is light,delicious and easy to make! Top it with some granola for texture if you would like! Once again I got this recipe from Dessert First! Enjoy!


Bumbleberry Fool
4 cups mixed berries, plus more for garnish 
1 1/4 cups sugar
2 teaspoons fresh lemon juice 
6 cups heavy cream
2 teaspoons vanilla extract 
Mint, for garnish

           Place your berries in a blender and add the sugar and lemon juice. Blend until nice and smooth. Place a fine-mesh strainer over a large bowl and strain the blended berries, pressing on the solids with a spoon or spatula to get all the juices into the bowl. You only want the juice, not the seeds, so throw the solids away. Reserve about 1 cup of the berry puree in a small bowl, the rest will be for the topping. Cover and pop in the fridge until ready to assemble your parfaits.
         Whip the cream and vanilla in a large bowl until stiff peaks form. Gently fold the reserved berry puree into the whipped cream. Fill a pastry bag with this berry cream and pipe into 6 tall sundae cups. (If you're not serving right away, you can keep the cream in the pastry bag in the fridge.) Layer the parfait glasses with whole berries, more berry cream and drizzle at the end with the reserved berry puree. Garnish with a few more whole berries and some mint.
Tuesday, April 19, 2011

Lucious Lemon Squares

             I know I have professed my love for Anne Thorntons Dessert First on Food Network before. These beauties are on the menu for Easter at the in laws! If you plan on making these allow enough time for chilling. They are not too sweet and not too sour. PERFECT!


Lucious Lemon Squares
Nonstick cooking spray
2 sticks unsalted butter, at room temperature
2/3 cup granulated sugar
1/2 teaspoon almond extract
2 cups all-purpose flour
1/4 teaspoon fine sea salt
Filling:
6 eggs, at room temperature
2 2/3 cups granulated sugar
3 tablespoons grated lemon zest
3/4 cup fresh lemon juice
3/4 cup all-purpose flour
Confectioners' sugar, for dusting
Raspberries, for garnish, optional
      For the crust: Preheat the oven to 350 degrees F. Grease a 9 by 13-inch baking sheet (otherwise known as a quarter sheet pan) with some cooking spray. In a stand mixer with the paddle attachment (or you can use a food processor), cream your butter with the sugar and almond extract until light and fluffy. Whisk the flour and salt in a small bowl, making sure there are no lumps. Turn the mixer speed to low, add the flour into your butter and mix until just incorporated. (Make sure not to over-mix.) Turn the dough onto the baking sheet, flour your hands and press it out evenly on the bottom and up the sides. Pop in the fridge for an hour (or overnight) to chill. Pop the crust in the oven and bake until a light golden brown, about 20 minutes. Cool completely on a wire rack.
       For the filling: While the crust is cooling, make your filling. Crack your eggs into a large bowl and add the sugar, lemon zest, lemon juice and flour. Whisk until combined. Pour into the crust and spread evenly. Put back in the oven and bake until the filling is completely set, about 30 minutes. Let cool to room temperature before serving. Dust with confectioners' sugar and then cut into 20 to 24 squares to serve. Garnish with raspberries, if desired.
Monday, April 18, 2011

THE Best Carrot Cake Hands Down!

             
            Carrot cake is a confectionery conundrum: it seems you either love it, or you hate it. But either way, there's no denying the appeal of this rich dessert throughout history. Food historians tell us that the origins of carrot cake were likely a type of carrot pudding enjoyed during medieval times. Later, during the Middle Ages, sweetening agents were hard to come by in Britain and quite expensive, so as a result, carrots were often used in place of sweeteners. Interestingly, despite being such a longstanding mainstay in Europe, American cookbooks didn't start listing carrot cake recipes until the early 1900s. And, it was actually in the 1960s before carrot cake began becoming a more common cake in the United States, soon becoming the dessert of choice at summer family reunions picnics and Mothers Day celebrations.
           My husband is not a fan of carrot cake...but there is something that feels so comforting about this cake. Just in time for Easter. No pineapple, no bells and whistles, just carrot cake at it's finest! Of course if you wanted you could add coconut or raisins, but really this cake is good without all of that!You can of course, omit the nutmeg and allspice or sub in pecans for the walnuts. It is all about taste


THE Best Carrot Cake Hands Down
2 cups sugar
1 1/4 cup oil
4 large eggs
2 cups flour
2 tsp. baking soda
1 TBS. cinnamon
1 tsp. nutmeg
1 tsp allspice
1 tsp. salt
3 cups grated carrots                           
1 cup chopped walnuts

 FROSTING:
       Beat ingredients together.
12 oz. powdered sugar
6 0z. cream cheese softened
1 tsp. vanilla extract
2 TBS. butter
2 TBS. milk                                 
         Preheat oven to 350. In a large bowl mix oil and sugar. Add eggs and beat well. Sift dry ingredients together then add to egg mixture. Mix well. Fold in carrots and nuts. Pour into greased 9x13 pan. Bake for 40-45 minutes. Watch carefully due to oven variances. Let cool completely. Make frosting. Frost cake then enjoy!


Sunday, April 17, 2011

Accepting Yourself..As You Are Right Now!


                          "Seek not outside yourself, heaven is within"~Mary Lou Cook

            While reading one of my most favorite books, Simple Abundance, it is difficult to pick an entry to build on. This one stuck out today. It reads...
          "Today we make peace with the past: with the bodies and faces we were born with and those that have evolved. Today, we embrace the lines that stare back at us, the parts that sag in the middle or stick out where they shouldn't, the hair that never keeps a curl or never loses it." It goes on to say, "It will take a bit of doing, learning to love all our personal pilgrimage places. However, before genuine love can flourish, we must finally accept ourselves exactly as we are TODAY! Not tomorrow or next week or when we lose twenty-five pounds. Remember acceptance is acknowledging the reality of the situation: that we are heavier than we'd like to be, for example or that our complexion is ruddy or sallow or that we've got gray streaks or that leggings just don't work for us. Most of us think of other women as beauties and never ourselves. But, every woman was created by Spirit to be a genuine beauty. We learn how to reveal to the world our unique radiance only after we acknowledge it ourselves. Today, take as your personal mantra, 'I am what I am and what I am is beautiful'."
             So, tell me is this something that you can do? Can you accept the person you are RIGHT NOW? As a woman I know how difficult it is to look in the mirror and like what you see. When I look in the mirror I see a woman who's body is definitely NOT what I want it to look like. I look tired, my stomach is not as tight as it used to be (Thank the children for some of that), things do sag and bulge out. No gray hairs yet but the kids aren't teenagers yet. My body has caused me physical pain.
         All that said, my body has done miraculous things for me the last 34 years of my life. It has protected me from illness, recovered from surgeries, bore three children and nourished their bodies. It accepts hugs and kisses, it allows me to run and play with them as well as hold my sweethearts hand as well as look into his eyes. Am I doing all that I can to keep this blessing healthy? First of all, I believe that everyone is beautiful flaws and all..even me. Second, I believe, that no amount of hair color, makeup or botox and while we are at it no fad diet is going to change your outlook on yourself. Stop telling yourself that if you lose 30 pounds or the last ten stubborn pounds, if you could change your hair, if you could whiten your teeth..if, if, if.... only then will you love yourself. I hate to break it to you, if you are not happy with yourself right now, it is not going to matter if you look like a svelte super model,that has the perfect body, perfect hair and the whitest teeth you have ever seen... you still will find flaws... maybe even more.
         If you want to find true contentment with yourself, if you want to finally rid yourself of all that negative mumbo jumbo...take a step back and look at your body. The whole picture. Realize just how much that your body has done, continues to and will do for you in the future. You may not look like you did when you were a teenager, you may wish that it would be different somehow, some way. But, until you accept your body, sags, bags, wrinkles...beautiful smile, shimmering eyes, loving hands and all...you will never be able to truly LOVE yourself! You deserve that because you ARE BEAUTIFUL JUST THE WAY YOU ARE!

"Remove those “I want you to like me” stickers from your forehead and, instead, place them where they truly will do the most good - on your mirror!" - Susan Jeffers

Raspberry Chocolate Truffle Pie

             I cannot help but think that you could use whatever crust you have on hand. An Oreo crust would be divine. NOTE: If you would like to susbtitute something else for the amaretto you could use 1/4 -1/2 tsp.almond extract but go light because it is very powerful. You can substitute the raspberry liquour for some raspberry syrup as well. YUMMY!


Raspberry Chocolate Truffle Pie
1 pie crust prepared 
1 teaspoon flour
4 c. frzn raspberries without syrup, thawed
3/4 c. sugar
1/4 teaspoon cream of tartar
1/2 c. sweetened condensed lowfat milk (not evaporated)
2/3 c. whipping cream
5 ounce (5 sq.) semi-sweet chocolate, melted
4 ounce (4 sq.) unsweetened chocolate, melted
2 egg yolks
2 T raspberry - flavored liqueur
2 T amaretto
1 1/3 c. whipping cream
2 T powdered sugar
1/2 teaspoon vanilla
Chocolate curls, if you like
Whole raspberries, if you like
        Heat oven to 450 degrees. Prepare pie crust according to package directions for unfilled 1 crust pie using 9 inch pie pan. (Chill remaining crust for later use.) bake at 450 degrees for 9-11 min or possibly till light golden. Cool completely.To prepare sauce, press 4 cups raspberries through strainer to make 1 cup puree. Throw away seeds. In small saucepan, put together sugar and cream of tartar; blend well. Stir in puree; mix well. Over medium heat, bring mix to a boil. Boil 3 min, stirring constantly. Cover; chill.   
         In medium heavy saucepan, put together condensed lowfat milk and 2/3 cup whipping cream; blend well. Over medium heat, bring mix to a boil. Remove from heat; cool 5 min. In food processor bowl with metal blade, put together lowfat milk mix and melted chocolate; process 5-10 seconds. Add in egg yolks, process 5 seconds. Add in raspberry flavored liqueur and amaretto; process 5 seconds. Pour blended mix into large bowl; set over ice. Stir for 5-7 min or possibly till mix is cool. Beat mix on highest speed for 2 to 3 min or possibly till soft peaks form. Pour into cooled, baked crust. Chill about 1 hour or possibly until.
         In small bowl, beat 1 1/3 cups whipping cream till soft peaks form. Add in powdered sugar and vanilla; beat till stiff peaks form. Spread over cooled filling. Garnish with chocolate curls and whole raspberries. Chill till serving time. Remove from refrigerator 1 hour before serving. Serve with raspberry sauce. Store in refrigerator. 10-12 servings.
Saturday, April 16, 2011

Firehall Steak Marinade

         As grilling season approaches..I thought I would throw in a marinade. We made this last night and Mike loved it. It came from Tasty Kitchen. I added some red pepper flakes to the marinade as well but, trust me this one is a keeper. Happy Grilling!

Firehall Steak Marinade
½ cups Olive Oil
¼ cups Brown Sugar
4 cloves Garlic, Peeled And Halved
3 Tablespoons Balsamic Vinegar
3 teaspoons Montreal Steak Spice
1 teaspoon Dried Mustard
1 teaspoon Fresh Ginger, Grated
½ cups Teriyaki Sauce (I Use Kikkoman)
4 whole Steaks (strip Loins, Flank Or Other)
      Combine ingredients in a large Ziploc bag (don’t be like me—make sure there are no holes in the bag!), close bag and squeeze to mix the ingredients. Add 4 medium striploin steaks (or your choice of beef steak) to the bag and seal. Place in the refrigerator for 1 hour or even overnight to marinate and then grill the steaks as you normally would. Steaks can be frozen in the marinade as well, just defrost them in the refrigerator and grill. Recipe can also be doubled to increase the amount of marinade. Enjoy! This also works great on chicken and pork!
Thursday, April 14, 2011

Peanut Butter Cup Cheesecake

              I absolutely love cheesecake. No matter what the flavor...If it is a well made cheesecake I am in heaven. This one is a little different than others I have come across...Doesn't it look sinful? I got the recipe from "The Slotted Spoon". Enjoy!

 peanutbuttercupcheesecake

Peanut Butter Cup Cheesecake
Crust
-6 oreo cookies
-20 graham cracker squares
-1/8 c. dry roasted peanuts
-2 Tbsp of coca powder
-1 Tbsp granulated sugar
-8 Tbsp. butter, melted
-1/2 c. creamy peanut butter
In a food processor combine cookies, crackers, peanuts, cocoa powder, and sugar. Process until fine.
Add melted butter and stir with a fork until well combined. Press into the bottom of a 9″ spring form pan.Bake at 350 for 10-12 minutes.Remove crust from the oven and cool for 5 minutes.Warm the peanut butter in the microwave until very spreadable (about 30 sec).Spread softened peanut butter over the crust, within 1″ of the edges.
Filling*All ingredients should be at room temperature *
- 1 Tbsp melted butter
-20 oz. (2 1/2 packages) cream cheese
-1/2 cup sour cream
-1/2 cup sugar
-3/4 cup peanut butter (crunchy or creamy, depending on preference)
-1 egg
-1 egg yolk
-1/3 cup half and half.
-1 tsp. vanilla
        Double wrap the bottom and sides spring form pan tightly in aluminum foil and prepare a water bath.Using a pastry brush, coat the sides of your pan with melted butter. (This will help prevent cracking as the cheese cake settles) Combine cream cheese, sour cream, sugar, and peanut butter until creamy.Add remaining ingredients just until combined, scrape sides of the bowl as needed, and do not over beat.
Set aside 3/4 cup of the filling, and pour the remaining over the prepared crust.
-6 coarsely chopped reses peanut butter cups
-1/2 cup hot fudge (ice cream topping)
      Sprinkle the top of the cheesecake with the chopped peanut butter cups.In a small bowl warm hot fudge in the microwave until easily stirred (about 3o sec). Add reserved cheesecake filling. Stir. Layer the fudge filling over the peanut butter cups. With a knife, carefully marble the fudge layer into the cheesecake just a bit. Bake cheesecake in the water bath at 350 for 15 minutes. Reduce the temperature to 250 and bake an additional hour.Turn off the oven and leave the cheesecake in for one more hour. Resist the temptation to open the oven door. Keep it closed.Remove from oven and from water bath and place on a cooling rack.
Topping
2/3 cup chocolate chips
1/4 cup sour cream
Combine ingredients in a saucepan and stir constantly until chocolate is melted.Pour over the prepared cheesecake.Refrigerate until set and ready to serve.Garnish with additional chopped peanut butter cups if desired.
Wednesday, April 13, 2011

Tasty Sloppy Joes

           This is supper at our house tonight! Not too sweet..and just about right with the heat (at least with tht kids) You could of course add more if you want. Or use some ground turkey instead of beef. Got this recipe from Tasty Kitchens. When you can make it fresh and this easily...why just open a can?


Tasty Sloppy Joes
1 pound Ground Beef
¼ cups Green Pepper
½ cups Chopped Onion
1 can 8 Oz. Tomato Sauce
¼ cups Ketchup
1 Tablespoon Apple Cider Vinegar
1 Tablespoon Sugar
1-½ teaspoon Worcestershire Sauce
1 teaspoon Salt
        Brown onion and ground beef. Add remaining ingredients and simmer 25-30 min. I like to serve these open faced on buttered toasted buns.  Top with some shredded cheese of your choice and pop under broiler just to melt the cheese. Enjoy!


Tuesday, April 12, 2011

Lemon Bundt Cake

            The moment I am getting ready to post this I have gotten over 6000 views on my blog. Thank you! Hopefully you are finding some recipe you would like to try, as well as getting a glimpse into my sometimes crazy but always blessed life!  Whatever the reason for your visit...please keep coming! Much like my home guests are always welcome. Y'all come back now..ya hear?!


Meyer Lemon Bundt Cake
3 cups all purpose flour
1 tsp baking powder
1/2 tsp baking soda
1/2 tsp salt
3/4 cup butter, room temperature
1 1/2 cups sugar
3 large eggs
2 tbsp Meyer lemon zest
1/2 cup Meyer lemon juice
1/2 cup buttermilk
2 tbsp Meyer lemon juice
1 cup confectioners sugar
         Preheat oven to 350F. Grease and flour a 10 or 12 cup bundt pan.In a medium bowl, whisk together flour, baking powder, baking soda and salt.In a large bowl, cream together butter and sugar until fluffy. Beat in eggs, one at a time, followed by lemon zest. Stir 1/3 of the flour mixture into the butter mixture, followed by the Meyer lemon juice. Add in additional 1/3 of the flour mixture, followed by the buttermilk. Stir in all remaining flour, mixing only until no streaks of flour remain visible. Pour into prepared pan.Bake for 40-45 minutes, until a toothpick inserted into the center of the cake comes out clean or with only a few moist crumbs attached. Let cake rest in pan for 15 minutes, then turn out on to a wire rack to cool completely.

      For the glaze, whisk together lemon juice and confectioners’ sugar in a small bowl. Drizzle over cooled cake. Serves 12-14
Monday, April 11, 2011

Salted Chocoate and Pecan Cake Bars

            Alright, when I saw these little morsels on Tasty Kitchens, I had to re-post. It was submitted by a blogger that has a blog called, "Eat Live Run". The picture is hers as well. Notice something different about his recipe? No butter! Shhhh...that means there are less than seven grams of fat in them! Yep, and they taste heavenly! If you love sweet/salty things...these are a MUST try! Serve up with some Vanilla Ice Cream. YUM!

Tasty Kitchen Blog Salted Chocolate Chip Pecan Bars

Salted Chocolate and Pecan Cake Bars
1 cup Flour
½ teaspoons Baking Powder
1 teaspoon Sea Salt
4 whole Eggs
2 teaspoons Vanilla Extract
2 cups Light Brown Sugar
1-½ cup Semi-Sweet Chocolate Chips
1 cup Crushed Pecans
        Preheat oven to 350ºF. Lightly grease an 8-inch square baking pan with cooking spray. In a small bowl, mix flour, baking powder and salt. Set aside. In a larger bowl, mix eggs, vanilla and brown sugar until lumps are gone. Mix flour and sugar/egg mixture together. Stir in chocolate chips and pecans.Pour batter into the greased 8-inch pan. Bake at 350ºF for 25–30 minutes until cake is soft. Sprinkle with powdered sugar and extra sea salt and enjoy!
Saturday, April 9, 2011

Oatmeal Crispie Cookies~Quite possibly the perfect cookie!

            I have a confession to make. As descent of a cook, I am, I cannot for the life of me bake cookies that are made with butter.  I have tried and tried. I have followed all of my friends "hints" of chilling the dough, baking at a lower temp. The end result is always the same. Thin as paper, flat cookies. Oh they taste good. They have that buttery taste that you crave but they just look atrocious. I have resulted in adjusting the recipe and using half butter and half shortening. Which results in a puffier cookie. So there you have it. I have not been able to master a cookie made with butter. Am I the only one? Any hints? Feel free to comment.
           These cookies are SO good. They are from Ree Drummond. The picture is hers as well. My friend Kristine made some and shared them with me. They are not your typical oatmeal cookie. These are a must try! These are perfect the way they are but you could easily add a little nutmeg or cinnamon. Maybe chocolate chips or white chocolate chips. Maybe even a few cups of coconut. How about some dried cranberries. You could of course use a different type of nut. I love Pecans so that is something I wouldn't omit. The combination possibilites are overwhelming. If you love butter flavor you could add half butter and half shortening. Any way you make them they will be delish!


Oatmeal Crispies
1 cup Shortening (Crisco)
1 cup Packed Brown Sugar
1 cup Sugar
2 whole Eggs
1 teaspoon Vanilla
1-½ cup All-purpose Flour
1 teaspoon Salt
1 teaspoon Baking Soda
3 cups Quick Oats
½ cups Finely Chopped Pecans
      In a large mixing bowl, cream shortening with both sugars until well combined.
In a separate bowl, beat eggs together. Add vanilla and stir to combine. Add to the shortening/sugar mixture and mix well.
In a separate bowl combine the flour, salt and baking soda. Mix carefully into the egg/shortening mixture until well combined. Now add the quick oats and mix well again. Finally add the finely chopped pecans and mix well to combine.
     Divide the dough in half and place each half of the dough onto a sheet of waxed paper. Roll the dough into a log and then wrap it tightly in the waxed paper. Now you can either chill or freeze the dough until later or you can go ahead and slice the dough evenly into cookie rounds.
When you are ready to bake them place them on a cookie sheet and bake at 350 degrees for 10 minutes until they are golden brown.

Standing Knee Deep In A River And Dying of Thirst


Standing Knee Deep In A River
Friends I could count on
I could count on one hand
With a left over finger or two.
I took them for granted,
Let them all slip away,
Now where they are I wish I knew.

They roll by just like water
And I guess we never learn,
Go through life parched and empty
Standing knee deep in a river,
And dying of thirst.

Sometimes I remember
The good people I’ve known,
Some I’ve forgotten I suppose.
One or two still linger,
Oh, I wonder now
Why I ever let them go.

They roll by just like water
And I guess we never learn,
Go through life parched and empty
Standing knee deep in a river,
And dying of thirst.

So the side walk is crowded
The city goes by,
I just rushed through another day
And a world full of strangers
Turn their eyes to me,
But I just look the other way.

They roll by just like water
And I guess we never learn,
Go through life parched and empty
Standing knee deep in a river,
And dying of thirst.

Go through life parched and empty,
Standing knee deep in a river
Dying of thirst...

          The first time I heard this song, I was young and I knew that I liked it but, I don't think at that time I knew what it meant. Fast forward a few years and Mike and I were married. I was reading a book called, Simple Abundance. Which, by the way, I highly recommend. One of her entries was about his song. It re-sparked my interest in finding this song. Have you ever read or listened to the lyrics? Have you ever stood knee deep in a river and been dying of thirst? How many times do we find ourselves wishing that we had more of whatever it is we want? Whether it is love, money, kids, belongings, friends..whatever the case may be and not realize that we are standing in the midst of blessings that are just slipping through our fingers?
         Think about it. In later elementary years we can't wait to get to junior high, then to high school, drivers license, graduate, college and or marriage and family. I should have just enjoyed the moment I was in. I spent a lot of my life, wishing it away. How many things did I let slip through my fingers? I spent the first seven years of our marriage wondering WHY I couldn't get pregnant and why other people that either couldn't take care of their kids or could care less about them could get pregnant so easily. Looking back now, I wish would have enjoyed Mike and I being a couple more. When I did finally get pregnant, I didn't take one moment for granted. I treasured every moment of every pregnancy. Even the pregnancies that I was sick the entire none months. However, once they were born I found myself saying, I can't wait until...they are weaned, are walking, are talking, are going to school...you name it. But, it has flown by so fast already, before I know it I will be wishing that I would have spent more time with them when they were little. Time is passing and I will never be able to get these moments back.
           Time keeps going whether we want it to or not. I have loved ones that have died early in their lives. Far before I was ready for them to go. Did they know how much they were loved while they were here? Or how much they would be missed? I took for granted that they would be around much longer than they actually were. I have a brother that has lost his freedom for years to come. His life will never be the same when he gets out. How many things, does he wish he would have done differently, other than the obvious? I know I wish things could have been a lot different with all of them. Does he realize now how much he is loved? I wish it wouldn't have taken this to show him.
            How many of us are standing in the midst of blessings in our life and are not content? I challenge you to write down or at least name five thing every night that you are grateful for. I promise you, that you have more in your life to be grateful for than you think. NEVER let a day pass you by without telling those that you love, how much they mean to you. It may be your last opportunity. Don't stand knee deep in a river....an be dying of thirst my friends. Time doesn't stop for any of us..until it is too late!

Friday, April 8, 2011

Spicy Southern Fried Chicken

           Hoping that chickens all over the world will not flag this recipe.... I have adapted this recipe from country living. I swear by marinating any chicken that you are frying or baking in buttermilk. The flavor and texture is something that just can't be matched. If you don't prefer bone-in chicken you could of course in MY opinion, do boneless chicken breasts. Give this one a try and if the weather where you are, is better than the weather here, maybe consider having a picnic. Enjoy!

Picture of Neely Family Spicy Fried Chicken Recipe

Spicy Southern Fried Chicken
2 cup(s) buttermilk
1 tablespoon(s) Dijon mustard
1 teaspoon(s) salt
1 teaspoon(s) dry mustard
1 teaspoon(s) cayenne pepper
1 teaspoon(s) cracked black pepper
1-2 Tbs. of your favorite hot sauce
Fried Chicken:
1 (3 1/2-pound) chicken, cut into 8 pieces
2 cup(s) all-purpose flour
1 tablespoon(s) baking powder
1 tablespoon(s) garlic powder
1/2 teaspoon(s) salt
1 teaspoon paprika
5 cup(s) vegetable shortening

Directions
      Buttermilk Marinade: In a gallon-sized sealable plastic bag or a large bowl with a tight-fitting lid, combine the buttermilk, mustard, salt, dry mustard, cayenne, hot sauce and black pepper. Add the chicken pieces and turn to coat. Seal and refrigerate for at least 2 hours or overnight.
       Frying the chicken: Preheat oven to 150 degrees F. In a 13-inch by 9-inch by 2-inch pan, whisk together flour, baking powder, dry garlic, and salt. Add chicken pieces and turn to coat thickly. Let the chicken stand 10 minutes, turning occasionally to recoat with flour. Shake off excess flour before frying. In a 10-inch by 12-inch heavy-gauge skillet with a deep-fry thermometer attached, heat the vegetable shortening over medium-high heat, bringing it to 375 degrees F. In batches of four, fry the chicken pieces, turning once when the coating is sealed and begins to brown -- 3 to 4 minutes. Reduce the heat to medium to lower the temperature to 325 degrees F. Maintain temperature and continue to fry, turning the pieces halfway through cooking time until chicken is golden brown and cooked through -- about 20 more minutes.Transfer to a wire rack on a baking sheet and place in oven to keep warm. Repeat the procedure for the remaining batches. Serve warm or at room temperature.
Thursday, April 7, 2011

The Reason That High Fences Make Great Neighbors

             "If you want to annoy your neighbors, tell the truth about them.” – Pietro Aretino
          

           Why is it so difficult to get along with the neighbors? Am I the only one that could just move far away from civilization just to get peace and quiet? I mean surely it is not too much to ask to watch you OWN children? Or not to start doing yard work as soon as the sun sets? Not kidding..Wish I was! It seems like we are surrounded by idiots. When we moved in we absolutely LOVED all of the neighbors. Now? Not so much! Just because you care I will give you the run down on some of the stranger ones. Just don't hold it against me!
              To the south this house has been a magnet for people that just DO NOT care about their children's whereabouts. There have been many neighbors in this house and just when we think it cannot get worse...some other peach moves into the house. Look, I am not opposed to letting you children play but it seems to me that a 4 year old and about a 2 year old just isn't old enough to be playing in the road. I am not joking when I say there are AT LEAST 15 yes, FIFTEEN children in that home and about 5 or 6 adults and yet not one person over the age of 18 can keep watch on the children. When my kids are out in my yard I have to watch and listen because the children throw around words that would make a sailor blush. Don't even get me started on the yard. ugghh!
            To the east of me, which is right across form my front door we have a single most of the time, kind of girl. She seems to have either OCD or partakes of illegal substances that mess with her brain. Her yard looks FANTASTIC. That I am not complaining about. She has had many a renters in her basement and quite a few gentleman callers. All seem to be as neurotic as she. EVERY night in the spring, summer, fall and sometimes in the winter she is out with her gas powered leaf blower...blowing around...NOTHING! She has her shop vac out, vacuuming out the leaves in between her hedges. She starts mowing her grass as soon as the sun goes down. She is in her "shop" ALL night long using some sort of power tool. The police have been there multiple times. The last real memorable one the had searchlights out looking for...something! Don't even get me started on her tree trimming experience. I should have video taped that one. A Who needs T.V.? And, let's not forget the beautiful statue that was carved into the leftover tree trunk. When I think of a classy statue, I know I think of groundskeeper willy from the Simpsons shaking his fist, holding a shovel. Once again. not kidding!
            It seems like the whole neighborhood is running one fry short of a happy meal. Riding loud obnoxious motorized scooters up and down the road ALL day and night. Revving an off road dirt bike just to laugh and high five each other. Fighting with your spouse while the kids are crying. Adult Parole and Probation knocking on their door at 2 am. YES!
              Look, I would love nothing more than to get along with my neighbors but I frankly just don't see that happening anytime soon. Given the economy we will not be moving anytime soon.I guess I will just have to get Mike to start building fort walls and get that watch tower put up. Do you think barbed wire would seem unwelcoming?

Perfect Homemade Lemonade

           My husband makes lemonade but does not make a simple syrup. I guess his is old fashioned style. Just remember the equation...1 cup sugar, 1 cup water, 1 cup juice. If you would like to make this a strawberry lemonade or raspberry lemonade just lightly mash up some berries and toss in. I make a frozen lemonade that is similar of course you just add the syrup and juice in the blender..fill it with ice then add water to the top.... What could be more refreshing on a warm day? Come on warmer weather...we are waiting for you.


Perfect Homemade Lemonade
1 cup sugar (can reduce to 3/4 cup if you prefer it a little more tart or using Meyer Lemons)
1 cup water (for simple syrup)
1 cup fresh squeezed lemon juice
3 to 4 cups cold water (to dilute)
          Make simple syrup by heating the sugar and water in a small saucepan until the sugar is dissolved completely.  While the sugar is dissolving, use a juicer to extract the juice from 4 to 6 lemons, enough for one cup of juice.Add the juice and the sugar water to a pitcher. Add 3 to 4 cups of cold water, more or less to the desired strength. Refrigerate 30 to 40 minutes. If the lemonade is a little sweet for your taste, add a little more straight lemon juice to it.
Serve with ice, sliced lemons
Wednesday, April 6, 2011

Salted Caramel Cupcakes

           Now I am a fool for salted caramel and add a cupcake to it...yummy! You could make your own salted caramel, I have an easy recipe on my blog but this is a no fuss no muss recipe. Best of all, it all begins with a mix. I found it at Joys Hope. This one is a must try!


Salted Caramel Cupcakes
One box chocolate cake mix and ingredients to make it (My fave is German Chocolate.)
Sea salt
4-5 Skor  or Heath bars
Caramel ice cream topping
Vanilla Bean Buttercream (Recipe below)
Squeeze bottle
       Bake your cupcakes according to package directions.When the cupcakes are almost done you will make the salty caramel goodness. Pour caramel into a measuring cup. Add 1/2 teaspoon of sea salt per 8oz. of caramel.Warm in the microwave for one minute.Stir.Pour the now warm and salted caramel in to a squeeze bottle. As soon as the cupcakes come out of the oven, inject caramel into each one.Then move them on to a cooling rack. After the cupcakes are cooled, frost them with the buttercream happiness, roll them into the Skor/Heath bar happiness, then drizzle the salted caramel happiness on top.

Vanilla Bean Butter Cream
1 stick unsalted butter (room temp, but not too soft):
1 lb. powdered sugar :
1 1/2 tsp. vanilla extract :
3 T whole milk :
pinch of salt
    Cream butter, sugar; add milk, vanilla, & salt. mix until thick and creamy.
Tuesday, April 5, 2011

Self forgiveness~ One of the most difficult but most necessary things you need to learn!


Forgiveness Begins With Forgiving Yourself

      
        The kindest and most compassionate thing you can do for yourself and others is to forgive yourself.We are often told that we should forgive others, the old saying “forgive and forget” is thrown around constantly, so you make an effort to forgive those who you feel have wronged you in some way and you find it almost impossible to do.

      Why is that? It is possibly because you have not yet learned how to forgive yourself.


     In terms of self-help a better saying to use would be “charity begins at home” or in this case charity begins with self. You cannot freely give to the world that which you do not give to yourself. Just as you cannot truly love someone without first loving yourself, you cannot forgive someone without forgiving yourself. When you learn to forgive yourself then and only then will you be able to forgive others. Paradoxically though, when you learn to forgive yourself you will in turn find that you have nothing to forgive others for.
         When you forgive yourself you let go of a part of yourself, the part that wants to keep you trapped inside a circle of blame, shame, guilt and fear. This part of you, which essentially is part of your ego, does not want you to be free of it because ego does not want to relinquish control. Free yourself from this viscous pattern of behavior for it has the ability to murder your spirit.
       It is possible to spend your entire life blaming yourself for this and that, feeling guilty because you did this or that and living in fear of the consequences of this and that. This way of living has you immobilized because you are dwelling in the past (the guilt and blame for what has been) and you cannot enjoy your future (for fear of the consequences of what has been).

        There is only on solution, you must give yourself the ultimate gift, the gift of forgiveness.


        Self forgiveness is not difficult to master, you only need to simply spend some time thinking over things that you feel badly about, things that you may have said or done to yourself or to others, thank your higher self for allowing you to see that you are in fact imperfect and there will be times when you mess up.
       Apologize to yourself and let it go. Practice this often, whenever you find yourself beating up on yourself about something you did or did not do, accept that the deed is done and it cannot be undone, forgive yourself and move on to find a solution if necessary, if it something that another action cannot rectify then you must let it go, for it is in fact in the past already and remind yourself that no one can change the past.
        This is not meant to relinquish you from responsibility, it in fact making you more responsible, but in a more positive and focused way. Often responsibility is seen as something negative, something to be endured, but being responsible can also be remarkably freeing and in terms of forgiveness if you take responsibility for forgiving yourself you will learn what it is to live without the burden on guilt, blame, fear and shame.


         When you have mastered the loving act of forgiving yourself, your heart will then be open to forgiving others. This is part of a natural progression on your journey to enlightenment, to forgive others means to take away yet a bit more control from ego and allow your higher self the possession of your thoughts and actions that it deserves.  Forgiving others shows you have the ability to open up and let love flow through you.
It shows that you no longer bear grudges and carry hatred in your heart, you will recognize the connection that you have to every other soul in the universe, you will not feel separate and alone, you will no longer allow the actions of others to instill bitterness within you and because you are radiating love despite what is happening around you, in turn love is what you will receive, thus eliminating the need to forgive.


     The law of attraction states that you receive that which you send out, so if you project only forgiveness and love, you will only attract others that do the same and so ultimately you will not encounter behavior that warrants your forgiveness. But all of this cannot be until you learn first to forgive yourself.
               ~About the Author~Carol King is the author of Inspired Journey

         While looking for a poem about self forgiveness, which by the way proved surprisingly difficult, I came across this excerpt. The author states it so simply and so beautifully. Why is it so difficult to forgive ourselves? Why do we hold ourselves accountable for a mistake that was made that we have made right to the people we have hurt or wronged and then lie in our bed at night and beat ourselves up?
           Learning to forgive ourselves is a beautiful thing. It takes a weight off of our shoulders and gives us the ability to breath easier. The fact of the matter is we are harder on ourselves than others. It is time to forgive yourself! It is time to hold your head high, look at yourself in the mirror and be proud of the person you are. The mistakes you've made and the bumpy roads you have travelled down have made you who you are today. Only you can make the changes necessary for you to progress. Come out of the darkness. Make a commitment to not hold yourself back any longer. You deserve so much more! YOU deserve to be happy!

Blog Archive

Followers