Search This Blog

Monday, May 30, 2011

Grilled Sweet Corn

          In the hot summer months, we all want to enjoy hot corn on the cob but who wants to heat up a kitchen with boiling water? Instead, Mike and I like to grill it. It seals in the flavor and it tastes SO good. You can eat the corn with your basic toppings or you can make some herb butter to go with it. Either way, try this for your next bar-b-que!

Grilled Sweet Corn
Corn on the cob
Heavy Duty Aluminum Foil
Desired Toppings
     Pull back the husks of corn but leave them attached. Remove the silk and fold the husks back up onto the corn. Soak in cold water for about 1 hour to get the husks nice and wet. Wrap tightly in foil and place on grill for about 20 minutes, turning occasioanlly. The soaked husks and foil allow the corn to steam and seal in all the flavor. (You could also add a little butter to the cobs before grilling)
You will not get the charred grill marks from cooking on the grill unless you remove from foil and grill that way  but in my opinion it really dreis out the corn.
This is just one of the MANY different herbed butter recipes I have found. I would recommend making while corn is soaking:

Herbed Butter
1/4 cup butter
1 teaspoon fresh lemon juice
2 tablespoons fresh chopped parsley
1 tablespoon fresh chopped chives
salt and freshly grounded black pepper to taste
      In a mixing bowl, beat butter, lemon juice, parsley, chives, salt and pepper until softened and well blended. Next place butter on wax paper and shape into a 1 inch wide cylinder roll, wrap tightly and chill in freezer until firm.Once herbed butter is firm, slice and arrange pats in a single layer on a plate and place into refrigerator until needed.

THE BEST Homemade Chocolate Frosting!

           Here it is girls. The chocolate frosting I have been raving about. This is the smoothest, tastiest chocolate frosting I have ever made. I have tried quite a few before but just can't seem to get the frosting that I want. So easy and so delicious. It is chocolatey without being over powering. It does't have a powdered sugar flavor either. Honestly, give this a try. I had to add a little more milk to get the consistency I needed for a cake but other than that..PERFECT! It came from Tasty Kitchens as did the picture. Thank you Laurie at Simply Scratch!


Homemade Chocolate Frosting
3 cupsPowdered Sugar
¾ cupsUnsweetened Cocoa Powder
1 stickButter, Softened
¼ teaspoonsPure Vanilla Extract
¼ cupsWhole Milk
       Sift together the powdered sugar and cocoa powder, set aside (I didn't sift these, I just whisked them together). Cream butter and vanilla, then add 1 cup of the cocoa/sugar mixture to the creamed butter and then add a tablespoon of milk. Mix and repeat this step until all of the cocoa and sugar mixture is combined (adding a tablespoon of milk after every cup of the mixture) until you reach your desired frosting consistency.
* Use more whole milk if you would prefer the frosting thinner. Frosts 1 9×13 cake or brownies!
Sunday, May 29, 2011

Caramel Chocolate Chip Cookie Ice Cream Sandwiches

            Alright, I watched my fave show yesterday, Dessert First with Anne Thornton. As you all well know, she is my most fave person ever and I may have an unhealthy obsession with her show. Not that I am a stalker, unhealthy because I may gain 100 pounds if I keep watching it! Yesterday, she had a basic cookie dough recipe and created three different recipes from the basic dough. This one looked like a Memorial Day recipe. Well, if it is warm where you are, that is. Cold and rain here. If you want to make the basic cookie recipe without making ice cream sandwiches, double the cookie recipe and omit the caramel if you would like. Either way you bake it....yummmy!

Picture of Caramel Chocolate Chip Cookie Ice Cream Sandwiches Recipe

Caramel Chocolate Chip Cookie Ice Cream Sandwiches
Heaping 1 1/8 cup all-purpose flour
Heaping 1/2 teaspoon baking soda
Pinch fine sea salt
1 stick butter, softened
1/4 cup granulated sugar
1/2 cup packed brown sugar
1 large egg
1 teaspoon pure vanilla extract
1 1/2 cups semisweet chocolate chips
1/2 cup chopped caramel candies
1 quart premium vanilla ice cream ( you could use another flavor if you would like)
1 1/2 cups chopped pretzels, nuts, sprinkles or whatever else you have on hand but try the pretzels on at least one
        Preheat the oven to 325 degrees F. Line baking sheets with parchment.In a large bowl, whisk together the flour, baking soda and salt. Cream the butter in the bowl of a stand mixer until it gets lighter in color. (You could also beat the butter by hand.) Slowly add in the sugars and keep beating until the mixture is light and fluffy. Add your egg and mix until fully incorporated. Stir in the vanilla. Add the flour mixture using the low speed, then mix in the chocolate chips and caramel candies.
       Drop the dough onto your baking sheets using a 1 1/2-inch (1/2-ounce) ice cream scoop. Space the cookies about 2 inches apart. Press down on the dough balls to flatten them to about 3 inches around. Pop in the oven and bake until golden brown, 15 to 17 minutes. Cool on the baking sheets for a couple of minutes, and then let cool completely on wire racks.
         Now to make the ice cream sandwiches. Line baking sheets with foil. Use a 2 1/2-inch ice cream scoop to drop the ice cream onto the flat half of half your cookies. Cover the ice cream with the remaining cookies. Get the ice cream oozed out to the edges of the cookies by pressing them together gently. Roll the sides of the ice cream sandwiches in the crushed pretzels, making sure the pretzels stick. Place on the prepared baking sheets lined and freeze until ready to serve, at least a half hour.

***The picture is courtesy of Food Network
Saturday, May 28, 2011

Refreshing Apricot Smoothie

        I am not sure why blogger is centering all of my posts but in the edit mode it doesn't look like this...so bear with me! In my bountiful basket this week we got quite a bit of staples. One of the items in there were apricots. A few facts about these little gems. The website www.apricotproducers.com states that:
      
 *Fresh California apricots are generally available May through early July.
 *To select the best fresh apricots, look for plump, fairly firm fruit with an orange-yellow to orange color. Avoid green apricots which will not ripen.
 *Convenient and versatile, canned apricots are a quick and healthy addition to cottage cheese, ice cream, desserts, salads and smoothies.
 *Apricots can be used in many recipes that call for peaches or nectarines such as tarts, cobblers, cakes or chutneys.
 *Canned apricots can be puréed in a blender to be used as a fat substitute in recipes calling for oil.
 *Nutritious California dried apricots are characteristically dried in halves, are dark orange in color and have an intensely sweet and tart flavor.
  *The kernels of an apricot pit are used in confections and to flavor liqueurs. Like bitter almonds, apricot kernels are poisonous until roasted.
   * An excellent source of beta-carotene (Vitamin A), California apricots also provide Vitamin C, iron, potassium, and fiber among other nutrients.
   *Just three fresh apricots provide an impressive 30 percent of the recommended daily amount for beta-carotene.
  *The beta-carotene found in apricots is believed to play a critical role in fighting disease.
 *Because beta-carotene turns to Vitamin A in the body, it is often referred to as Vitamin A on food labels.
  *To retain the highest quality and nutrient levels, apricots are selected for canning at the peak of ripeness and are processed within hours of picking.
  *Canned apricots are nutritionally comparable to their fresh and frozen counterparts.
  *Sweet canned apricots are a convenient way to add important vitamins and extra flavor to a healthy diet.
        
           So in honor of this little beauty I have included this recipe. But the website has a bunch more. Have a great holiday weekend. Of course you could throw in a banana if you would like. Yum!


Refreshing California Apricot Smoothie
1 (15 1/4oz.) can California apricot halves, chilled
1 cup (8 oz.) plain or vanilla yogurt
2-3 drops vanilla extract, to taste
6-8 ice cubes
Servings: 2 (12 oz. each)
           Combine ingredients in blender. Cover and blend on high until smooth. Add more ice cubes for a thicker consistency.
Friday, May 27, 2011

Crying...who needs it?

   Little Boys And Girls Who Were Not Allowed To Cry
Susan Aldred Lungton
Their mothers and fathers were too damaged to hear.
Their mothers and fat
hers were too busy to hear.
Their mothers and fathers were too depressed to hear.
Their little boys and girls were not allowed to cry,
They lay in their beds just wanting to die

Many years later and they are grown adults now.
Many years later and they are patients now
Many years later and they remember now.
Those little boys and girls are now allowed to cry,
they lie in their beds not wanting to die.

            While looking for a poem for the topic of my blog today, I couldn't really find a poem to express about what I wanted to write about. I stumbled on this one and although it seems dramatic it does tie in, I promise. I am not a person who cries. I hate it. It makes me feel weak. I was always told when I was younger whether it be in action or verbally to "SUCK IT UP". I have blogged many times about my childhood and the relationships that helped form me. But, I am going to write this one from MY perspective and hopefully it will end up where I want it to..happy.
             Have you ever met a person or maybe you are a person that can cry at the drop of a hat? My mother was that way. Coincidentally, it made me so that I HATE crying. I have always, always, always struggled with self image. I have always been self conscious. From the time I was little I have felt like I am not good enough. Some of that stems from a biological father that couldn't care whether I was alive or dead. (Of course this is by my perspective, I may be totally wrong and he loves me so much that he has never sought me out or even introduced himself to me, but I highly doubt it). Even back then, I couldn't let myself cry about that. Now consciously, I know that I am better off without people like that, but to a child, it makes you feel like crap. I felt like there must be something wrong with me if my own father doesn't like me. Unfortunately, it has carried over into my life today. I never feel worthy of my husbands love, or of love from friends or family. When playing that game, in one word describe yourself, I will say, funny, sarcastic, caring etc. but inside I am thinking , forgettable, unworthy, un-beautiful (is that one word?) As a resuIt, I feel as if I need to keep over achieving or they will leave. In turn, I wind up feeling over whelmed with life. 
           Being a girl that was taught to stuff her feelings, my poor husband has had to live with a woman for the last 16 years that shuns a lot of affection from him. I can't imagine what it must be like for him. I love him with all of my soul and yet I can't seem ot show him any affection. SOmetimes I wonder how he has stayed with me all this time. I struggle in showing my kids, family and friends how much I love them. I am unfortunately, starting the cycle for my children, that I hated when I was younger. I never let them see me cry. I have only let my husband see me cry maybe 3 times the whole time we have been together. Does that mean I don't cry? No. I am a closet crier I suppose. I can only let myself feel vulnerable if I am by myself. I am not sure if that will ever change. There are days I feel like the tears are right at the surface and that I am going to start crying but I can stuff them right back in and people will never know that I am weak.
          However, I want to take this opportunity to say, I know that crying does NOT make you weak. It has tremendous healing powers. It gives you the strength sometimes to just carry on. I am not very open with feelings. Good or bad. I am going to take this opportunity to tell my friends how much you mean to me.So, for all the friends that I haven't allowed myself to tell you how much you mean to me I want to tell you how thankful I am for the friends that I have in my life right now as well as the ones I knew in the past. I am a firm believer that people come into your life at a particular time for a reason. Sometimes they leave or move on because it is time to move on.
            My now sister in law Melea. We grew up together. We laughed until we cried, we had fun, we enjoyed each others company. You and your family showed me stability. Something that I so longed for as a child. I always felt welcome (and still do). I am determined that we were meant to be together as sisters in this life. Thank you for the memories that we have made, thank you for the love, understanding and friendship you have so readily gave me over the years. If I haven't told you before, I love you my sister.
          Kristine, my best friend ever. I met you 5 years ago and I swear that we were sisters in another life. We are kindred spirits. You make me laugh until I cry. You have been with me through pregnancies and births as well as given me a shoulder to cry on when sorrow and death have come into my life. You are my one true friend. I have told you so many secrets that I have never told anyone. I truly love you my friend. I cannot imagine my life without you in it.
          I have met people through social networking that although we are not in the same town or region make me feel like I matter. Jennifer dear Jennifer. What a wonderful woman you are. You have taught me so much about life and being a mother. You are a fighter for children. You are honest, caring and loving. You tell people what you think and you don't sugar coat it. I admire you for that. You have made me laugh and cry and I love you for all of the support you have given me. Angelo, what a wonderful man you are. You are educated, well spoken as well as tender hearted and understanding. You are honest to a fault. You stand up for what you believe. You make me laugh, cry, think and all of those things that I was taught not to do. I thank you my friend for showing me that differences are what make the world a better place. I thank you for all of your kind words that you so freely share. Stacey, what a spitfire you are and I love you for it. You tell it like it is and stick to your guns. You are truly a beautiful woman inside and out. Thank you for giving me love and support as well as laughter. What a blessing you are to those around you. Lyzz, what a fantastic mother you are. You are truly an inspiration to me. The love you have for your children is remarkable. Thank you,for showing me how beautiful a mothers love for her children can be.  April, sweet April, what can I say about you? You are kind, loving, thoughtful a truly wonderful person. You have been through more in your life than I will ever know but you use your trials to better others and THAT is what this world needs. More people like you. More people to love, to heal and to support others.If we had more people like you imagine how different the world would be. In fact, you all share similar qualties and yet are so different. I am truly blessed to have friends in my life whether close to home or far away that make me feel like I matter.
             I have so many friends I would like to mention by name on here. They have came into my life at just the right times. I can't explain why they are here in the present but as time passes I look back and say to myself "That is why they were in my life at that time." I know you don't want to read each one of the reasons that I am thankful for everyone of my acquaintances. Just know that if you are in my life right now,you are important to me. You mean the world to me. I only hope that at some point in my life I can make you feel as supported, as safe, as loved as you have made me feel. MUAHHH! So whether it is tears of joy, or pain and sorrow, let it out. You will feel much better. For some, that is easier said than done.
          I doubt that this all tied into where I started but boy it felt good to purge my soul again! Have a great holiday weekend!


German Chocolate Cupcakes

          Tomorrow is my father in laws birthday. His fave cake is German Chocolate. So for our Sunday get together I am going to make him these beauties. This is the same cake recipe from Anne Thorntons show, Dessert First. She has just converted it to cupcake form and made the delicious topping from scratch. The advantage to these cupcakes...my hubby doesn't like the frosting/topping (which is my fave part) so I can just use the chocolate ganache on his and load mine with the good stuff. Thank you Anne Thronton! FYI The German Chocolate cake isn't actual from Germany. It was created for a man who's last name was German he was from England. Just a little tid bit of info. No worries there won't be a quiz after.

 
German Chocolate Cupcakes
1 Chocolate Cake recipe, recipe follows

Chocolate Glaze:
3/4 cup heavy cream
6 ounces bittersweet chocolate, chopped
2 tablespoons honey
1 tablespoon prepared coffee (opt.)

Topping:
3 egg yolks
12 ounces evaporated milk
1 1/4 cups packed dark brown sugar
1 1/4 sticks unsalted butter
1 teaspoon pure vanilla extract
1/2 teaspoon fine sea salt
2 cups packed sweetened flaked coconut, toasted (if desired)
1 3/4 cups toasted pecans, chopped

Special equipment: silver/foil-lined muffin cups, 1 (2-ounce) ice cream scoop and 1 (1/2-ounce) ice cream scoop (Not absolutely necessary but helpful)
      
      Cook's Note: Make sure all of your topping ingredients are at room temperature, except for the shredded coconut which you should keep in the refrigerator or freezer just until needed.
   Preheat the oven to 350 degrees F. Line 24 regular muffin pans with muffin cups.Use a 2-ounce ice cream scoop and portion out the Chocolate Cake batter evenly into the muffin cups. Pop the pan in the oven and bake 25 to 30 minutes, turning the pans halfway through. You'll know it's done when a toothpick inserted in the middle of the cupcakes comes out clean. Let the cupcakes completely cool in the pan on a rack.

For the glaze: Mix the cream, chocolate, honey and coffee in saucepan on low heat. Stir until smooth. Let it cool a bit.

For the topping: Put the egg yolks, evaporated milk, brown sugar and butter in a separate saucepan. Place it over medium heat and cook until the sugar dissolves and the butter melts. Continue cooking, stirring constantly until thick, 8 to 10 minutes or so.

Take off the heat and stir in the vanilla, salt, coconut and pecans. Allow to cool.Dip the cooled cupcakes in the chocolate glaze. Place on the rack and let the glaze harden. Scoop the topping on the cupcakes with a heaping 1/2-ounce ice cream scoop.

Chocolate Cake:

2 cups all-purpose flour
3/4 cup unsweetened cocoa powder
1 1/2 teaspoons baking soda
1/2 teaspoon sea salt
2 sticks unsalted butter, softened
1 1/4 cup packed light brown sugar
1/2 cup granulated sugar
4 eggs, at room temperature for 30 minutes
1/3 cup semisweet chocolate, melted and cooled
2 teaspoons pure vanilla extract
1 1/2 cups well-shaken buttermilk (or 1 cup milk plus 1 tablespoon lemon juice)
         Sift the flour, cocoa, baking soda, and salt together onto parchment paper. With an electric mixer on medium-high speed, cream the butter and sugars until light and fluffy, 4 or 5 minutes. Add your eggs, 1 at a time, mixing until completely incorporated before adding each additional egg. Mix in the chocolate and vanilla, making sure to combine really well. Turn the mixer to low and slowly add the dry ingredients, alternating with the buttermilk, in 3 batches, starting and ending with the flour mixture. Make sure to let it mix thoroughly.
Thursday, May 26, 2011

Chocolate Kahlua Ice Cream Pie

             My most fave pie that I have ever tasted was a Kahlua Cream Pie. All the recipes that I found had raw eggs in them. Then I stumbled on to this ice cream pie recipe. Even easier! Yumm. That is all I can say!


Chocolate Kahlua Ice Cream Pie
9 oz Chocolate wafer cookies
1/2 c Unsalted butter, melted
10 tb Kahlua, divided
1 t Expresso powder
3 oz Semi-sweet chocolate, choped
1 tb Unsalted butter
1 pt Ice cream -- vanilla, coffee, or chocolate chip
1 pt Chocolate ice cream
3/4 c Whipping cream, whipped
           In food processor, place half of cookies, breaking into pieces. Process to make fine crumbs. Repeat with remaining cookies. Add 1/2 cup melted butter and process with on-off pulses, just to blend. Press crumbs evenly onto bottom and up side of 9" pie plate. Press crumbs evenly to rim. Bake at 325~ for 10 minutes. Cool completely. In small saucepan, heat 6 tbls Kahlua and expresso powder over low heat until warmed and powder is dissolved. Stir in chocolate and 1 tbls butter and stir until melted and smooth. Cool completely. Transfer vanilla ice cream to electric mixer bowl and allow to soften slightly. Add 2 tbls Kahlua and beat on low speed to blend. Spread over bottom of cooled crust and freeze until firm. Spread cooled chocolate mixture over ice cream in plate. Freeze until firm. Transfer chocolate ice cream to mixer bowl; blend in remaining 2 tbls Kahlua as above. Spread chocolate ice cream over sauce in pie. Freeze until firm. To serve, pipe decorative border of whipped cream around inside edge of pie.
Wednesday, May 25, 2011

Grandma Parkers Baked Beans

         My grandmother was a fantastic cook, although to hear her tell, she really sucked at it. One thing I remember her making for our family gatherings...Baked Beans! I am sure everyone has their own recipes and to be honest, sometimes it is just easier to open a can. These are great for special occasions. I prefer them tangy. This recipe is easily modified. So give them a try..you won't regret it.


Grandma Parkers Baked Beans
½ poundsGround Beef
2-3 slices bacon cut into pieces
½ cupsChopped Green Pepper
½ cupsChopped Onion
1 can 15 oz. Navy Beans or you could use a prepared can of baked beans
1 can 15 oz. Pork and Beans
1-2 Tablespoon Mustard
1 Tablespoon Cider Vinegar
¼ cups Brown Sugar (I prefer dark gives it more molasses flavor)
⅓ cups Bar B Q Sauce ( I use Sweet Baby Rays)
Red pepper flakes to taste (opt)
       Cook your ground beef and bacon together until all but done. Add green pepper and onion. You want your green pepper and onion to be done but not mushy. (I make double the amount and freeze half to use at a later date.)Drain most of the liquid off of your navy (baked beans) and pork and beans and pour in a 9 x13 baking dish. Add mustard, vinegar, brown sugar, red pepper flakes and Bar B Q sauce; mix into the hamburger mixture. Bake at 350 degrees for 20-25 minutes or until bubbly.

Scott Walters MarinatedTri-Tip Roast

          Scott Walters. What can I say about Scott? Well he and his father Max, were the real estate agents working on the home that Mike and I currently have. His mother Mava, helped us with a mortgage as well as few refi's. I have never met such an honest family. They brought a baby gift over after I had Grace as well as flowers for the holidays as well as many other kind gestures. They just seem to always go above and beyond. Which, is unheard of nowadays.Just a great group of folks! I don't generally recommend or refer people but THIS is the exception. If you are in need of a home or want to sell or need mortgage advice, please contact the Walters family. They are always fair and honest. I know that whenever we sell and buy a home Scott will be the first person we call. http://www.scottgwalters.com/
           Scott submitted this recipe after a call out for your favorite summer eats. I am still waiting for more! He said that he rarely goes off a recipe but swears this is to die for. Thanks Scott for all you have done for us as well as the recipe!
            What is a tri-tip? Well, it is probably the best cut that you are not buying.For years the beef tri-tip found itself being ground into hamburger or cut into cubes and sold as soup meat. The reason for this is that there is only one per side of beef and in the days when butchers carved their own meat it was considered a waste of display space to sell the tri-tip by itself. Now that the carving is done by packers you are much more likely to find the tri-tip at your local butcher. If you don't, ask for it. This often over looked piece of meat is not only relatively inexpensive but also very flavorful and has become a favorite amongst the few in the know.
     The tri-tip roast or steak (also called a triangle roast) is the 1 1/2 to 2 1/2 pounds of meat that sits at the bottom of the sirloin. Not only does it have a great flavor, but also tends to be lower in fat than most other cuts, so it's a good lean cut. Of course this means that it can dry out faster, but with a good marinade you really can't go wrong with this cut. Particularly good flavors for tri-tip are Southwestern or Asian.
           Because tri-tip is lean, be careful not to over cook it, particularly when preparing the full roast. Medium is as far as you should go with this cut. Use a meat thermometer to make sure you get it right where you want it. If you are used to grilling other cuts, this one can throw some grillers off by appearing underdone when it is ready to serve. A tip that I have is to take it off the grill an wrap in foil and let it rest. This will keep it moist as well as complete the cooking time.
          I know a lot of people who complain about not being able to find this cut. In past almost all of it was shipped to California or ground for sirloin burger patties. With the recent interest however, you can find this cut in many places including the large shopping club stores like Costco and Sam's Club. If you have to, try calling around. It's a great cut of meat and worth the search.

Marinated Tri-Tip Roast
Tri-tip roast
Montreal Steak Seasoning
Lawrys Teriyaki Marinade
    Sprinkle the seasoning  all over the meat. Place in a Ziploc bag and pour the marinade over the meat. Put in refrigerator and let marinate over night at least. Heat the grill up then turn off one side and bbq the roast on the side that is the flame is not on. Indirect heat is highly recommended. I turn the roast every 10 minutes or so for about an hour and half. You can use a meat thermometer. It is really delicious.
Tuesday, May 24, 2011

The Good, the Stressed and the Ugly!


Stress

© Jody Mark
Stress is eating at me every minute and second of the day, how do I cope with the horrible effects and make it go away?

I feel so tired and run down and I don't sleep, I lie in bed at night and wonder why it runs so deep.

Everyone asks why do you look so sad, do I tell them that my stress is eating me up and that I feel really bad?

Does everyone notice how I walk around in a daze, and that I have deep black bags under my eyes nowadays.

I wake up every morning feeling so hopeless, like nothing ever goes right and wondering why my life has to be such a mess.

Stress is my one worst enemy, it’s taken over my mind and my whole life in every single degree.
          

             It has been a long time since I have written a personal post on my blog. There are a few reasons for that. Number one..the children. I am so busy and it is the end of the school year so I am doing a ton of running back and forth. Number two...some days I do good just to get the house cleaned and the meals prepared and last but not least, stress. I probably do my best blogging when I am stressed but I am not sure what will come out. Although, it is good therapy for me and cheaper than hiring a professional to tell me how crazy I am. All kidding aside it feels great to purge my soul once in awhile.
         My brothers sentencing is coming within a few weeks and while I continue to hope for the best I am expecting the worse. I need to get up there to see him again, before they move him out of state. Some days I feel so overwhelmed I just don't think I will be able to make it. It is so sad for me to think that my brother, MY brother, is going away to a federal prison for years. I will not see him for years. I more than likely won't hear his voice for years. That kills me. It makes me feel so helpless and so angry. Angry at him for getting into this predicament. Angry at the government for nailing him to the wall while they let others who have committed far worse crimes get off with lighter sentences (That is all I should say about that, I don't want to be in jail for speaking my mind). Angry that his court appointed attorney doesn't give a damn whether he wins or loses because he gets paid no matter what. Angry that no one had enough money to get him "real" legal council. Angry that the justice system is anything but. Angry that the news media can twist a story any way they so choose, to sell papers and make a man guilty until proven innocent then not bother to recant any of the story. Angry that people have the nerve to comment on the story with such vicious comments and so called friends fall by the way side, without giving the benefit of the doubt. He is the first to admit his wrong doing and agrees that he should be punished but the punishment should fit the crime. Angry that every time I see his work vehicle that he comes into my head and it saddens me. Angry that for the next 5-20 years I have to wait, worry and wonder if he is alright, if he is safe. Angry for all of the missed holidays, birthdays and probably deaths. Angry that my brother had to deal with all of the crap he had to deal with when he was younger. Angry that I am the one that has to help him through this instead of my mother. Angry that I have to deal with his bill collectors and explain to them why he cannot pay them. Angry that I don't know how his life will be when he gets out, where he will live, how he will live and if he will be able to find a job.Angry that his life is probably destroyed for a mistake he made that he can't take back. Angry that I can't admit to my feelings because it makes me feel weak. I guess I am just ANGRY!
           That being said, I love him with every fiber of my being and now that we are in this situation I am NOT going to abandon him. I suppose if anything has come of this, it is that he used to never say he loved us. He is a  man of few words but he tells me he loves me and appreciates me. That he loves the family. I just wish it didn't take this, to show him how much he is loved. And so it goes...
            My little family has had it's ups and downs lately as well. Marisa had her 9th birthday and things were going smoothly, or so I thought. A few things have happened that have made me question my ability as a mother as well as made me question my limitations. She has had a few difficulties dealing with her emotions and her anger. Some of the behavior could be harmful to her. I have mentioned it to the doctor and hopefully we are working at moving forward. Grace has lost 4 teeth in a week. She looks like a hillbilly. The tooth fairy may have to take out a loan at this rate. Maddox is getting better at sleeping but is awfully whiny. He graduated pre school this week. Then there's Peyton. My little busy body. He has chipped a front tooth and he loves to climb and explore he is hard to keep track of sometimes.
uggh! Stress. But what do you do? You keep moving forward. One step at a time. There isn't anything I can do to change my situation just my attitude towards it. It doesn't change the fact that some days I fantasize about how much a one way ticket with a window seat to some far off island is going for now a days. My husband should just be thankful I guess, that we can't afford it no matter the cost!
                      
    "Sometimes the most important thing in a whole day is the rest we take between two deep breaths." ~Etty Hillesum

Mint Chocolate Chip Cookies

          This easy and delicious cookie would be perfect for the mint chocolate chip ice cream lover in your life. It comes your way from the kitchens of betty crocker. A few extra ingredients and you have a tasty little cookie.
recipe photo
Mint Chocolate Chip Cookies
1 pouch (1 lb 1.5 oz) Betty Crocker® sugar cookie mix
1/2 cup butter, softened
1/4-1/2 tsp mint extract
6-8 drops green food coloring
1 egg
1 cup creme de menthe baking chips
1 cup chocolate chips
                
Heat oven to 350°F. In large bowl, stir cookie mix, butter, extract, food color and egg until soft dough forms. Stir in creme de menthe baking chips and chocolate chunks. Using small cookie scoop or teaspoon, drop dough 2 inches apart on ungreased cookie sheet. Bake 8 to 10 minutes or until set. Cool 3 minutes; remove from cookie sheet to wire rack. Serve warm or cool completely. Store tightly covered at room temperature.
Makes 36 cookies
Picture Courtesy of Betty Crocker
Monday, May 23, 2011

Kool-Aid Slushies

             So todays post is more for the kids, I suppose or at least a kid at heart. I had never had this little concoction until I met my husband.. about 20 years ago. Yeah, that does make me feel old. Anyway, moving on! The only place to get a drink like this one was usually 7-11. However, there are no 7-11 stores left in our city an let's be honest, they were mostly air anyway. So if it is beginning to feel like summer where you are, number one count your blessings, we may never reach 80 this year and number two, your kids  will love these and to be honest so does my hubby..my biggest kid! Enjoy!


slushie
Kool-Aid Slushies
1 packet of Kool-Aid any flavor
1/2-1 cup of sugar
ice water
       In a blender add sugar, and drink packet. Fill blender with ice. Next add, water. Enough to almost filll blender. Blend until smooth. That's it!
 ***Note if you want a Coca-cola or Mountain Dew (or any soda flavored slushie), simply add to blender with enough ice to cover!
Sunday, May 22, 2011

Salted Caramel Milk Chocolate Cake

           I know I have professed my love for Anne Thornton many, many, times before. Her show on Food Network, Dessert First is one of my faves. This week she made a dessert with one of my very favorite ingredients...salted caramel. Salted Caramel Milk Chocolate Cake....sigh! Heavens I may have to grease the doors to get me out. I may eat the whole thing! Take a moment and savor the sight...YUMMY! Start with the Chocolate Caramel frosting first, as it has to cool before you add the powdered sugar.
 

Salted Caramel Milk Chocolate Cake
Frosting:
18 ounces milk chocolate, finely chopped
10 ounces semisweet or bittersweet chocolate, finely chopped
 1/2 cup water
1 1/2 cups sugar
2 1/4 cups heavy cream
1/2 tablespoon fine sea salt
1 1/2 sticks room temperature unsalted butter, cut into cubes
1 Chocolate Cake recipe, recipe follows
Sea salt flakes (recommended: Maldon
          Put your chocolates in a big bowl. Put the sugar and 1/2 cup water in a saucepan and place over medium heat. Stir until the sugar dissolves and bring up to a boil. As soon that happens, stop stirring and let it boil until it turns an amber color, 8 to 10 minutes or so. (If you think that it needs another stir, brush down the sides of the pan with a wet pastry brush, and stir the entire mixture, picking up the pot itself by the handle, being careful not to touch the caramel or else it could crystallize.) Once the mixture reaches that dark amber color, turn the heat down. Stand back from the pot and add the cream very slowly, stirring with a heatproof spatula. (If you are nervous about the steam, wear a kitchen glove to protect your hand.) Continue to stir until all is incorporated. Once the mixture is smooth, stir in the fine salt. Take off the heat and pour the caramel over the bowl of chocolate. Whisk to combine, making sure all the chocolate melts. Pop in the fridge for about 1 hour until completely chilled.

Take the frosting out of the fridge and beat it with a hand mixer just until it becomes spreadable. Add the butter in pieces and mix until it's all combined. Pop back into the refrigerator for another hour.

Place 1 cake layer on a cake platter, flat-side up. (You want the cake flat-side up so when you get into it you'll have nice and even layers.) Evenly spread 2 cups of the frosting over the top. Sprinkle with sea salt flakes, then put the other cake layer on top, flat-side up. Spread the rest of the frosting over the top and on the sides of the cake. Sprinkle the top with more salt flakes.

Chocolate Cake:

2 sticks unsalted butter, softened, plus more for greasing pan
2 cups all-purpose flour
3/4 cup unsweetened cocoa powder
1 1/2 teaspoons baking soda
1/2 teaspoon sea salt
1 1/4 cup packed light brown sugar
1/2 cup granulated sugar
4 eggs, at room temperature for 30 minutes
1/3 cup semisweet chocolate, melted and cooled
2 teaspoons pure vanilla extract
1 1/2 cups well-shaken buttermilk (or 1 cup milk plus 1 tablespoon lemon juice)
          Put a rack in the middle of the oven and preheat the oven to 350 degrees F. Butter 2 (9 by 2-inch) nonstick round cake pans. Line the bottom of each with a round of parchment paper, and then butter the paper.Sift the flour, cocoa, baking soda and salt together onto parchment paper. With an electric mixer on medium-high speed, cream the butter and sugars until light and fluffy, 4 or 5 minutes. Add your eggs, 1 at a time, mixing until completely incorporated before adding each additional egg. Mix in the chocolate and vanilla, making sure to combine really well. Turn the mixer to low and slowly add the dry ingredients, alternating with the buttermilk, in 3 batches, starting and ending with the flour mixture. Make sure to let it mix thoroughly. Pour half the batter in each pan and spread it evenly with a spatula or butter knife. Bake until a toothpick comes out clean, 25 minutes. Remove the pans to racks and allow the cakes to cool for 10 minutes or so. Loosen the edges of the cake from the pan with a knife, then turn them onto the racks. Remove the paper and let the cakes completely cool. Yield: 2 (9-inch) cake layers
Saturday, May 21, 2011

Mango Cobbler

             We got eight mangoes in our bountiful basket. Wondering what to do with them, I stumbled on this divine recipe from Just a Pinch. The picture is from there as well. This is one way I might could get my hubby to eat mangoes. Enjoy!
 MANGO COBBLER

Mango Cobbler

1/4 c margarine
1 c white sugar
1 c all purpose flour
2 tsp baking powder
1/8 tsp salt
1/2 c milk
 1 tsp vanilla extract                
 2 can(s) mangoes or peach
 1 c juice of the canned fruit
             Cream together softened margarine and sugar. Sift flour, baking powder and salt.  Add alternately dry ingredients with milk and vanilla extract. Beat well until smooth. Pour batter into 9x9 inch cake pan. Place the mangoes over batter. Pour juice. Bake at 375 F for 45 minutes or until tester comes out clean. Serve with whipped cream or ice cream. Note: For fresh mangoes - Peel skin of 4 mangoes (halved) and simmer for a few minutes with 1 cup water and 1/4 cup sugar. Use it's liquid for juice. Fresh mangoes that were simmered are juicier than the canned ones. Canned peaches are also great for this recipe. I prefer to use fresh mango, though.
Friday, May 20, 2011

Grilled Sticky Ribs

             My blog has been a mess for most of the day today...sorry! Trying to get everything rearranged as well as getting the summer background up. By doing so I am hoping against hope that the weather here in Utah will change a bit. So what are your plans for this weekend? Hoping to get some baking in as well as some yard work. I would love to get our garden in but it has just been too wet to plant. Tomatoes are going to have a short ripening season I am afraid. I am also picking up my bountiful basket tomorrow. If you haven't heard of them or aren't sure if they are in your area check out their website www.bountifulbaskets.org. Great produce co- op and the best thing is, you get produce that you may have never bought or may have never used before so it makes you think outside of the box a bit. Makes weekly menu planning a bit of an adventure. I have to admit I was nervous my first time participating. I thought that maybe the produce would be less than fresh but that hasn't been the case. Check them out. You won't be sorry.
          Todays recipe comes from recipe goldmine. I love that site. Great recipes over there. Grilled Sticky Ribs. What a great way to kick off summer! Break out the grill, dust off the tongs! Let's get grilling!


Grilled Sticky Ribs
 Yields 5 to 6 servings
Aluminum foil
2 racks (about 4 pounds total) baby back ribs
Garlic salt
Ground black pepper
1 tablespoon vegetable oil
1/4 cup finely chopped red onion
1 teaspoon finely chopped garlic
1 teaspoon grated fresh ginger
3/4 cup MAGGI TASTE OF ASIA Sweet Chili Sauce
1/2 cup Apple NESTLÉ® JUICY JUICE® All Natural 100% Juice
1 tablespoon rice wine (mirin)

            Preheat oven to 300°F. Using knife, remove membrane from bone side of ribs (this step is very important for tender ribs). Pat ribs dry with paper towel; season both sides liberally with garlic salt and pepper. Place ribs in a large roasting pan, overlapping as needed. Add about 1/2 cup water to pan. Cover tightly with foil. Bake for about 3 hours or until meat is very tender but not quite falling off the bones.Heat oil in small saucepan over medium-high heat. Add onion; cook, stirring occasionally, for 2 to 3 minutes or until soft. Stir in garlic and ginger; cook for 1 minute. Stir in sweet chili sauce, Juicy Juice and rice wine. Reduce heat to low; cook for 8 minutes or until sauce is reduced to about 1 cup (it should be thick and sticky).Preheat grill or broiler. Brush glaze over tops of ribs. Grill over medium flame for 4 to 5 minutes or broil about 4 inches from heat for 3 to 5 minutes or until sauce caramelizes. Serve with any remaining glaze.

Recipe and photograph provided courtesy of Nestle and meals.com. Used with permission.
Thursday, May 19, 2011

Mexican Lasagna

           So, yesterday on Facebook, I shared a recipe for mexican lasagna. Instead of re posting the same recipe, I decided to research a few more and low and behold Ree Drummond has one. I have yet to find a recipe from her that hasn't turned out FANTASTIC. This recipe has quite a few ingredients but it is simple and delicious. If you are looking to shake things up a bit for dinner...I highly recommend this one! The picture is from Ree Dummond as well! Ooohh  Yummy!


Mexican Lasagna
4 cups Unprepared Rice
6 cups (to 8 Cups) Low Sodium Chicken Broth/stock
4 whole (to 8) Tomatoes (up To You)
2 whole (to 3) Onions (up To You)
8 cloves (to 14 Cloves) Of Garlic (up To You)
Butter
Taco Seasoning (or Chili Powder, Paprika, And Cumin) To Taste
1 can (to 2 Cans) Black Or Pinto Beans (up To You)
3 pounds Lean Ground Beef
2 jars (16 Ounce) Salsa Verde
Flour Tortillas
3 packages (16 Ounces) Mexican Cheese Blend
1 jar (16 Ounce) Enchilada Sauce
3 cans Corn, Drained
Sour Cream, to taste
Cilantro, to taste
        Begin by preparing rice with chicken broth/stock. Once prepared, salt to taste. Chop up tomatoes, onions, and garlic as small as you prefer. Saute in pan with a tablespoon or so of butter. Add approximately 3 tablespoons chili powder, and 1 ½ tablespoon of both paprika and cumin. Stir until nicely combined.
Feel free to add beans if you like them… no need to drain. Mix cooked rice together with tomato/onion/garlic mixture. Brown the ground beef using about 3 tablespoons chili powder, 1 ½ tablespoon, paprika and 1 ½ tablespoon of cumin and salt to taste with about 4-6 ounces of water to create the taco beef.Spread one container of salsa verde in the bottom of a large casserole or baking dish. Layer on tortillas covering salsa verde. Some overlapping is expected. Divide your rice mixture in half and spread it over the layer of tortillas. Divide cheese in half and layer it on top of the rice layer. Approximately 24 ounces of cheese per layer. Add another layer of tortillas on top of your cheese layer. Pour enchilada sauce over the tortillas and spread it out evenly. Add layer of browned ground beef. Add 3 cans of corn (drained) on top of beef layer. Then the remaining amount of rice mixture on top of corn layer followed by the remaining jar of salsa verde, on top of which you will add the remaining cheese (approximately 24ounces) to the top…this is our final layer of ingredients. Sprinkle top with some taco seasoning or cayenne pepper.
Bake at 375º for 25-35 minutes until cheese has melted and begins to brown a bit.
Enjoy!

Pico De Gallo~ Round two

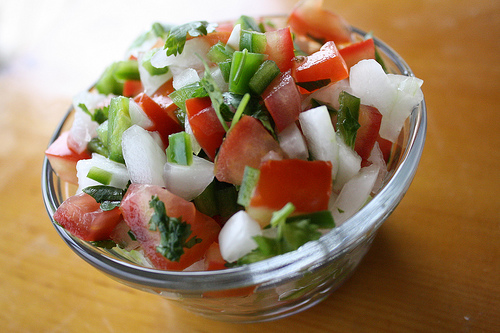
          I love any kind of salsa. My brother in law Brad makes a kickin' salsa. This Pico de Gallo Salsa is the bomb. I don't have many foods that I could eat every day but salsa....is one of them. Think outside the box. Don't just use for tacos or dipping chips (which is divine). The recipe makes a few suggestions..let your imagination run wild! The recipe came your way by Cooks.com. A must try..in my book anyway.


PICO DE GALLO

Read more about it at www.cooks.com/rec/view/0,196,143163-227203,00.html
Content Copyright © 2011 Cooks.com - All rights reserved.
6 fresh tomatoes, seeded and diced
1/2 to 1 sweet onion, diced
1 green pepper, diced
1 red pepper, diced
1 orange pepper, diced
2 jalapenos, seeded and minced
2 avocados, cut into small cubes
4 - 6 cloves garlic, minced (I love garlic!)
1/4 cup fresh cilantro, chopped
juice from 2 limes
1 tbsp ground cumin
sea salt and crushed black pepper, to taste

Mix all the ingredients in a big old bowl, as this recipe makes a lot. Remove the seeds and juicy parts of the tomato for better consistency. Add the avocados last and immediately cover with lime juice so they don't brown. Cover and refrigerate for a couple hours. Serve with tortillas, on top of a juicy steak, or on burgers with a slice of grilled pineapple.

Wednesday, May 18, 2011

Ultimate Spaghetti and Meat Sauce

           For those of you that know me, you know that I don't prefer meat. I will cook it but I don't prefer it.What I love about this recipe is that is has a couple different cooking variations. Stove top, crock pot...whatever you have time for. In my opinion if you didn't like sausage you could leave it out and to be honest you could probably leave out the ground beef if you really wanted but this is MEAT Sauce and so...give it a try!Don't let all of the ingredients fool you, the recipe is simple and straight forward and besides... Who doesn't like spaghetti? If you are doing your weekly meal planning like me, this would be a great variation for Italian night. If not...why haven't you started planning meals yet? I promise it is going to save you time and money. And who wouldn't like more time and money? Chop Chop!!! This recipe is from you guessed it..Tasty Kitchens as is the photo.


Ultimate Spaghetti and Meat Sauce
1 pound Lean Ground Beef
1 pound Italian Sausages (aproximately 5 Links)
1 Tablespoon Olive Oil
1 cup Red Onion, Diced
1 cup Green Pepper, Diced
4 cloves Garlic, Minced
1 Tablespoon Dried Basil
1 Tablespoon Dried Oregano
1 Tablespoon Dried Marjoram
½ teaspoons Dried Red Pepper Flakes
2 leaves Bay Leaves
1 teaspoon Salt
½ teaspoons Black Pepper
1 Tablespoon Sugar
1 can Tomato Sauce (28 Ounce Cans)
2 cans Diced Tomatoes (15 Ounce Cans)
1 can Tomato Paste (8 Ounce Can)
1 cup Water Or Red Wine
8 ounces, weight Grated Parmesan Cheese
       Heat oil in a large ovenproof pot or cast iron Dutch oven over medium heat. Remove casings from Italian sausage. Brown hamburger and sausage in the pot, breaking up the meat into small pieces as it cooks.As meat is browning, place onion, bell pepper and garlic cloves in a food processor and pulse until chopped. Add vegetable mixture to meat and cook until onion becomes translucent. Add the basil, oregano, marjoram, pepper flakes, bay leaves, salt, pepper and sugar. Mix well to incorporate flavors.When meat is entirely browned and vegetables are cooked add the tomato sauce, stewed tomatoes, tomato paste and wine. Heat the mixture until just barely boiling and reduce heat to simmer. Add the grated parmesan and stir to mix thoroughly into sauce.
Method 1 – Continue to cook on stove, uncovered for 2-3 hours stirring occasionally to prevent sticking to the bottom of the pot. This is the the method I typically use.
Method 2 – Heat oven to 200 degrees F. Cover pot or Dutch oven leaving lid slightly ajar to allow excess steam to escape. Bake sauce in oven for 2-3 hours.
Method 3 – Transfer sauce to an electric crock pot or slow cooker. Keep lid slightly ajar with a toothpick in order to allow excess steam to escape. Cook on low for 4-6 hours. This method results in a slightly runnier sauce, but is great if you don’t have the time to monitor a pot on the stove or in the oven.
Serve sauce with your favorite cooked pasta.
Tuesday, May 17, 2011

Homemade White Chocolate Peanut Butter

            At my local store I can get peanut butter freshly made in the bulk section (WinCo for all of you locals they also have fresh almond butter which you probably could sub for the peanut butter as well as honey). I will probably do that or a shortcut. Can you imagine how this will taste on apples or crackers..or whatever else you use peanut butter on.So much better for you than the prepared ones that you buy, no preservatives or additives. Yummy! It came our way through Tasty Kitchens as did the picture.

Homemade White Chocolate Peanut Butter
1-½ cup Dry Roasted Peanuts (I Used Salted)
1-½ Tablespoon Canola Oil
1 teaspoon Vanilla Extract
⅓ cups White Chocolate Chips/chunks/bars, Melted (about 3-4 Ounces)

        Add peanuts to a food processor and blend until a thick nut butter forms. Stream in oil and vanilla with the processor on, continuing to run it until the mixture is smooth—this took me about 3–4 minutes. You can add more oil if needed, just do it in small increments. Turn off processor, add melted chocolate, and turn processor back on. Blend until smooth.
Monday, May 16, 2011

Maple Nut Cake

            I know I have done a lot of desserts lately but I just couldn't pass this yummy cake by! I love maple anything so this cake would be a guilty pleasure for me. With cakes, it is important to follow the directions exactly. This recipe has you alternate the wet and dry. If you do not follow it will alter the texture of the cake. Also, try not to over mix. Give it a try!
Maple Nut Cake with Maple Buttercream Frosting

FOR THE CAKE
3 cups cake flour
2 teaspoons baking powder
1 teaspoon baking soda
1 teaspoon salt
1 1/2 cups (3 sticks) unsalted butter, softened
1 cup sugar
1/2 cup maple sugar (can sub brown sugar)
4 eggs, at room temperature
2 teaspoons vanilla
1 cup maple syrup
1/2 cup milk
1 cup chopped walnuts (optional)

FOR THE FROSTING
1 cup (2 sticks) unsalted butter softened
1 lb. confectioners’ sugar (make sure it’s gluten-free, if necessary)
1 1/2 teaspoons vanilla
1/2 teaspoon salt
1/3 cup maple syrup
2 tablespoons heavy cream
      To make the cake: Preheat the oven to 350 degrees. Line 3 8-inch cake pans or 13x9, (or you could do cupcakes.) with parchment paper, or grease and flour them. In a large bowl combine the flour, baking powder, baking soda, and salt; set aside.In a medium bowl or large measuring cup, whisk the syrup and milk together; set aside.In another large bowl, or the bowl of a standing mixer, cream the butter and sugars together until light and fluffy. Add the eggs, one at a time, scraping the bowl as needed, and beat until combined. Stir in the vanilla.Sprinkle about 1/3 of the flour over the batter and mix until just combined. Add half of the syrup mixture and beat until combined, then scrape the bowl. Add another third of the flour, mixing until just incorporated, then add the remaining syrup mixture and beat until just combined. Finally, add the remaining flour and beat the mixture until thoroughly combined. Scrape the bowl, then divide the mixture evenly into the prepared pans. Bake for 25-30 minutes, or until a toothpick inserted in the center of the cake comes out with a crumb or two clinging to it. Leave the cakes in the pans for about 2 minutes before transferring them to a wire cooling rack. To make the frosting: Beat the butter on high speed until light and fluffy. Beat in the sugar until combined. Stir in the vanilla, sugar, and syrup. Add the heavy cream and whisk on high for 4 minutes.
Sunday, May 15, 2011

Cheesecake Stuffed Strawberries

             Stumbled on this recipe on momformation. I am certainly glad I did. Can you say easy and delicious? These babies look more complicated than they actually are! You could add a little cocoa to the cream cheese mix for a chocolate version! Or better yet...dip them in white, milk or dark chocolate. I had better stop. I may lick the computer screen. YUMMY!


Cheesecake Stuffed Strawberries
24 large strawberries, hulls removed
12 ounces cream cheese, room temperature
1 1/2 teaspoons vanilla
1/4 cup, plus 2 tablespoons confectioners’ sugar (add gradually, to taste)
1/4 cup graham cracker crumbs
             Place cream cheese in a bowl and microwave for 30 seconds, or until soft. Use an electric mixer to combine the cream cheese, vanilla, and sugar. (Add the sugar gradually — I like mine pretty sweet, but don’t feel forced to use it all.)Use a sharp knife to make a hole in the center of each strawberry (going as deep as you can without hitting bottom). Williams Sonoma makes a fabulous tool called the Strawberry Huller ($8) that will remove the stem and create a perfect hole in one easy step.
Spoon or pipe the filling into each hole. I like to pipe it in with a cake tip; it goes faster and looks better.Sprinkle graham cracker crumbs on top!
Saturday, May 14, 2011

Easy Homemade Rootbeer

          I know that when you read the back of rootbeer concentrate it has a long drawn out way of making rootbeer, but my in laws have taught me an easy way to make it. The recipe makes a lot. I am talking 5 gallons. So if you have a bunch of kids coming over...whip some of this up. You will be the new fave parent. Which, to be honest, I have no desire to be! No rootbeer for my house! Ha! Kidding...sort of!


Easy Homemade Rootbeer
1 bottle of rootbeer concentrate
5 pounds sugar (see why you are the new fave?)
5-7 pounds dry ice (I prefer 7)
5 gallons water
         In a large container (we use the camping style drink cooler or water jug) combine water, sugar and rootbeer concentrate. Stir well until sugar is dissolved. Carefully add dry ice and stir occasionally making sure that the ice stays clear of the spout. Lightly cover and let brew for awhile. Now one thing to be aware of is, you need to let it vent otherwise, you will be making a rootbeer bomb (which coincidentally may still make you the new fave but you will be the only one cleaning up the huge mess).We like to put our glasses in the freezer and take them out just before serving. Yummy!

Butter Pecan Cupcakes

            So, Butter Pecan is one of my fave ice cream flavors. If I can get it in a cupcake then I am a happy camper! I just  have to say I may have to hide in the bathroom and eat a few of these!
Butter-Pecan Cupcakes

Butter Pecan Cupcakes
2 cups cake flour, stirred before measuring
2 teaspoons baking powder
1/2 teaspoon salt
6 tablespoons butter
1 cup light or dark brown sugar,
1 large egg
2 teaspoons vanilla extract
3/4 cup (6 ounces) milk
1/2 cup finely chopped pecans
***Brown Sugar Frosting***
1/2 cup (4 ounces) butter
1/4 cup half-and-half or milk
1 cup light brown sugar, packed
2 cups confectioners' sugar

Preparation:

Heat oven to 350°. Line 18 to 21 muffin cups with paper liners.In a medium bowl, combine the cake flour, baking powder, and salt; set aside.
In a mixing bowl, beat 6 tablespoons butter and 1 cup brown sugar until light. Beat in the egg and 2 teaspoons vanilla extract until well blended. Add about half of the flour mixture and about half of the milk, slowly beating until blended. Blend in the remaining flour mixture and milk, then fold in pecans.
Fill paper liners 1/2 to 2/3 full. Bake for 24 to 28 minutes, until the cupcakes bounce back when lightly touched with a finger. Cool in pan on a rack; remove from the pan, then frost with brown sugar frosting or dust with sifted confectioners' sugar.

Frosting:
In a saucepan over medium-low heat, slowly bring 1/2 cup butter, 1/4 cup half-and-half or milk, and 1 cup light brown sugar to a boil, stirring frequently. When the mixture begins to boil, remove from heat and set aside to cool to lukewarm. Sift 2 cups of confectioners' sugar into the lukewarm brown sugar mixture and beat until smooth and creamy. Add a little more confectioners' sugar if needed, or beat in a little hot water if the frosting becomes too stiff. Frost the cooled cupcakes.
Friday, May 13, 2011

Fried Chicken Seasoning

             This recipe came from Just a Pinch. If you love Fried Chicken..give it a try! Just combine all of the spices together. I would soak my chicken in buttermilk for awhile then  Mix together 4 teaspoons of the mixture, 1 cup flour, 2 Tbls. packed light brown sugar and 1 teaspoons salt. You can either dredge the chicken through the mixture or put the flour mixture in a paper bag and shake to coat. Fry, drain on paper towels, serve!

 11 Secret Herbs and Spices( Kfc Copycat). Photo by Rita~

Fried Chicken Seasoning
1 tsp
1 tsp
ground cardamom
ground oregano
1 tsp chili powder
1 tsp ground sage
1 tsp dried basil
1 tsp dried marjoram
1 tsp pepper
2 tsp salt
2 Tbsp paprika
1 tsp onion salt
1 tsp garlic powder
2 Tbsp accent (an msg-based seasoning)
Wednesday, May 11, 2011

Happy Birthday to The Best Husband!

SOMEONE IS HAVING A BIRTHDAY!!!!

                                                                 
           May 13th is my husbands birthday! So to embarrass him I thought I would write a post about him. (Hence the picture) Not really! I just wanted to write something to honor him. He has been the love of my life for 16 years. He has been through a lot with me. I do not even know where to begin. We met early one summer and have been inseparable since. Pretty much. There was just something about him. I just had to get to know him better. We had a lot in common and we disagreed on a lot. But, we got along so well. We just seemed to mesh. It just felt ...right. I truly believe we were together before we made it to earth and when I first saw him, it was like our souls knew each other. I know that sounds cheesy but it is so true.
            Fast forward a few years and a couple of hardships...we got married. Times were tough for awhile and to be honest..they still are at times. We made very little money, Mike got injured at work bad enough that he was home for a month. Later on, he went to school and worked full time. We did foster care for Marisa, adopted, bought a house and had a baby the same year.The point is..life got busy. Sometimes it feels like we never have time for each other but I love him so much. Eventually life will slow down and we will get to enjoy each others company. Until then...we will have to settle for a hug and an I love you along with a few stolen kisses.
                    For those of you that haven't met my sweet husband I will do my best to describe him. Although words will never be enough. He is a gentleman. Always courteous to women (and men). He thinks of others before himself. He sacrifices for his family everyday. He is soft spoken. He has a sense of humor that most of the time..I just don't get but, his laugh cracks me up. He is thoughtful, patient and kind. Although, the guys at work may disagree, especially in the morning. He is NOT a morning person at all. He is a hard worker. He works until the job is done. He can be a little impatient at times but is so much better now than when he was younger (kids do that to you). He is a bit of a perfectionist. He is spiritual. He is down to earth. He is loyal. He has wiped my tears on the few occasions that I have cried in front of him. He has held my hand through tough times an child birth. He has put up with my crazy family as well as me for more years than I thought he would. He is a fantastic father. He is a peacemaker however, with that comes he is NOT a disciplinarian. He is my best friend, lover, companion. He is fun. He is loving. He is everything I hope my boys are when they are grown. He has the qualities that I hope the girls look for in a man when they are grown.
He is everything I had hoped for in a husband. I am lucky to have him! I am truly blessed!
       

                  Happy Birthday Mike ! I love you !

Blog Archive

Followers