I love Molasses Cookies. I may be the only one in my house to feel this way but all the better reason to make them. This recipe is so good. I love spicy cookies and cakes. It has a hint of orange zest. You can taste the orange slightly but it just adds a depth to this cookie that can't be beat. My house smells just like Christmas. Did I mention that I am not a photographer?! Here's what I did...
Spiced Ginger Molasses Cookies
1 1/2 cups softened butter (3 sticks..don't judge)
2 cups brown sugar
2 eggs
1/2-1 tsp. grated orange zest. (add more if you want the flavor more pronounced)
1/2 cup molasses
1/2 tsp. salt
4 tsp. baking soda
1 Tbs. ginger
2 1/2 tsp. cinnamon
1/2 tsp. nutmeg
1 tsp. cloves (yum)
4 3/4 cup AP flour
1/2 cup sugar (to roll in)
Preheat oven to 375 degrees. In a
large bowl cream butter and brown sugar and orange zest. until light and fluffy.. about 3-5 minutes. Add eggs and molasses, mix thoroughly.
Sift together the flour, baking soda, salt, cloves, cinnamon and ginger. Add the
dry ingredients to the butter mixture. Use an ice cream scoop that holds 2 tablespoons of dough. Roll each
ball into the sugar and place on a silpat lined cookie sheet or you can use parchment paper. Place in oven and bake for 10-12 minutes. Remove from oven and transfer to a
cooling rack to cool. Makes about 3 dozen cookies.
Search This Blog
Tuesday, December 11, 2012
Thursday, December 6, 2012
Crock Pot Hot Chocolate/Snowflake Cocoa
There a few posts with this exact same recipe floating around the internet. Not sure who "created" it but I made this as well as the Snowflake Cocoa on Saturday for my sweet Gracie's baptism. Throwing ingredients in the crockpot and letting it do it's thing... works for me. The end results...It was too sweet. I think adding a bit more milk would make it great. OR omitting the sweetened condensed milk all together. I also used semi sweet instead of milk chocolate. Can you imagine if you added a few peanut butter chips in with the chocolate? Mmm!
The first photo is from Crock pot ladies. (I should have taken one but was too busy). The second photo, of the Snowflake Cocoa is from All Recipes.

Crockpot Hot Cocoa
6 cups milk (I recommend at least 8)
1 can sweetened condensed milk (or omit all together)
1 1/2 cups whipping or heavy cream
2 cups chocolate chips
1 tsp. vanilla
Add all ingredients to crockpot and heat on low for 2 1/2 hours. Whisking often. Be careful when serving..it is very hot.
Now for the Snowflake Cocoa the recipe is the same only you use white chocolate chips and crush up candy canes. I used Torani's peppermint syrup in it as well. This was also VERY sweet, almost like melted ice cream. I would recommend adding more milk as well or just omitting the condensed milk. These both tasted great but were just too strong for my liking. Definitely a keeper.. just modifying it a little.
Friday, November 30, 2012
Frothy Cappuccino Punch
We are not coffee drinkers at my house. I love the smell and my mother loved to drink coffee. I personally like the flavor. Coffee, ice cream, frappes...whatever but my tummy just can't handle it. Don't get me wrong there are days when I think I should be hooked up to an IV of the stuff. I think my boys are trying to kill me very slowly with sleep deprivation. There are some days it feels as if I will never sleep again. And, trust me, I know that one day I will miss it but until then a full 8 hours of sleep sounds HEAVENLY! But, I digress...My husband on the other hand cannot STAND the smell let alone the flavor of coffee. I know.. it perplexes me as well. This recipe from Nestle sounds scrumptious and I know there are quite a few coffee drinkers out there. Let me know what you think.
Just know that there this one tired mama that could probably drink a whole gallon of the stuff just to stay awake until noon. Hence the lack of posts. I have also notice that my last three posts have been drinks. Maybe that is because I live off of a liquid diet. As, I don't have time to actually sit and enjoy a proper meal. Besides, I am nursing as well, which means I am always dying of thirst. BTW, this is being typed with a chubby, sleeping 5 month old on my lap, a three year old destroying my front room with his blocks, trucks and magnets and my 5 year old running through the hall in his underwear because he went to get dressed and got as far as getting undressed but has now forgotten what I sent him in there to do. Typical day here at the Howlett Wild Animal Park! Cheers!! :)

Frothy Cappuccino Punch
1 gallon freshly brewed, double-strength ground coffee*, chilled
3 cans (12 fluid ounces each) NESTLE CARNATION Evaporated Milk, chilled, divided
1 cup granulated sugar, divided
1 teaspoon vanilla extract
1 quart chocolate ice cream
NESTLE TOLL HOUSE Semi-Sweet Chocolate Baking Bars, made into curls
Ground cinnamon (optional)
POUR coffee into large punch bowl. Combine 2 1/4 cups evaporated milk, 1/2 cup sugar and vanilla extract in blender; blend until frothy. Add milk mixture to coffee. Repeat with remaining evaporated milk and remaining sugar. Add scoops of ice cream to punch and top with chocolate curls.
LADLE punch into cups; sprinkle with cinnamon.
* Measure 2 rounded tablespoons of ground coffee to every 6 ounces of water. Vary measurements to suit your individual taste.
HINT: To make chocolate curls, carefully draw a vegetable peeler across a bar of NESTLE TOLL HOUSE Semi-Sweet Chocolate. Vary the width of your curls by using different sides of the chocolate bar.
Yields 50 servings
Recipe and photograph courtesy of Nestle
Just know that there this one tired mama that could probably drink a whole gallon of the stuff just to stay awake until noon. Hence the lack of posts. I have also notice that my last three posts have been drinks. Maybe that is because I live off of a liquid diet. As, I don't have time to actually sit and enjoy a proper meal. Besides, I am nursing as well, which means I am always dying of thirst. BTW, this is being typed with a chubby, sleeping 5 month old on my lap, a three year old destroying my front room with his blocks, trucks and magnets and my 5 year old running through the hall in his underwear because he went to get dressed and got as far as getting undressed but has now forgotten what I sent him in there to do. Typical day here at the Howlett Wild Animal Park! Cheers!! :)
Frothy Cappuccino Punch
1 gallon freshly brewed, double-strength ground coffee*, chilled
3 cans (12 fluid ounces each) NESTLE CARNATION Evaporated Milk, chilled, divided
1 cup granulated sugar, divided
1 teaspoon vanilla extract
1 quart chocolate ice cream
NESTLE TOLL HOUSE Semi-Sweet Chocolate Baking Bars, made into curls
Ground cinnamon (optional)
POUR coffee into large punch bowl. Combine 2 1/4 cups evaporated milk, 1/2 cup sugar and vanilla extract in blender; blend until frothy. Add milk mixture to coffee. Repeat with remaining evaporated milk and remaining sugar. Add scoops of ice cream to punch and top with chocolate curls.
LADLE punch into cups; sprinkle with cinnamon.
* Measure 2 rounded tablespoons of ground coffee to every 6 ounces of water. Vary measurements to suit your individual taste.
HINT: To make chocolate curls, carefully draw a vegetable peeler across a bar of NESTLE TOLL HOUSE Semi-Sweet Chocolate. Vary the width of your curls by using different sides of the chocolate bar.
Yields 50 servings
Recipe and photograph courtesy of Nestle
Monday, November 12, 2012
Pumpkin Spice Steamers
Sorry for the delay in posts, I have had sick children already this season. It has offset everything.
So because I am WAY behind the times... I blame the children :) I had no idea what a steamer was. Do you know? Well, I tried a Pumpkin Spice Steamer from Kneaders, our local bakery. If you don't have a Kneaders where you are... I'm sorry. That place is delicious. A steamer, is hot frothy milk that is flavored to your liking. Now, I researched this because, I am behind the times. I found all sorts of recipes on straining pumpkin and making your own syrup but come on now. When I want a drink in the morning, I don't wanna be making flavored syrup. Enter..Torani's. sigh. Now I have heard of Toranis before but holy moly. I visited their website and they have like a bazillion..OK 80 flavors or so. BUT, the possibilities are overwhelming. The cool thing about their site... they have recipes. Recipes for hot chocolate, Italian sodas, steamers, milkshakes, coffees and cocktails. Whatever floats your boat. I ordered a few..OK 5 bottles of syrup. Different flavors of course and they arrived on my door the next day. Now a few grocery stores carry Toranis but the flavors are limited. P.S. Pour some Toranis in your pancake batter....it is FABULOUS!!!
I popped open my Pumpkin Spice Bottle and VOILA! A Pumpkin Steamer. Tasted pretty similar, if not exactly like Kneaders. Now they had Pumpkin Spice as well as Pumpkin Pie syrup but I think the Pumpkin Spice tasted more like Kneaders. Looking forward to my gingerbread flavored Steamer as well. Now, I have mixed the White Chocolate and Caramel Syrups with success. Seriously, This could be my new obsession. At least I am aware of it right?! My brother has used Almond milk for his Steamer and it gives it a nuttier flavor but is still really good. So if you are like me and were completely in the dark about steamers and you want something a little different than Hot Cocoa... try a steamer. Look for Torani's in your store or visit their website. No, they are not compensating me for this...just feeding my new addiction. I am almost ashamed to post this easy recipe. Here goes:
Pumpkin Steamers (or whatever flavor your little heart desires)
8 oz Milk (Skim, Whole, Almond...)
2-3 Tbs. Torani's Pumpkin Spice Syrup or if you have a fancy dispenser (which they sell), 3 squirts
Whipped Cream (optional)
Heat milk to steaming hot. Making sure not to burn yourself. I'll be honest here... you could microwave it and it does work but heating it on the stove top and letting it steep a little, is so much better. I don't know why. There is probably some scientific explanation... but I am not a scientist. Add in your syrup to your liking. Now you could take the time to whip it and froth it but I don't... I am not that patient. That's it. I know. Simple. Try it, you will thank me later. Tastes like pumpkin pie in a glass..with fewer calories. :)
So because I am WAY behind the times... I blame the children :) I had no idea what a steamer was. Do you know? Well, I tried a Pumpkin Spice Steamer from Kneaders, our local bakery. If you don't have a Kneaders where you are... I'm sorry. That place is delicious. A steamer, is hot frothy milk that is flavored to your liking. Now, I researched this because, I am behind the times. I found all sorts of recipes on straining pumpkin and making your own syrup but come on now. When I want a drink in the morning, I don't wanna be making flavored syrup. Enter..Torani's. sigh. Now I have heard of Toranis before but holy moly. I visited their website and they have like a bazillion..OK 80 flavors or so. BUT, the possibilities are overwhelming. The cool thing about their site... they have recipes. Recipes for hot chocolate, Italian sodas, steamers, milkshakes, coffees and cocktails. Whatever floats your boat. I ordered a few..OK 5 bottles of syrup. Different flavors of course and they arrived on my door the next day. Now a few grocery stores carry Toranis but the flavors are limited. P.S. Pour some Toranis in your pancake batter....it is FABULOUS!!!
I popped open my Pumpkin Spice Bottle and VOILA! A Pumpkin Steamer. Tasted pretty similar, if not exactly like Kneaders. Now they had Pumpkin Spice as well as Pumpkin Pie syrup but I think the Pumpkin Spice tasted more like Kneaders. Looking forward to my gingerbread flavored Steamer as well. Now, I have mixed the White Chocolate and Caramel Syrups with success. Seriously, This could be my new obsession. At least I am aware of it right?! My brother has used Almond milk for his Steamer and it gives it a nuttier flavor but is still really good. So if you are like me and were completely in the dark about steamers and you want something a little different than Hot Cocoa... try a steamer. Look for Torani's in your store or visit their website. No, they are not compensating me for this...just feeding my new addiction. I am almost ashamed to post this easy recipe. Here goes:
8 oz Milk (Skim, Whole, Almond...)
2-3 Tbs. Torani's Pumpkin Spice Syrup or if you have a fancy dispenser (which they sell), 3 squirts
Whipped Cream (optional)
Heat milk to steaming hot. Making sure not to burn yourself. I'll be honest here... you could microwave it and it does work but heating it on the stove top and letting it steep a little, is so much better. I don't know why. There is probably some scientific explanation... but I am not a scientist. Add in your syrup to your liking. Now you could take the time to whip it and froth it but I don't... I am not that patient. That's it. I know. Simple. Try it, you will thank me later. Tastes like pumpkin pie in a glass..with fewer calories. :)
Monday, October 29, 2012
Goulish Punch
Because last week was a crap shoot at getting anything posted...I thought I had better get moving today. Halloween is Wednesday. I can't believe it. It seems like October flew by. The older I get, time just flies much faster. Maybe it is the sleep deprivation. Who knows. At any rate.... The holiday season is fast approaching and that to me is just overwhelming to think about. Let's just stick to the holiday at hand shall we. Then I can stick my head in the sand for the next few weeks, panic at the last minute then run around stressed out. I think I may have gotten off track here.
I wanted to do a Halloween recipe. Even though you all probably had a party this past weekend. We usually do chili every Halloween. That is because it is usually cold and a little snowy here. Not this year...they are forecasting highs in the 70's. I may try a chicken tortilla soup this year instead. Not that it matters, the kiddos will complain anyway. Today I am doing a punch. Goulish Punch to be exact. The recipe and photo are from Kraft.

Goulish Punch
2 cups boiling water
1 package (8-serving size) JELL-O Brand Lime Flavor Gelatin
2 cups cold orange juice
1 bottle (1 liter) seltzer, chilled
Ice cubes
1 pint (2 cups) orange sherbet, slightly softened
1 orange, thinly sliced
1 lime, thinly sliced
STIR boiling water into dry gelatin in large bowl at least 2 minutes until completely dissolved. Stir in juice. Cool to room temperature.
POUR into punch bowl just before serving. Add seltzer and ice; stir.
ADD scoops of sherbet and fruit slices.
Great Substitute
Substitute 2 packages (4-serving size each) JELL-O Brand Lime Flavor Gelatin for the 1 package (8-serving size) gelatin.
Great Substitute
Substitute club soda for the seltzer.
Thursday, October 25, 2012
Chicken Pot Pie Soup
I am so sorry that I haven't written a post in like FOREVER. This having 5 kids thing is kicking my OCD butt. I try to be organized and at some things, I succeed but it is the little things..like going to the grocery store, taking a shower and stuff like that...I FORGET everything. Today I forgot the main ingredient for dinner. Luckily, I was able to improvise. In all fairness, I don't forget to shower..I just can't seem to sneak away to get it done until late in the day. I would like to think that as they get older...it will get easier but I know that won't be the case. Enjoy the moment..that is all I can do. Yep, enjoy shampooing the carpet more often than I vacuum. Enjoy stepping on and over every ones shoes, books, toys movies, etc. Truth is, one day real soon, they will all be gone. They will have moved out and moved on with their lives. I won't be stepping over anything, well besides my husbands shoes, books and....well...NEVER MIND. The point is...I will miss it.
It officially soup weather around here. It snowed today. It was whimpy but it did snow. This soup will leave you feeling warm and fuzzy all over. The picture and recipe are from McCormick. Remember recipes are suggestions..add or replace what you like. I always say, Make a recipe the way it was written the first time you make it so that you know how it tastes...then tweak it and make it your own after. I hope that made sense..my mornings have began at 3 am the last few days..BTW that is one thing I will not miss. :) Enjoy!
Chicken Pot Pie Soup
1 1/2 teaspoons McCormick® Rosemary Leaves, crushed
1 1/2 teaspoons McCormick® Thyme Leaves
1 teaspoon McCormick® Garlic Powder
4 teaspoons butter, divided
1 package (8 ounces) mushrooms, sliced
1 cup sliced carrots
1/2 cup flour
4 cups reduced sodium chicken broth
1 1/2 cups frozen pearl onions
1 pound boneless skinless chicken thighs, cut into 1-inch pieces
1 cup frozen peas
8 thin bread slices
1 teaspoon oil
1. Mix rosemary, thyme and garlic powder in small bowl. Reserve 1/2 teaspoon. Heat 1 teaspoon of the butter in large saucepan on medium heat. Add mushrooms, carrots and remaining seasoning
mixture; cook and stir 3 minutes. Remove from saucepan. Set aside. Melt remaining 3 teaspoons butter in saucepan on medium heat, stirring to release browned bits from bottom of skillet. Sprinkle with flour; cook and stir 3 to 4 minutes or until flour is lightly browned.
2. Gradually stir in broth until well blended. Bring to boil. Reduce heat to low; simmer 10 minutes or until slightly thickened, stirring occasionally. Add vegetable mixture, chicken, pearl onions and
peas; simmer 8 minutes or until chicken is cooked through, stirring occasionally.
3. Meanwhile, preheat oven to 350°F. Cut bread into rounds with 3-inch cookie cutter. Place on baking sheet. Brush bread with oil and sprinkle with reserved seasoning mixture. Bake 10 minutes
or until toasted. To serve soup, ladle into soup bowls and top each with 1 crouton.

Saturday, October 13, 2012
Learning to love the reflection in the mirror

So, for those of you that know me, I am fairly outgoing. I love to make people laugh and have a good time. But, inside, I still feel like that little girl that lived in a run down old house at the end of a dead end road. In my mind I still reek of cigarette smoke, my hair is messy and my clothes are less than sub par. My shoes are worn out and there are holes in my socks. Chances are my tummy is rumbling a little too. I am not sure I will ever escape that feeling. Back in the day, it was all I knew. I was never made fun of in school and I had quite a few friends. The feelings came from inside. The self doubt and criticism started early.
We were poor..true. However, when I look back my mother always had nice clothes, her nails were done, here hair was primped and her make up perfect. How was it that this little girl of hers never felt like she mattered enough to look beautiful. Maybe my mother tried to do my hair and I squawked who knows. Don't get me wrong, I know that she did the best she could do...for us and for her but I can't help but wonder if things would have been different maybe, I wouldn't still feel like an outcast.
As I got older, she wanted to do my nails and girly stuff like that but it was just not something that I liked and it seemed like it was just another wedge that was driven between us. After all, I was her only daughter, I should have enjoyed primping I guess. Don't get me wrong I like to get my make up on and have my hair done...but I still feel so out of place. When my hair is curled, I feel like a mutant or something. Like I am not deserving of feeling beautiful. When it comes to my clothes...I tend to dress blah. I prefer to blend in instead of standing out. Compliments make me want to crawl into a hole and hide. I am aware of this and I try to be polite. I heard once that if you criticize someone especially a child, it gets burned into their memory and for every positive that they hear, the negative self talk loops and repeats at least ten times. My mother was NEVER verbally critical of me. Although, I don't really remember her praising me either. Maybe I reminded her of my bio father and for that, she couldn't stand me. (Probably not but that is how I felt) My grandmother on the other hand, as I have said before, was VERY critical. Not just of me but of all of us. It really hurt me back then. Truth be told, it really hurts me now. I think for her, it came from her own low self esteem.
So how do I change it? How can I make me feel better for ME? How do I not repeat the same mistakes as my mother? Of course there is the obvious things like washing their clothes, and combing their hair while letting them explore their own individuality. I don't want my kids to live a cookie cutter life and have to always fit in. I do however, want them to be comfortable in their own skin. Know just how beautiful they are. Praise my kids. Love their differences. Do my best to take care of them both physically and spiritually. Make sure their cup always feels full. Let each of them know just how beautiful they are...differences and all. Let them know that it is OK to br their own kind of beautiful and truly love the person they see when they look in the mirror. Teaching them of course that true beauty starts from within. Because lets face it, you can be a supermodel on the outside but if you don't feel like it on the inside, your true beauty will never be seen.
Thursday, October 11, 2012
Goulash
Here's the thing....I don't really like Goulash. Now let me say, that this recipe is good but it is not something that I PREFER. I ate it way too often when I was a kid. I mean let's face it. It is cheap to make and makes a ton. It is filling and to most people it is a comfort food. To a mom on States assistance...it worked rather nicely. I rarely make the same recipe for this soup twice. I use the same base ingredients and then change up the spices. This is my daughter Graces, favorite meal. So I try and accommodate her once a month. I am going to share the recipe that I usually use for her. My mother made this with no spices. Just the tomato juice, beef and the peppers and onions. Give it a try! Most of my kids eat it and that in and of itself deserves an award. Now I would prefer to use actual canned tomatoes for a chunkier soup but..whatever. Recipes are merely suggestions right?! Keep in mind, if there is a particular spice that you don't like or that you love more than others...adjust the recipe. Nothing is written in stone when it comes to cooking.
Goulash
1lb ground beef
1 onion diced (I usually use yellow or white but you can use what you have on hand)
1 each green and red bell pepper or whatever you have on hand (I have used orange and yellow as well)
Splash or two of Worcestershire sauce
1 lb. macaroni
1 large can tomato juice
2 tsp. chili powder
2-3 bay leaves
1-2 Tbs. Italian Seasoning
1 tsp. cumin (I love cumin)
1/2 tsp-1 tsp garlic powder
salt and pepper to taste
2-3 Tbs. butter (optional)
shredded cheddar, mozzarella or Monterey Jack (totally optional but so worth it)
red pepper flakes (optional)
Brown the beef, onion and peppers together. In the meantime, start cooking your macaroni. Add the spices, Worcestershire sauce and tomato juice to your beef. Let simmer while macaroni cooks. I like the sauce to reduce just a bit. Also, letting the bay leaves release some of their goodness. Drain off your pasta. Remove bay leaves then add your sauce to the pasta. Add in your butter and heat through. Add some grated cheese to your bowls and serve up.
Sunday, September 30, 2012
No Knead Sticky Buns
It has been a long weekend for me. After giving birth to my son a few months back, I found a lump in my abdomen. I attributed it to my body trying to get back to normal but it has yet to go away. Needless to say, after a doctor visit and a CT scan, I discovered that I have a hernia as well as gallstones! YAY ME! Sigh! Not sure when I will find time to fit that in but..whatever. I have decided the children owe me big time when they are older :) At any rate..on to the food...
Because I have an obsession with searching for recipes....many many recipes, I have stumbled on many beautiful food blogs and websites. Last night was no exception. The photographs were amazing. The recipes sounded divine. The only problem I had was deciding which one to share. I decided on something sweet because those seem to be the most popular. Also, if I could have afforded to go to school to be a pastry chef, I think I would have. These wonderful photo and recipe comes from a beautiful website called merelymarie. It is a beautiful site and these look absolutely sinful. Yummy! Best part...no kneading. All of the gooeyness and a lot less work! It is a win win! Have a great week friends!

No Knead Sticky Buns
DOUGH
6 3/4 cups or 7 3/4 cups Unbleached All-Purpose Flour
1 tablespoon + 1/2 teaspoon salt
1 1/2 tablespoons instant yeast
1 3/4 cups lukewarm water
4 large eggs
1/2 cup honey
1/2 cup melted butter
FILLING
2/3 cup granulated sugar
1 tablespoon ground cinnamon
TOPPING
3 tablespoons butter, melted
2 tablespoons honey
1/3 cup + 3 tablespoons of brown sugar
2/3 cup pecan halves or coarsely chopped pecans
1) The flour/liquid ratio is important in this recipe. If you measure flour by sprinkling it into your measuring cup, then gently sweeping off the excess, use 7 3/4 cups. If you measure flour by dipping your cup into the canister, then sweeping off the excess, use 6 3/4 cups. Most accurate of all, and guaranteed to give you the best results, if you measure flour by weight, use 33 ounces.
2) To make the dough: Combine all of the dough ingredients, in the order written, in a very large bowl (at least 6 quarts). Stir to make a sticky dough. You can do this in a stand mixer and then transfer to a larger bowl; or simply use a big bowl and spoon (or dough whisk).
3) Cover the bowl, and let the dough rise for 2 hours at cool room temperature.
4) Refrigerate the dough for at least several hours, to chill it and make it easier to work with. It can be refrigerated for up to 3 days before using.
5) When you’re ready to make sticky buns, make the filling. Combine the sugar & cinnamon. Set aside.
6) To make the topping: Spread the melted butter and honey in a lightly greased 9″ round cake pan. Sprinkle the sugar atop the butter, then scatter the nuts atop the sugar. Set aside.
7) To make sticky buns: Spray your hand with non-stick vegetable oil spray, and dip it into the dough in the bucket. Pinch off/pull out 1/3 of the dough; this is about the size of a large softball or a large grapefruit, a scant 22 ounces. For best accuracy, weigh on a scale. Place the remaining dough back in the refrigerator, to use another time. Or wrap and store in the freezer. This dough recipe is enough to make three 8″ or 9″ round pans of sticky buns.
8) Transfer the dough to a floured work surface, and roll it into a rectangle approximately 15″ x 10″.
9) Spread the filling over the dough, leaving a narrow margin around the edges uncovered.
10) Starting with a long edge, gently roll the dough into a log. Don’t roll it too tightly; if you do, the centers of the buns will pop up as they bake.
11) Cut the log into 8 pieces. (I usually cut it into 12 pieces, to fit my 9 by 13 inch baking pan)
12) Space the buns in the pan. Lightly press each down till they’re touching one another.
13) Cover the pan, and allow the buns to rise till they’re quite puffy, about 1 hour. Towards the end of the rising time, preheat the oven to 350°F.
14) Uncover the pan, and bake the buns for 40 to 45 minutes, till they’re a deep golden brown.
15) Remove the pan from the oven, and turn it over onto a piece of parchment, or onto a cooling rack set over a piece of parchment or waxed paper (to catch any drips).
16) Lift off the pan, and scrape any nuts or sugar in the pan onto the buns. Then, allow to cool for a few minutes.
Devour! Immediately.
Tuesday, September 25, 2012
Salted Caramel Rice Krispie Treats
I had time to write a quick personal post today but wanted to get at least one recipe up for the week. Rice Krispie Treats...What can I say about them? Besides that they are delicious. Salted Caramel...what can I say about salted caramel? LOVE IT! Combine the two and you have got one slice of heaven let me tell you! Pots and Pins had this beautiful picture and this divine recipe. I stumbled on her lovely website and was immediately smitten with this recipe. The key here is to cook the caramel until it gets to the right temperature or it will be runny...delicious but runny. Yeah you could use store bought sauce but why? Homemade caramel is a snap, if you follow the directions. Thank you for killing my post baby weight loss Pots and Pins :) Oh well...tomorrow is another day! If you get a chance stop by and visit her website. Both the photo and recipe are from her site. www.potsandpins.com

Salted Caramel Rice Krispie Treats
(You could also add chocolate or butterscotch chips to the Rice Krispies Treats, or sprinkle chocolate chips on top of the hot caramel before sprinkling with salt...fancy them up all you want, they are dang good...five dangs on the ol' meter!!)
Rice Krispies Treats:
3 tablespoons butter1 package (10 oz.) regular marshmallows or 4 cups of mini-marshmallows
*6 cups Rice Krispies
Caramel:
2 cups white sugar
1 1/2 cups corn syrup
2 cups heavy cream
1 cup butter
1 teaspoon vanilla extract
Coarse Sea Salt for sprinkling on top
Butter a 9x13-inch baking dish. In a large pan, over medium-low heat, melt butter. Add marshmallows and stir until completely melted. Pour in Rice Krispies and stir until evenly coated. Scoop Rice Krispies mixture into prepared baking dish and using a lightly buttered spatula or buttered fingers, press Rice Krispies down firmly into baking dish.
Make Caramel: In a large (mixture will bubble up so use a large pan!), heavy-bottomed pan, combine sugar, corn syrup, 1 cup of cream and butter. Stirring often, bring to a boil, over medium heat, then pour in remaining cup of cream. Heat, without stirring to 242 degrees (soft ball stage) or until a small abount of syrup dropped into cold water forms a firm but pliable ball when removed from water. (Using a candy thermometer is a really good idea, but if you don't have one, make sure to do the cold water test and the "ball" needs to hold it's shape but still be pliable for the caramel to set up right.) This will take about 20 minutes or so, watch so it doesn't boil over. Remove from heat, stir in vanilla. Immediately pour over Rice Krispies. Some of the Rice Krispies will float to the top and some bubbles will appear, just pop with a fork. Let caramel set for about 3 minutes then sprinkle with coarse sea salt. Allow caramel to cool completely, then cut into bars, squares or however big or small you want. I cut mine into 3-inch squares, wrapped them individually in waxed paper and tied them with a string, all in an attempt to make them harder for me to eat...didn't slow me down one bit!
*For your chocolate lovers out there, substitute Cocoa Krispies or make a batch that's half and half...dang good!
Where, O where has my privacy gone?!
I am writing today about something that I have lost...no, not my marbles (everyone knows they have been gone for years). PRIVACY! Yep! I have none! Zilch! NADA! Remember the days that going to the bathroom was a personal matter? Well...that my friends, is long gone! Going to a public restroom gives me more privacy than my own home and if you are a mom..you can relate. Look, I will give you an example. Just today, I had dropped my Kindergartner off to school, the older two were still in school. That left the 3 year old and the baby. Not that difficult right?! Well... I was finally able to get into the tub. Now I wasn't expecting a Calgon bath, a nice relaxing 2 minute scrub was all I asked for. What did I get? A 4 month old SCREAMING in his car seat at the top of his lungs in the door way and the three year old standing next to the tub throwing in his tub toys while playing with his latest Happy Meal toy that spins around and flies off the base, which by the way. also became a tub toy.
It's not just bath time either, using the restroom is exactly the same. I can pinpoint the exact moment I lost privacy in this area. Lets see we adopted Marisa almost 9 years ago...IT HAS BEEN NINE YEARS since I have been able to take care of "paperwork" without an audience. It never fails.I go into the bathroom and before I even undo my pants....someone is at the door. "Can you brush my hair, sign this paper, give me a hug, wipe my nose, paint my nails, put the lid on my cup, grade my homework, answer the phone, and my favorite.. make a sandwich, I brought you the stuff.".. because the bathroom is a great place to make a sandwich ?!? Really? None of this could wait until I finished? I should have known, considering after I gave birth to Grace I had nurses and doctors down in an area that I preferred to keep personal and private. That my friends was just a precursor of things to come. It was preparing me for life as a mother.NOTHING is sacred or private. I may as well have my bathroom in a fish bowl. I what you all are thinking..lock the door. My older children can pick the lock and the younger...well they just sit outside the door pushing their little fingers under the door trying to peek inside. I know all of the optimists will say that one day the house will be quiet, I will soon wonder where everyone is....yes I know... but until then, I will continue to dream of a peaceful and serene bathroom or at least an out house where I can have a moments peace. A place where I can have a 3 MINUTE bath and quite possibly be able to sit on the commode and finish without being interrupted. Hey...A girl can dream can't she?!
Monday, September 17, 2012
Chicken Tinga
I am always on the look out for new recipes. My husband LOVES Mexican food. So when I stumbled on this recipe...I knew I HAD to make it. A friend told me of a neighbor that had made Chicken Tinga for her but I had never heard of it. I researched it a little and found this recipe. Now, this isn't the recipe that my friend spoke of but man oh man....yumm! The recipe and photo are from Muy Bueno Cookbook. My eternal thanks to her. Yumm! If you think that it would be too spicy with a full can of chipotle peppers you can use half. Really though...the tomatoes DO balance it out. Did I say Yumm before?! Have a great week my friends! Enjoy!

Chicken Tinga

Chicken Tinga
Yield: 10 to 12 servings
Ingredients:
6 cups water
2 pounds skinless/boneless chicken breast
4 teaspoons salt, divided
1 clove garlic
1 medium yellow onion, quartered
1 large vine ripened tomato, quartered
1 (7-ounce) can chipotle peppers in adobo sauce
1/4 cup canola oil
1 large yellow onion, chopped
3 large vine ripened tomatoes, chopped
1 clove garlic, chopped
12 Flat tostada shells, packaged or corn tortillas
Toppings (optional)
1 iceberg lettuce, finely shredded
3 avocados, pitted, peeled, and sliced
2 cups crema Mexicana or sour cream
2 cups queso fresco or Cotija, crumbled
2 cups salsa of your choice
6 radishes, sliced
Directions:
In a large stockpot, over medium to high heat, add water, chicken, 2 teaspoons salt, 1 clove garlic, and quartered onion. Cover and simmer for about 30 minutes. Reserve.
Remove the chicken and allow it to cool. After the chicken cools off shred it. Reserve.
In a blender add the boiled onion and garlic clove, quartered tomato, chipotle peppers including adobo sauce, 2 teaspoons salt, and enough chicken broth to fill the blender half way. Puree until smooth.
Heat the oil in a large and deep pan over medium heat.
Once it is hot but not smoking, stir in the chopped onion and cook until soft and translucent, about 2 minutes.
Add chopped tomatoes and chopped garlic and cook for an additional 2 minutes.
Add the cooked shredded chicken, the chipotle sauce from the blender and more chicken broth if it is too dry. Bring to a boil, reduce heat and simmer for 10 minutes.
Add salt to taste.
Tostadas
In a heavy skillet heat one-quarter inch of oil. Drop tortillas carefully into hot oil, one at a time, for 20 to 40 seconds on each side or until crisp and golden. Drain on paper towels. Store bought tostadas can also be used.
Assemble
To assemble, place a tostada (fried tortilla) on a serving plate; spoon on Chicken Tinga, lettuce (optional), 1 or 2 slices of ripe avocado, crumbled queso fresco, and top with crema Mexicana or sour cream.
Garnish tostada with toppings of your choice
Monday, September 10, 2012
Light and Fluffy Pumpkin Pancakes
For some reason my backgrounds are having a difficult time loading. I am sorry. Not sure where the problem lies. Hopefully it gets fixed soon.
Seems like I am struggling just as much with the kids in school as I was with them all home. I just can't find my free time to get my blog updated and I was doing so good too. I guess a new baby does that. I am hoping that it will all begin to mellow out soon and that I will get myself back on a schedule. Of course it didn't help that my entire family had a cold already cycle through the house..including the baby. I am always running between here and the school and my sweet husbands schedule or lack thereof at his new job doesn't help either. I promise I will try and be better.
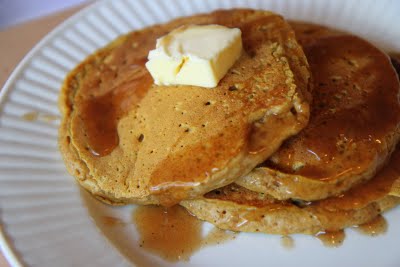
With Fall just around the corner I love to fill my house with the smells of simmering soups and slow cooked meals. Autumn is my favorite season. The crisp nights and all of the beautiful colors that surround us. Pumpkin is one smell that just screams Fall to me. My hubby really isn't a fan of anything pumpkin except for maybe a sliver of pumpkin pie on Thanksgiving but that is it. I know..he is some sort of mutant. I try and stock up on canned pumpkin before it becomes scarce in the store. Which happens pretty soon around here. I found this recipe for light and fluffy pumpkin pancakes. With a drizzle of maple syrup this would be divine on an Autumn morning. Maybe even throw in some mini chocolate chips. DELICIOUS! The recipe and photo are from momadvice.

Light and Fluffy Pumpkin Pancakes
1 1/4 cups all-purpose flour
2 tablespoons sugar
2 teaspoons baking powder
1/2 teaspoon cinnamon
1/2 teaspoon ginger
1/2 teaspoon nutmeg
1/2 teaspoon salt
1 pinch clove
1 1/4 cup low-fat milk
1/3 cup canned pumpkin puree
2 tablespoons melted butter
1 egg
mini chocolate chips (as per my addition)
Whisk flour, sugar, baking powder, spices and salt in a bowl. In a separate bowl whisk together milk, pumpkin, melted butter, and egg. Fold mixture into dry ingredients. Spray or grease a skillet and heat over medium heat: pour in 1/4 cup batter for each pancake. Cook pancakes about 3 minutes per side. This recipe makes six 6-inch pancakes.
***Side Note- This can easily be doubled and frozen or stored in the refrigerator for a great breakfast later in the week.
Seems like I am struggling just as much with the kids in school as I was with them all home. I just can't find my free time to get my blog updated and I was doing so good too. I guess a new baby does that. I am hoping that it will all begin to mellow out soon and that I will get myself back on a schedule. Of course it didn't help that my entire family had a cold already cycle through the house..including the baby. I am always running between here and the school and my sweet husbands schedule or lack thereof at his new job doesn't help either. I promise I will try and be better.
With Fall just around the corner I love to fill my house with the smells of simmering soups and slow cooked meals. Autumn is my favorite season. The crisp nights and all of the beautiful colors that surround us. Pumpkin is one smell that just screams Fall to me. My hubby really isn't a fan of anything pumpkin except for maybe a sliver of pumpkin pie on Thanksgiving but that is it. I know..he is some sort of mutant. I try and stock up on canned pumpkin before it becomes scarce in the store. Which happens pretty soon around here. I found this recipe for light and fluffy pumpkin pancakes. With a drizzle of maple syrup this would be divine on an Autumn morning. Maybe even throw in some mini chocolate chips. DELICIOUS! The recipe and photo are from momadvice.
Light and Fluffy Pumpkin Pancakes
1 1/4 cups all-purpose flour
2 tablespoons sugar
2 teaspoons baking powder
1/2 teaspoon cinnamon
1/2 teaspoon ginger
1/2 teaspoon nutmeg
1/2 teaspoon salt
1 pinch clove
1 1/4 cup low-fat milk
1/3 cup canned pumpkin puree
2 tablespoons melted butter
1 egg
mini chocolate chips (as per my addition)
Whisk flour, sugar, baking powder, spices and salt in a bowl. In a separate bowl whisk together milk, pumpkin, melted butter, and egg. Fold mixture into dry ingredients. Spray or grease a skillet and heat over medium heat: pour in 1/4 cup batter for each pancake. Cook pancakes about 3 minutes per side. This recipe makes six 6-inch pancakes.
***Side Note- This can easily be doubled and frozen or stored in the refrigerator for a great breakfast later in the week.
Thursday, September 6, 2012
Milky Way Brownies
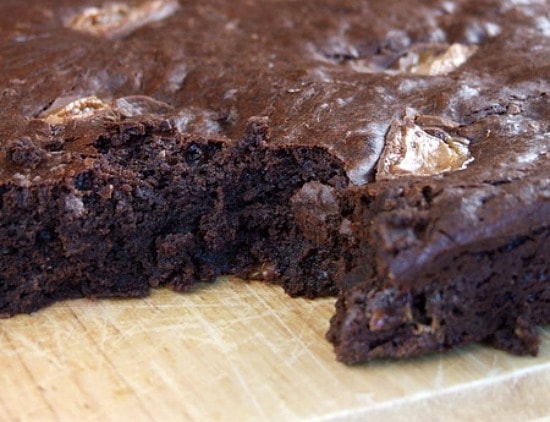
So here's the thing...I could eat my weight in Milky Way candy bars...every day. I love the things. Especially when they are right out of the fridge or freezer. Yummm! I never crave any junk food while I am pregnant. Just ice. I had my baby just 3 months ago and just like the previous three postpartum times... I crave CHOCOLATE! Normally, I don't eat a lot of chocolate. For some reason, after a baby.... I CANNOT get enough of the stuff. While looking for new ways to feed my love/hate relationship with chocolate, I stumbled on these Milky Way Brownies by recipe girl. The photo and recipe are from her beautiful site. Can you imagine the possibilities? You could chop up any candy bar and create your own dessert. But, to be honest, she had me at Milky Way. MmmMMmmm! I wouldn't have the patience to put them in the fridge and wait. I would want them gooey with a scoop of ice cream.

Milky Way Brownies

Milky Way Brownies
1 pound (4 sticks) unsalted butter, cut into pieces
1 pound semi-sweet chocolate chips (or chopped chocolate)
6 ounces unsweetened chocolate, chopped
2 Tablespoons instant espresso powder
7 large eggs
2 Tablespoons vanilla extract
2 1/4 cups granulated white sugar
1 1/4 cups all-purpose flour
1 Tablespoon baking powder
1 teaspoon salt
12 ounces miniature Milky Way Bars, chopped
1 full-size Milky Way Bar, sliced thinly
Directions:
1. Preheat oven to 350°F. Butter and flour 12x18x1-inch pan. Line with foil or parchment that hangs over the sides for ease in getting them out (butter the foil/parchment).
2. In a heatproof, medium-bowl set over a saucepan of simmering water, heat butter, and chocolates until melted and smooth; cool slightly.
3. In a large bowl, whisk together the eggs, espresso powder, vanilla and sugar. Stir the egg mixture into the slightly cooled chocolate mixture. Cool to room temperature.
4. In a medium bowl, sift together flour, baking powder, and salt, then add to batter. Stir chopped mini Milky Way bars into chocolate mixture. Then pour into prepared baking pan and smooth top with a rubber spatula. Place slices of the full-size Milky Way Bar onto the top of the brownie batter.
5. Bake for 25 to 35 minutes, or until toothpick inserted in center comes out clean with a few crumbs attached; do not overbake! Let cool completely, then cover tightly and chill overnight. Chilled brownies are easier to cut.
Tips:
*These taste better the second day.
*If it's a warm day inside your house, you might consider chilling the Milky Way bars before you try to cut them.
Monday, August 27, 2012
Frozen Strawberry Lemonade
I wish I would have taken a picture of my frozen concoction yesterday but they were devoured before I could get the camera out. I will make them again soon and take some pictures...until then you all will have to use your imaginations on what it looks like. It was a simple frozen lemonade recipe from my grandmother that I tweaked just a little. I used some fresh strawberries that I had frozen awhile back. You could use raspberries, blueberries or whatever else you could think of. You have to try this. The strawberries added an added sweetness that can't be beat. I got my lemons from Costco, so they were large lemons. Here's a picture.....as you can tell...I am not a photographer. :)
Frozen Strawberry Lemonade
Juice of 4 lemons (mine were fairly large lemons)
1 1/2 c to 2 cups sugar (start with less and adjust if necessary)
ice
water
frozen strawberries (I used about 5 berries)
Juice the lemons and add to blender. Add in your sugar. Fill lender with ice then add enough water to fill blender. Blend until ice is slushy. Add in your berries and pulse until blended. This made four 12 oz glasses. This drink is great with out the berries as well. So refreshing on a hot summer day.
Friday, August 24, 2012
No Roll Mexican Rice Enchiladas
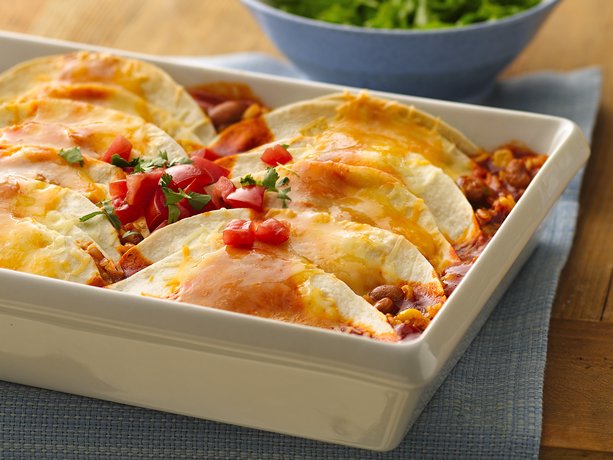
We love Mexican style food at our house. Any new recipe is a welcome addition to my recipe box. This recipe from Betty Crocker is so versatile that you could add chicken, turkey or beef (although I would prefer the meatless version). You could customize the rice to whatever you had on hand. I used regular rice and added a can of Mexican style tomatoes to cook the rice in. I also prefer black beans. If you love Mexican food, give these a try. The photo and recipe are from Betty Crocker.

No-Roll Mexican Rice Enchiladas
1 box (6.4 oz) rice and vermicelli mix with Spanish seasonings
2 tablespoons butter or margarine
2 1/4 cups water
1 can (19 oz) Old El Paso® mild enchilada sauce
1 can (16 oz) pinto beans, drained, rinsed
1 can (11 oz) Green Giant® SteamCrisp® Southwestern style corn, drained
1 package (8.2 oz) flour tortillas for soft tacos & fajitas (ten 6-inch tortillas)
2 cups finely shredded Mexican cheese blend (8 oz)
Spray 13x9-inch (3-quart) glass baking dish with cooking spray. In 12-inch nonstick skillet, cook rice and vermicelli with butter over medium heat until rice mixture is golden brown, stirring frequently. Stir in water and seasoning mix from rice box. Heat to boiling. Cover; reduce heat to low. Cook 15 to 20 minutes or until rice mixture is tender. Stir in 1/2 cup of the enchilada sauce, the pinto beans and corn. Heat oven to 350°F. Place about 1/2 cup rice mixture on center of each tortilla; top rice mixture in each tortilla with about 1 tablespoon of the cheese. Fold each in half. Arrange tortillas in 2 rows of 5 in baking dish, placing tortillas open end up, slanting and overlapping. Pour remaining enchilada sauce evenly over enchiladas. Cover tightly with foil.
Bake 30 to 35 minutes or until hot and sauce begins to bubble. Uncover; sprinkle with remaining cheese. Bake uncovered about 5 minutes longer or until cheese is melted.
Tips****
*Enchiladas can be assembled earlier in the day. Pour the enchilada sauce over the enchiladas just before baking. Refrigerate enchiladas and sauce until just before baking. Enchiladas may need to bake 5 to 10 minutes longer.
*One can (15.25 oz) Green Giant® whole kernel sweet corn, drained, can be used instead of the Southwestern style corn. One can (15 oz) black beans, drained and rinsed, can be used in place of the pinto beans.
*One and a half cups finely chopped cooked chicken can be used in place of the beans.
Monday, August 20, 2012
Zucchini Oat Dark Chocolate Chip Cookies
This has been one LONG hot summer. The weather has been unseasonably warm and we have had more than our shares of wildfires. It has been so dry. To top that off we have a new baby and my husband started a new job. He will normally work the day shift but has been on grave shift for almost two months. It has not been easy keeping 5 children quiet while my husband tries to sleep. It threw a wrench in the entire summer. I am so thankful for him and I am thankful for his job but oh how I loathe grave shift. The kids go back to school tomorrow and they are excited....not as excited as their mother but excited. Coincidentally, my husband is now off grave shift. Life will be getting back to "normal"...I hope. I thought I would brave church yesterday with all 5 kids. I have never had so many people give me that "I feel for you" look. But, we made it....and that's all that counts. Small blessings!
Are you being over run with zucchini? It is that time of year when people are scrambling trying to figure out what else they could possibly make with zucchini. I stumbled on this recipe at Tollhouse and was intrigued. I love squash of all kinds..my hubby, doesn't prefer squash. I try and sneak it in when at all possible. Loaded with fiber and vitamins it makes it well worth it. Now here's the thing If you are making theses you need to have it grated pretty fine or you need to peel it. My food processor gates pretty coarsely and I was pretty much flossing with the zucchini. This cookie incorporates oats which adds a great texture, along with some spices (I added nutmeg and cloves) and dark chocolate but you could use whatever chocolate you have on hand. Photo and recipe are from Tollhouse.

Zucchini Oat Dark Chocolate Chip Cookies
1/4 tsp. ground nutmeg
1/4 tsp. ground cloves
1/2 teaspoon baking soda
1/2 cup (1 stick) butter, softened
3/4 cup granulated sugar
1 large egg
3/4 teaspoon vanilla extract
1 1/2 cups shredded zucchini (1 medium)
1 cup quick oats
1 cup chopped nuts
1 2/3 cups (10-oz. pkg.) NESTLÉ® TOLL HOUSE® Dark Chocolate Morsels
Are you being over run with zucchini? It is that time of year when people are scrambling trying to figure out what else they could possibly make with zucchini. I stumbled on this recipe at Tollhouse and was intrigued. I love squash of all kinds..my hubby, doesn't prefer squash. I try and sneak it in when at all possible. Loaded with fiber and vitamins it makes it well worth it. Now here's the thing If you are making theses you need to have it grated pretty fine or you need to peel it. My food processor gates pretty coarsely and I was pretty much flossing with the zucchini. This cookie incorporates oats which adds a great texture, along with some spices (I added nutmeg and cloves) and dark chocolate but you could use whatever chocolate you have on hand. Photo and recipe are from Tollhouse.

Zucchini Oat Dark Chocolate Chip Cookies
1 1/2 cups all-purpose flour
1 teaspoon ground cinnamon1/4 tsp. ground nutmeg
1/4 tsp. ground cloves
1/2 teaspoon baking soda
1/2 cup (1 stick) butter, softened
3/4 cup granulated sugar
1 large egg
3/4 teaspoon vanilla extract
1 1/2 cups shredded zucchini (1 medium)
1 cup quick oats
1 cup chopped nuts
1 2/3 cups (10-oz. pkg.) NESTLÉ® TOLL HOUSE® Dark Chocolate Morsels
PREHEAT oven to 350° F. Lightly grease baking sheets.
COMBINE flour, cinnamon, nutmeg, cloves and baking soda in small bowl. Beat butter, sugar in large mixer bowl until well combined. Add egg and vanilla extract, beat well. Add zucchini; gradually beat in flour mixture. Stir in oats, nuts and morsels. Drop by rounded teaspoon 2 inches apart onto prepared baking sheets.
BAKE for 9 to 11 minutes or until light golden brown around edges. Cool on baking sheets for 2 minutes; remove to wire rack to cool completely. Store in tightly covered container at room temperature.
Monday, August 13, 2012
Fresh Apricot Syrup
Back when I was young and carefree....a LONG time ago, my grandparents had an apricot tree. That tree produced HUGE apricots. My grandmother would make homemade apricot jam. I loved to help her. I was about 3 years old and I had her recipe memorized. I can remember sitting on the counter at their little farmhouse helping her. I suppose my love for cooking started way back then. The best thing about homemade jams and syrups is that you can control the sugar. I love a little bit of tang to my apricot jam. Another memory of my grandmother and apricots...many years later when I was in high school, she would make french toast for me....everyday.Topped with apricot syrup. I appreciated her making me breakfast but at about the halfway point in the school year, I had to tell her that I just couldn't handle french toast one more day. The tree has been cut down for a long time but the memories that came from the fruit that it produced are priceless. Interestingly enough...french toast remains my favorite breakfast and apricot jam and syrup is still my fave as well. Just not everyday.
This recipe and photo come from Grandmas Kitchen not my grandmas but someones grandma. After all, don't grandmas know best?!

Fresh Apricot Syrup
3 tablespoons fresh lemon juice
This recipe and photo come from Grandmas Kitchen not my grandmas but someones grandma. After all, don't grandmas know best?!

Fresh Apricot Syrup
5 1/2 pounds apricots
1 cup water3 tablespoons fresh lemon juice
4 cups granulated sugar
Peel the apricots. Cut in half and remove the pits. Process apricots in a blender until pureed.Combine apricot puree, water and lemon juice in a large saucepan. Bring to a boil over medium-high heat, stirring frequently. Add granulated sugar to apricot mixture and stir until sugar is dissolved. Bring to a boil. Boil for 10 minutes; remove from heat. Skim foam from surface and discard. Spoon syrup into 4 hot sterilized 1-pint jars, leaving 1/2-inch headspace. Seal with 2-piece lids. Process in hot water bath for 5 minutes. Makes 4 (1-pint) jars. Serve over waffles, pancakes, pound cake or ice cream.
Friday, August 10, 2012
PW's Good Morning Muffins
School is starting soon. Am I the only mama doing the happy dance? The kids are bored and are ready to go back and I am ready to get my life back on a schedule and have a few hours of breathing room. Maddox starts Kindergarten this year which is always bittersweet. I try and hold back tears until after they have gone into their class. That way I am the only one that is traumatized by the fact that my baby is growing up too fast. That being said, WAHOOO! I love them but I love them even more when I get a break from them. Not to mention the grocery shopping will be a little..OK a lot easier. It has been a crazy summer, new baby, hubby has a new job and has been working shift work (hopefully that will stop and he will get a set schedule..graves are NOT fun for anyone). I hope your summer has been going well and that you are enjoying these last few weeks.
My kids all LOVE muffins for breakfast. Blueberry, Cinnamon, Chocolate Chip...it doesn't matter to them. Not the healthiest breakfast around I know but once a week I let them splurge. When I don't feel like making muffins or I don't have the time I usually pull some gigantic muffins out of the freezer that we bought at Costco. I can split those babies in half easily. As you all know I have a mild obsession with Ree Drummond. I love her. My fave Saturday morning pastime is watching her cooking show. Although, I have helpers usually..thank goodness for DVR is all I have to say. She inspires me to cook, to be more self sufficient, be a better mother and enjoy life. If I am in need of a good recipe, I go to her cookbooks or her website. These muffins look beautiful and taste delicious. A big thank you to PW for the great recipes. The photo is from Ree as well.

Good Morning Muffins
Muffin Batter:
4 cups Flour
1/2 cup Sugar
2 Tablespoons Baking Powder
1/2 cup Shortening (can Use 1/4 Cup Shortening With 1/4 Cup Butter)
2 cups Orange Marmalade
1 cup Orange Juice
1 teaspoon Vanilla
2 whole Eggs Beaten
Topping Ingredients:
3/4 cups Sugar
1 teaspoon Cinnamon
1 teaspoon Nutmeg
1 Tablespoon (plus 1 Teaspoon) Melted Butter
1/4 teaspoon Salt
Wheat Germ (optional)
Preparation Instructions
Preheat oven to 375 degrees. Sift together flour, sugar, and baking powder. Place in a mixing bowl. Use a pastry cutter to mix in shortening (or butter/shortening if desired). Mix marmalade, orange juice, and vanilla in a small bowl. Pour into dry ingredients. Beat eggs and pour into the bowl. Mix all ingredients together gently, using fewer than 10 large strokes. In a small bowl, mix topping ingredients. Fill muffin pans with batter. Sprinkle 1 heaping teaspoon of topping ingredients over each muffin. Sprinkle wheat germ over the top for extra crunch.
Bake for 20 to 22 minutes until done. Remove from pan and cool on wire rack. Eat warm or at room temperature.
Monday, August 6, 2012
Slow Cooker Rotisserie Chicken
This recipe has been floating around Pinterest the last couple of days and when I stumbled on it I was both intrigued and skeptical. No chicken I have ever cooked in the crock pot has looked like this...EVER! I thought I would give it a try BUT I had to modify it. I did not have the whole chicken required because I don't eat chicken off of the bone..I know I am strange,,,, so..I did chicken breasts. I made the paste, rubbed it on and tossed it in the crock pot. Now the recipe doesn't call for any water or liquid at the bottom but since I was doing breast only I threw in a little bit of water (I would say about an inch or so in the the bottom of the crockpot) but you could use a little broth if you have it.. After a few hours, I peeked through the lid, because we all know the cardinal rule of slow cooking...."Don't open the lid!". It was not looking promising. BUT...after a few more hours, the aroma began permeating the house and it started to smell good. At the end of cooking time almost all of the liquid had evaporated. Now the breasts looked a little dry. I put a pat of butter on each because...you can't go wrong with butter.
The true test was coming up...the family. My kids devoured it and my husband said that he couldn't believe how much it smelled like and tasted like turkey. I don't get that part BUT he loves turkey so I will take that as a compliment. The leftovers we shredded into a green salad the next day but you could make this into a variety of yummy things. The recipe and photo are from Busy-mommy.com. I HIGHLY recommend this one, it is tasty. You probably already have all of the ingredients in your pantry and freezer.

Slow Cooker Rotisserie Chicken
1 broiler/fryer chicken (3.5-4 lbs)
2 Tbsp Paprika (I used smoked)
1/2 tsp. cayenne pepper (optional!)
1 1/2 tsp onion powder
2 Tbsp garlic powder or 3 cloves garlic
1 tsp salt
1/2 tsp black pepper
(I added about 1 teaspoon of Season salt)
I also sliced up an onion for the bottom of the crockpot
(I added about 1 teaspoon of Season salt)
I also sliced up an onion for the bottom of the crockpot
Start by removing the giblets and neck if you have a full chicken. No one wants those on their plate. Place all of your ingredients in a small bowl and stir in water by the teaspoon until a paste forms. Spray your slow cooker with cooking spray and place the chicken in, breast side up. I hate the look and feel of raw chicken, but trust me- it will be good when it’s done. Coat the chicken inside and out with the paste. Cover and cook on low 6-7 hours or on high 3.5-4.5 hours ( I added a little water to the bottom of the crock pot). Make sure the thickest part of the thigh registers at 180 degrees. Wow, how simple is that?
Monday, July 30, 2012
Baked Chicken Fries
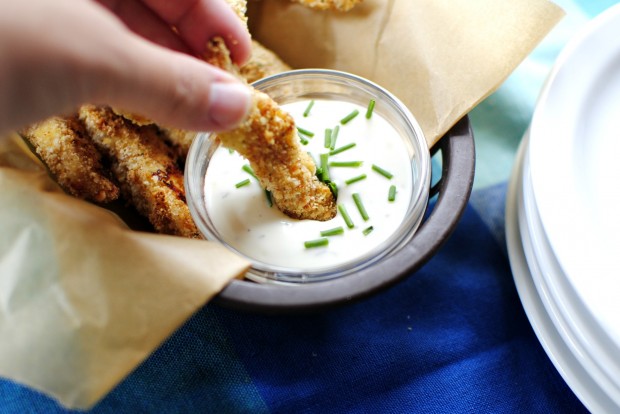
Getting my footing under me with 5 kids home is proving more difficult than I originally thought. I apologize that my postings are so sporadic. Maybe when school is in (3 weeks and YES I am counting) things will calm down. Simply Scratch posted this recipe and I adore it. I am always looking for chicken recipes and more importantly...ones my kids will eat. I cheated and bought my chicken already cut from the butcher because I HATE handling raw chicken. Easy recipe with very minimal ingredients. Simple and delicious. AND They are baked! You can find the Panko bread crumbs either in your ethnic foods section or by the other bread crumbs at your local grocer. Happy Monday friends...Enjoy. A big thank you to Simply Scratch...she always seems to have the best recipes and the most beautiful photos. The photo I used is from her as well. I include a link to her Homemade Ranch Dressing at the bottom.
Baked Chicken Fries
6 Chicken Breast Halves, cut into 1/2 inch strips
1 cup Panko Japanese Breadcrumbs
1 cup Italian Breadcrumbs
1 cup Freshly Grated Parmesan Cheese
2 whole Eggs
1/2 cup Buttermilk
1/2 teaspoon Fresh Cracked Black Pepper
A couple pinches of Kosher Salt, for sprinkling
Preheat your oven to 400 degrees and line a rimmed baking sheet. In a food processor {I love my mini one!}; combine the Panko breadcrumbs with the freshly grated Parmesan cheese. Pulse until the cheese and Panko are combined. In a medium dish whisk together the egg, black pepper and buttermilk. Working in batches, dunk the strips of chicken into the egg mixture and let any excess drip off. Place the coated chicken into the breadcrumbs and coat generously, pressing the crumbs into the chicken. Arrange on the prepared baking pan and slide them into the preheated oven for 15-20 minutes. They should come out golden and crispy.
Serve with homemade ranch or blue cheese dressing. Enjoy!
Here's the link~http://www.simplyscratch.com/2011/05/buttermilk-ranch-dressing.html
Monday, July 23, 2012
Homemade Sliced Pickles
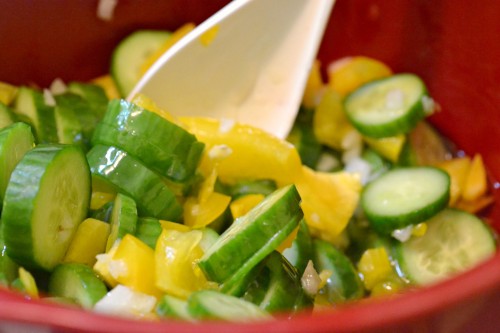
It's a miracle!!! OK well not REALLY but for the first time in the 15 years we have been married, we have been able to grow cucumbers in our garden. I don't know why we haven't been able to or if we will be able to again..but for now we are savoring the moment : ) I stumbled on this beautiful post from "The Realistic Nutritionist". Beautiful photo and a fantastic recipe. Have you ever tried to make homemade pickles? If not you are truly missing out. They are easy to make, it just takes a little patience. They take about ten minutes to prepare but a few weeks to cure. You will get about two pints. Give it a try..you won't regret it. As with most things, homemade is better than store bought any day. Photo and recipe are from The Realistic Nutritionist.

Homemade Sliced Pickles
3 cups of sliced mini cucumbers
3/4 cup sugar
1 medium onion, sliced
1 yellow pepper, sliced
1/2 cup white wine vinegar
Salt and pepper
In a medium size sauce pan, heat sugar, salt and pepper and vinegar over medium high heat until sugar dissolves, about 6 – 8 minutes. Remove from heat. Mix cucumbers, onion and pepper. Pour vinegar over the vegetables and toss with salt and pepper. Pour mixture into 2 sterile pint-size mason jars and refrigerate for 2 – 3 weeks, or until tangy and crisp.
Monday, July 16, 2012
Caesar Pockets
I found this wonderful recipe on Kraft. It would be easily customizable. Grilled chicken, fresh tomato slices, shredded cheese. You name it..the possibilities are overwhelming. Funny story about Pita sandwiches. Back in the pre-children days, my husband and I travelled with his family to Lake Powell. His family loves pita sandwiches...I do too,...just not many days in a row. It has taken a long, long while to get past that in fact, I am not sure I am and it has been years. I may make an exception for this wonderful, tasty recipe. I can use some of the fresh from the vine tomatoes that are ripening in my garden. The photo and recipe are from Kraft. Enjoy friends!

Caesar Pockets
COMBINE all ingredients except pitas.
SPOON into pita pockets.

Caesar Pockets
4 cups tightly packed torn romaine lettuce
6 oz. OSCAR MAYER Deli Fresh Smoked Turkey Breast, cut into strips
1/4 cup drained roasted red pepper strips
3 Tbsp. KRAFT Grated Parmesan Cheese
1/4 cup KRAFT Classic Caesar Dressing
4 pita breads, warmed, cut in half
Make It
COMBINE all ingredients except pitas.
SPOON into pita pockets.
Kraft Kitchens Tips
~Substitute
Prepare using KRAFT Classic Ranch Dressing.
~Variation
Substitute 4 flour tortillas for the pita breads. Spread each tortilla with 1 Tbsp. softened PHILADELPHIA Cream Cheese; top with salad. Fold 2 sides of each tortilla toward center, then roll up, using the cream cheese to seal the edges.
~How to Warm the Pitas
Use your microwave, toaster or toaster oven to warm the pitas.
Wednesday, July 11, 2012
I loved you best!
We had to put our old dog to sleep yesterday. While we knew it was coming (she was 15), it was still difficult. They become part of your family. She was my first "baby". She was ready though and I just couldn't bear to watch her suffer or get any worse. I keep remembering the good times we had over the years with her. She has been through births as well as deaths of loved ones. She kept me company when no one else was around. She was my pal, my playmate, my loyal friend. It seems like just yesterday we found her hiding behind the "Puppy For Sale" sign. She loved chasing a tennis ball, going for car rides and begging for food. She loved the sprinkler and getting everyone wet with the hose. So many great memories..too many to write down.
Here's to you my sweet baby. 15 years wasn't long enough for our companionship. Love you old girl. Things just aren't the same around here without you. I hope I treated you the way you deserved to be treated, like a princess. I am sorry I just couldn't bring myself to tell you goodbye before you left. Know that I love and miss you tremendously. Meet me on the other side with your tennis ball ready!
I Loved You Best
Copyright © Jim Willis 2002, all rights reserved
So this is where we part, My Friend,
and you'll run on, around the bend,
...gone from sight, but not from mind,
new pleasures there you'll surely find.
I will go on, I'll find the strength,
life measures quality, not its length.
One long embrace before you leave,
share one last look, before I grieve.
There are others, that much is true,
but they be they, and they aren't you.
And I, fair, impartial, or so I thought,
will remember well all you've taught.
Your place I'll hold, you will be missed,
the fur I stroked, the nose I kissed.
And as you journey to your final rest,
take with you this...I loved you best.
Daphne Oz Blueberry Whoopie Pies
This recipe caught my attention. It looked fairly simple and delicious and to be honest the recipe is basic enough that you could change it up a bit. Maybe with strawberries or rasperries or even cherries in place of the blueberries. You could make the whoopie pies vanilla instead of chocolate. If you can't find the mascarpone cheese..sub in cream cheese.The possiblities are limited only to your imagination. The recipe and photo are from "The Chew"

Daphne Oz Blueberry Whoopie Pies
For the Whoopie Cake:
1 cups Unbleached All-Purpose Flour
1/4 cup Unsweetened Cocoa
1/4 teaspoon Baking Soda
1/4 teaspoon Fine Salt
4 tablespoons Unsalted Butter (at room temperature)
1/2 cup Granulated Sugar
1 large Egg
1/2 cup Milk
For the Filling:
1 pint Mascarpone Cheese
1/2 cup Confectioners Sugar
1 teaspoon Vanilla
1/4 cup Blueberry Puree (strained)
pinch fine salt
For the Whoopie Cake:
Arrange the oven racks in the upper and lower thirds of the oven and preheat the oven to 425°F. Line 2 large baking sheets with parchment paper.Whisk together the flours, cocoa, baking soda and salt in a medium bowl. Cream the butter and sugar in the bowl of an electric mixer at high speed until fluffy, about 4 minutes. Add the egg and milk and beat at medium speed until incorporated. At low speed, add the flour mixture in 2 batches, alternating with the milk, mixing until just blended. Using a half-tablespoon measure, drop 18 generous teaspoons of batter onto each sheet, leaving about 2 inches between cakes. Bake the 2 sheets at the same time, 5 to 7 minutes, until springy to touch. Let cool on the sheets for 5 minutes, and transfer to racks to cool completely.
For the Filling:
Beat together mascarpone, confectioners sugar, salt and vanilla in a bowl with electric mixer at medium speed until smooth, about 3 minutes. Fold in blueberry puree. Spread filling on half of the cakes. Sandwich them closed and serve.
For Blueberry Puree:
Pulse a pint of blueberries in a blender or food processor until pureed. Strain mixture with strainer or cheese cloth.
Monday, July 9, 2012
California BLT
While watching the "Food Network" the other day, I happened upon Barefoot Contessa. Normally I do not watch her show because, well... I find her a bit stuffy and I cannot connect with her or most of the food that she prepares. However, this one caught my eye. One reason for that, it was for a twist on a classic recipe..the BLT. BLT's are one of my favorite sandwiches. Her recipe, seemed basic (finally). I thought I would share it with you. I looked it up on Google an her recipe came up as did this one. The only difference between this one and Ina's....the thin sliced red onion and the type of bread. Which, we all have our faves. (I have left a link to her bread recipe). This picture was beautiful, so I opted on this one. So what makes a BLT from the west coast? The Avocado of course. I will admit I wasn't a fan of the green fruits for a long time but turns out, taste buds change and they get smarter. I love these buttery, creamy little things and they are so good for you. The photo and recipe adaptation come from A Hint of Honey. I am going to have to search that site some more. The photos are stunning. Enjoy!

California BLT's
4 slices thick and hearty whole wheat bread OR Cheddar-Asiago Potato Bread
4 slices bacon (I use thick peppered)
1/4 cup real mayonnaise
4 tender lettuce leaves, washed and dried (Romaine or Bibb)
1 ripe Hass avocado
fresh lemon juice
1 large ripe tomato, thickly sliced (Beefsteak are best)
red onion, sliced (optional)
salt and freshly ground black pepper
DIRECTIONS
Cook bacon in oven or on stove top until crisp. (I bake my bacon on a sheet pan on 400 degrees until crisp.) Drain on paper towels and set aside. Place 4 slices of bread on a sheet pan and toast them in a 400 F oven for 5 minutes. Turn them over and toast for 1 more minute, until all the bread is evenly browned. Spread each slice of bread with a thin layer of mayonnaise. Cover half with a layer of lettuce. Then place two slices of bacon on top of the lettuce. Peel the avocados and slice them 1/2 inch thick. Toss the avocado slices with lemon juice. Arrange on top of the bacon. Add a layer of tomato slices and sprinkle with salt and pepper. Top with the remaining slices of bread (mayo side down) and serve.Makes 2 sandwiches.
(Adapted from Food Network)
Thursday, July 5, 2012
Lemon Ice Cream
I love anything with lemon. A custard shop near my house, sells Lemon Chiffon custard on every other Friday. It is to die for. I have only tried to make ice cream once...a long time ago and it did not work out...at all. Of course I was in my teens and barely started to cook but it was enough to stop me I guess. This ice cream recipe came to my email from Just a Pinch via Pat Morris. It requires NO ice cream maker. The ingredients are basic too. This would be fantastic on any cobbler. It smooths out as it freezes. Can't get any easier than this. Light and refreshing. Delicious. This recipe makes one pint but can easily be doubled. Thanks Just a Pinch!

Lemon Ice Cream
Blend well all of the above ingredients. Pour into a cake pan, glass loaf pan -or ice tray without the removable inserts. Freeze for 3 hours in freezer or freezing compartment of refrigerator. It is not necessary to stir, as it freezes smooth. No cooking -let the freezer do the work; no ice cream maker needed. Enjoy.
Delicious and refreshing on top of a warm slice of Blackberry (or Blueberry) Cobbler.

Lemon Ice Cream
| 3 Tbsp | fresh lemon juice |
| 1 c | granulated sugar (you can use splenda) |
| 1 pt | half and half |
| 2 tsp | grated lemon rind |
| 2 dash(es) | (2 drops) yellow food coloring (optional) |
Blend well all of the above ingredients. Pour into a cake pan, glass loaf pan -or ice tray without the removable inserts. Freeze for 3 hours in freezer or freezing compartment of refrigerator. It is not necessary to stir, as it freezes smooth. No cooking -let the freezer do the work; no ice cream maker needed. Enjoy.
Delicious and refreshing on top of a warm slice of Blackberry (or Blueberry) Cobbler.
Saturday, June 30, 2012
Michael Symon's Jalapeno Corn Salad
Summer is here..with a vengence in most parts of the country. Triple digits everywhere and my whole state is on fire. The last thing you are probably thinking about is more heat. This salad however, will be perfect at your next party or BBQ. Now I am only highlighting the salad and not the porkchop here but feel free to look up his pork chop recipe.
Anyone catch "The Chew" this week? Michael Symon made a jalapeno corn salad that just looked scrumptious. You could serve it next to the pork chops like he did on the show or for a wonderful side to compliment anything that you are grilling this summer. Corn will be coming into season soon. I can't wait. Nothing better than some sweet local corn in the summertime.This one you just gotta try! It is so easy and delicious with just the right amount of heat. Remember if you want to keep it on the more mild side, remove the seeds and membranes of the jalapeno. Photo and recipe are from "The Chew".

Michael Symon's Jalapeno Corn Salad
4 ears Corn (husked and silk removed)
2 Limes (zested and juiced)
1/4 cup Cilantro - leaves only (chopped)
1 pint Sweet 100 Tomatoes (halved)
1 Jalapeno (minced)
3 scallions (chopped)
1 clove garlic (minced)
2 Tbs. Olive Oil
Grill the ears of corn til charred at parts, about 3 minutes per side. Remove the kernels from the ear to a bowl, and toss with the lime zest and juice, cilantro, tomatoes, scallions, garlic and jalapeno. Add olive oil and toss to coat. Season with salt and pepper.
Subscribe to:
Posts (Atom)