Search This Blog

Monday, January 9, 2012

Homemade Chicken and Dumplings

           This is my 547 post. WoW! I may have to back off a bit on the recipes. If you are new to Home Cooing For Six (soon to be seven), first of all welcome. Second, this is a sight where I post both family favorites as well as tasty, beautiful recipes from all over the web, that you can prepare for you and your family. I hope you enjoy your stay here. If there is a recipe you would like to see or would like to submit, I would love to hear from you.
            If you are looking for a comfort food, Chicken and Dumplings is always a great go to meal. It is simple, warm, filling and delicious. I found the recipe on Tasty Kitchens. It was submitted by Eat at Home. Beautiful picture and wonderful recipe. A big THANK YOU to her for submitting it. It will help keep us warm inside and out this winter.

 
Homemade Chicken and Dumplings
2 cups Flour
½ teaspoons Baking Powder
1 pinch Salt
2 Tablespoons Butter
1 cup Milk, A Bit Less Than A Full Cup
2 quarts Chicken Broth
3 cups Cooked Chicken
                In a bowl, combine the flour, baking powder and salt. Cut the butter into the dry ingredients with a fork or pastry blender. Stir in the milk, mixing with a fork until the dough forms a ball.
Heavily flour a work surface. You’ll need a rolling pin and something to cut the dumplings with. I like to use a pizza cutter. I also like to use a small spatula to lift the dumplings off the cutting surface.
Roll the dough out thin with a heavily floured rolling pin. Dip your cutter in flour and cut the dumplings in squares about 2″x2″. It’s okay for them not to be exact. Just eye ball it. Some will be bigger, some smaller, some shaped funny.
         Use the floured spatula to put them on a heavily floured plate. Just keep flouring between the layers of dumplings.
         To cook them, bring the broth to a boil. Drop the dumplings in one at a time, stirring while you add them. The extra flour on them will help thicken the broth. Cook them for about 15-20 minutes or until they not doughy tasting. Add the cooked chicken to the pot and you’re done!
Saturday, January 7, 2012

Jalapeno Jelly

           While out to dinner last night, the other couple we were with raved about the jalapeno popper jelly. I told them it was easy to make. It won't look like the ones from the store, unless of course you add food coloring. You could add red and green peppers in this if you wanted to make it look festive but the recipe is fantastic just the way it is. Remember to wear gloves when handling the jalapenos. If you have never had jalapeno jelly, it is sweet like jelly with a little heat to it. Great served with poppers or over cream cheese for a cracker dip, with meat...etc, etc. If you want a little more zip, one reader suggested putting the membranes of the jalapenos in a tea steeper while it simmers. The recipe and photo comes from Sleepycathollow on Tasty Kitchens. Great job on the recipe and photo.


Jalapeno Jelly
1 cup Jalapeno, Seeds And Membranes Removed, Finely Diced
2 cups Apple Cider Vinegar
½ cups Red Or Orange Bell Pepper, Seeds & Membranes Removed, Finely Diced
6 cups Sugar
2 envelopes Liquid Pectin, 3 Oz Each
½ teaspoons Unsalted Butter
              Prepare canning jars and lids as directed by manufacturer’s directions. This recipe makes 6 8-oz 1/2 pint jars…so have at least 8 jars ready, just in case. Do not use seeds in your jelly (if you’d like it hotter then put seeds into a piece of cheesecloth or muslin packet and put into the sugar mixture…BUT TAKE IT OUT BEFORE you put the pectin in!). You can mix up the peppers if you’d like…habanero, jalapenos, bell peppers.
             In a large stainless-steel pan combine the vinegar, peppers and sugar. Bring to boil over medium heat, stirring until the sugar is completely dissolved. (add the unsalted butter here if you want to use it…it helps to keep the foam down to a minimum) Increase the heat to medium-high and bring to a full boil, at this point stir constantly. Once a rolling boil has been reached, pour in the pectin. Return to a full boil and stir constantly for 1 full minute. Remove from heat.
Immediately ladle the jelly into your jars leaving about 1/4″ head space. Wipe rims off and screw on bands.
            4 to 8 oz jars need to be processed for 10 minutes. 1 pint jars for 15 minutes. ADJUST FOR ELEVATION!  I live in Northern Nevada at 4400+ feet so I need to add an extra 10 minutes to the bath process. Remove from canner and place on paper or cloth towel. Wait about 15-30 minutes and then carefully twist or tilt jars to distribute the pepper pieces throughout the jelly while cooling.
Friday, January 6, 2012

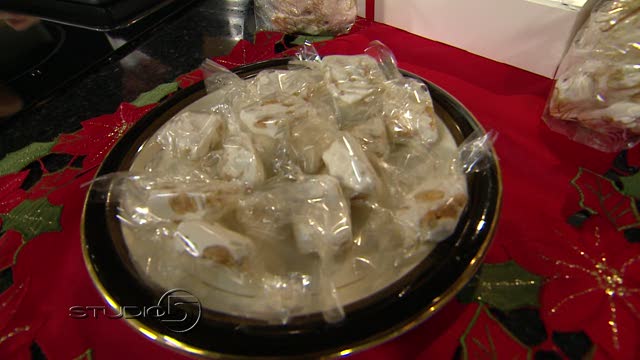
Homemade Big Hunk Nougat Candy

            I meant to get this out at Christmastime but was too busy. I love, love, love Big Hunk candy bars. I have never thought of making them from scratch ...ALTHOUGH, quite  a few years ago my grandmother and I thought about making divinity (not a fave of mine). We tried using my old hand mixer and it just wasn't powerful enough. The end result, tasted a lot like Big Hunk candy bars. BUT, this recipe is much easier and tastes divine.


Homemade Big Hunk Nougat Candy
3 cups dry roasted peanuts (about 18 oz)
3 jars (7 oz each) marshmallow cream
2 1/4 cups light corn syrup
2 1/4 cups sugar
1 1/2 teaspoons vanilla
6 tablespoons butter
1/4 teaspoon salt
Method:

Spray 11x17 baking sheet, with edges, with non-stick spray; sprinkle with peanuts, set aside.

Place marshmallow cream in large mixing bowl, set aside.

Combine corn syrup and sugar in saucepan; place over medium heat, stir constantly until mixture comes to a boil. Remove spoon; using a candy thermometer cook syrup to 280 degrees or to a soft crack stage (syrup will make a soft crack sound when dropped into cold water and is hard but pliable when picked up with the fingers).

Remove syrup from heat and allow to cool 2 minutes. Pour syrup over marshmallow cream (do not scrape pan), add butter, vanilla and salt; fold ingredients together using a wooden spoon. Pour over peanuts and spread evenly on prepared pan. Allow nougat to stand at room temperature for 3 hours or until firm. Cut into bite-size pieces and wrap in wax paper or cellophane.

Notes:
Tastes just like a Big Hunk and Makes approximately 187 pieces, serves approximately 62.
Thursday, January 5, 2012

Banana Peanut Butter Oatmeal

            Do you like oatmeal? How do you eat it? Some people love it with maple, some with berries. I have heard of cocoa powder and some use butter. My husband being an eternal chocoholic, puts chocolate chips in his. I really don't have a preference. I just love oatmeal. Old fashioned, instant or my fave really...steel cut.Steel-cut oats are golden in color and resemble small rice pieces. They are also known as coarse-cut oats, pinhead oats, or Irish oats. This form of oats takes longer to prepare than instant or rolled oats due to its minimal processing, typically 15–30 minutes to simmer (much less if pre-soaked). The flavor of the cooked oats is described as being nuttier than other types of oats, and they are also chewier  Such a healthy way to start your day.
              I stumbled on this recipe and it was a little different than I have heard of before. You may need to sweeten a bit depending on your preference but give it a try without extra sugar. Of course if you are not a peanut butter fan, you could stir in some chocolate chips instead. I got the photo from All You and I modified a few recipes that I stumbled on to make one tasty recipe. Enjoy!
Easy breakfast oatmeal

Banana Peanut Butter Oatmeal
1/2 large ripe banana
1/4 cup skim milk
1/4 cup quick-cooking oats
1/2 tablespoon creamy peanut butter
splash of vanilla
         Cut banana into chunks and put into a small blender jar with milk; blend until smooth. Or you could mash with a fork. Put the dry oatmeal in a microwave safe bowl. Pour the banana mixture on top of oatmeal & stir to incorporate. Add vanilla. Microwave (uncovered) on high setting for 30 seconds. Stir & microwave another 30 seconds. Stir in peanut butter.

Wednesday, January 4, 2012

Open Faced Oregano Grilled Cheese Sandwich

           My husbands family makes these all of the time..minus the oregano. One of the great things about Oregano is, of all the dried herbs, oregano has one of the highest antioxidant levels. Just one teaspoon of dried oregano leaves has as many antioxidants as three ounces of almonds and ½ cup of chopped asparagus.Rosmarinic acid is the active compound in oregano that appears to have the strong antioxidant activity. Many of the studies on oregano (literally translated, "joy of the mountain") have focused on the antimicrobial properties that help fight the growth of bacteria and parasites. Because of the high antioxidant level of oregano, researchers are continuing to explore the use of oregano in various food applications to inhibit bacterial growth. One lab study examined the antimicrobial effects of oregano on the bacteria associated with ulcers.
            Now onto the fun part..the recipe. Talk about a comfort food. They are best when your garden is over flowing with plump, juicy tomatoes and you want a quick lunch or dinner. But, if you have to purchase a tomato from the store to taste this yummy sandwich....you must. If you are not a fan of oregano, you could use a little basil, my husband LOVES crushed red pepper flakes. I coat it with black pepper and a sprinkling of sea salt. Any seasoning will do. Easily customizable to your tastes. You could add any other veggie like and avocado, thinly sliced onion or roasted red pepper slices. Just looking at this photo gives me a hankering for summer. The actual recipe and photo are from McCormick. Enjoy!


Open Faced Oregano Grilled Cheese Sandwich
4 slices multigrain bread, lightly toasted
8 slices part-skim mozzarella cheese (1 ounce each)
2 plum tomatoes, cut into 16 thin slices Any tomato will do
1 teaspoon McCormick Oregano leaves
DIRECTIONS
Top each bread slice with 2 cheese slices, 4 tomato slices and 1/4 teaspoon of the oregano. Broil 4 to 5 minutes or until cheese is melted.
Tuesday, January 3, 2012

Meatball Sub Simmer

            Oh, Crock pot how do I love you? Let me count the ways. This recipe from Kraft is BEYOND easy. It is so easy my hubby could make it..maybe without even burning it. A few ingredients, a crock pot and that is it. The only change I would make is, if you want to season up your spaghetti sauce a little bit, you can. How great would this be for a Super Bowl party. Just let it go in a crock pot, and keep on warm. The meatballs would stay nice and warm sandwich after sandwich. AND best of all, it freezes well. The recipe and photo are from Kraft!

Meatball Sub Simmer recipe

Meatball Sub Simmer
1 jar (26 oz.) spaghetti sauce
1 cup water
36 frozen cooked meatballs (1 lb.)
6 sandwich buns, partially split
1/2 cupKRAFT Shredded Low-Moisture Part-Skim Mozzarella Cheese

MIX spaghetti sauce and water in slow cooker; stir well. Add meatballs; stir gently until evenly coated. Cover with lid.
COOK on LOW for 6 to 8 hours (or on HIGH for 2 to 4 hours).
FILL buns with meatballs and sauce; sprinkle with cheese.    


***Special Extra: Prepare as directed, adding 1/4 cup KRAFT Grated Parmesan Cheese with spaghetti sauce and water; stir well.
***Serving Suggestion: Serve with a bagged green salad tossed with your favorite KRAFT Dressing.
***Variation  Add 1 chopped red pepper and/or onion to spaghetti sauce meatball mixture, and heat as directed
Monday, January 2, 2012

Italian Cream Cupcakes

            The beginning of a New Year...and I am already sabotaging your diet. The guilt I feel is almost overwhelming..in fact I may have to hide in the bathroom and eat a few of these to cover the shame. I can't take full responsibility...Confessions of a Cookbook Queen deserves a lot of the blame. If she wasn't such a good cook then I wouldn't have to share these with you. See? Who loves you? In a twisted diet saboteur kind of way. The photo and recipe come from Confessions of a Cookbook Queen. You can send the hate mail to her if you so wish. However, I am pretty sure that you will overlook the extra calories, just this once. And let's be honest man cannot live on low caloric diets alone.


Italian Cream Cupcakes


Cupcakes:
1 box French Vanilla cake mix
1 stick of butter, melted
4 eggs
1/2 cup cream of coconut
1/2 cup water
3/4 cup pecans, finely diced
1 1/2 cups sweetened shredded coconut
Frosting:
1 stick butter, slightly softened
8 oz block cream cheese, slightly softened
4 Tablespoons Cream of Coconut
3 cups powdered sugar
1 cup coconut and 1/2 cup pecans, combined (for garnish…I toasted mine on the stove but this is optional)
  Preheat oven to 350. Line 24 muffin tins with cupcake liners. In the bowl of a mixer, combine cake mix, butter, eggs, cream of coconut, and water. Beat on low speed for about a minute. Scrape sides of bowl and increase speed to medium high and beat for another minute. Fold in coconut and pecans.  Fill muffin cups 2/3 full. Bake for 12-15 minutes or until tops spring back when lightly touched. Place on a cooling rack until completely cool. In the bowl of a mixer, beat butter, cream cheese, and cream of coconut until combined. Slowly add powdered sugar and beat on low until just combined. Increase speed to high and beat for a minute and half. Frost cupcakes and top with coconut and pecans.
Notes:
If you want to top your cupcakes with TOASTED coconut and pecans, just place them in a cold pan on the stove. Turn the heat to medium and stir constantly, keeping a close eye on it. Once it starts to brown, remove from heat and let cool.
If you want to pipe giant mounds of frosting on the cupcakes, you will need to double the frosting recipe.

Followers